So my machine arrive today (only the actual machine, not the crumb tray box that should have been with it) and everything visually seemed fine… But when I went to open the lid i found it very hard to do so, like it was caught on something. I then checked the back of the machine and again everything was fine.
I added a little pressure to the lid and it did open, so I thought it just needed more force than I was originally using. Then I went to close the lid and it would not close comfortably either. After inspecting it seems that the metal trim was manufactured incorrectly because it is grinding against the metal trim on the lid…
Has anyone else had a similar issue? I reached out to support but received a generic email about how busy they are…
Could also be binding. The casing of the machine is quite flexible, so if the middle of the machine is sagging inwards it puts pressure on the lid. It would also help to post pictures of where the lid is catching, and the more photos the better. It’s also common practice to put some form of shims under the Glowforge or the table that it sits on to get everything level.
I’m not saying that you’re wrong in thinking it’s broken, just trying to eliminate the other options before calling it broken. Support has been really busy lately, so the community members may be your best bet on getting help quickly.
The case of the machine is slightly flexible, and when you set it down, it can flex slightly and cause that to happen. Lift the ends of the machine about two inches off the table and pull out slightly then set it back down. Do it on both sides, gently. If it gets a little better, great, you can try it again. And sometimes it helps to shim one side with a few sheets of paper like from a Post-it pad.
(Mine is rubbing since I moved it to a new table a couple days ago, but it should close.)
So after giving the machine a little wiggle, it seems to have helped a little bit with the opening and closing. I do still think something is off because there is still rubbing and it doesn’t visually close aligned… But I am curious to see if it will give me the “lid open” error when the power cord actually arrives on Tuesday.
If the right side of my machine is the side that is not closing properly, which side should i try and shim?
Haha thank you! I have only one shim on the right back side of the machine and it seems to be closing and opening much smoother. still isn’t a flush close but the grinding is minimized.
Okay, I found my sweet spot…2/3 of the way from the left side of the machine at the back. (That would have been the Post-it pad we found under it when we moved it. Took about 20 sheets or so.
By the looks of it, you have a table with screw-on legs like you would get from Ikea. There’s nothing wrong with that, but any unevenness in the floor is going to transfer to the table surface.
You would be better off adjusting or shimming the feet of the table so that the surface is flat. Note that level is not the same - it’s not critical that the surface be level, but it is important that it is flat - not just for the lid alignment, but also so that the carriage movement will run true across the X and Y axis.
It’s very unlikely there’s anything wrong with the lid on your machine, it just needs to sit on a flat surface.
Thanks for the response. What do you mean by ‘it being level is not critical’ but it being flat is? I did use a shim under one foot of the machine and it seems to have helped but I am concerned that not it may be a little too unbalanced. Should I be shimming the table instead?
Level simply means that the machine is parallel to earth, or horizontal. Flat means that the base, and the feet which mount upon it, are in the same plane.
… and, yes, by correcting the table, the machine should have a flat surface to sit on without needing to shim its feet.
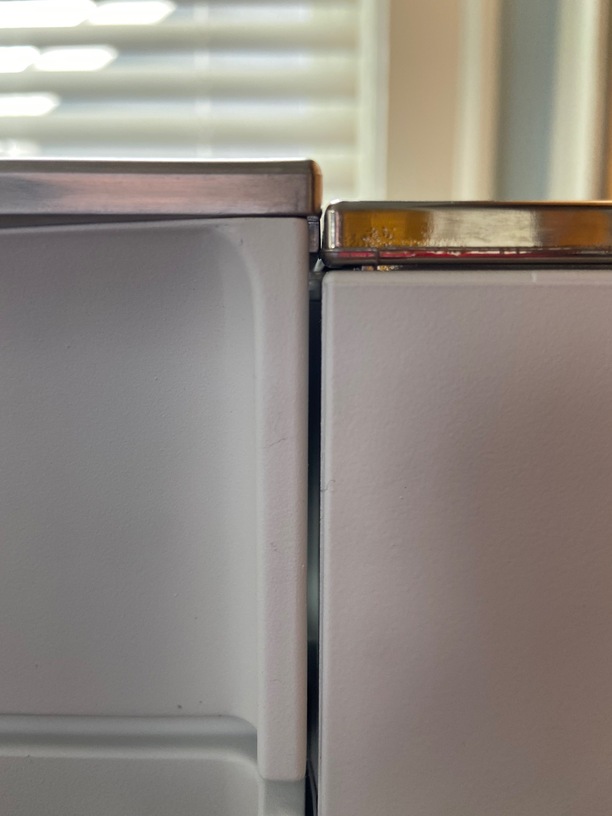
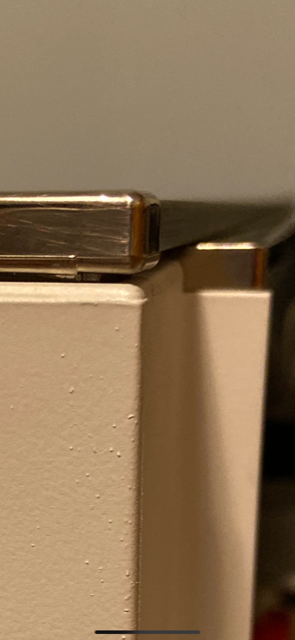
Pic #1 is the side I think is catching. Notice the metal sliver lip on the edge. It’s just prominent enough to cause a problem. I’m sure I can file it down but I don’t want to do anything like that until I have exhausted all other options.
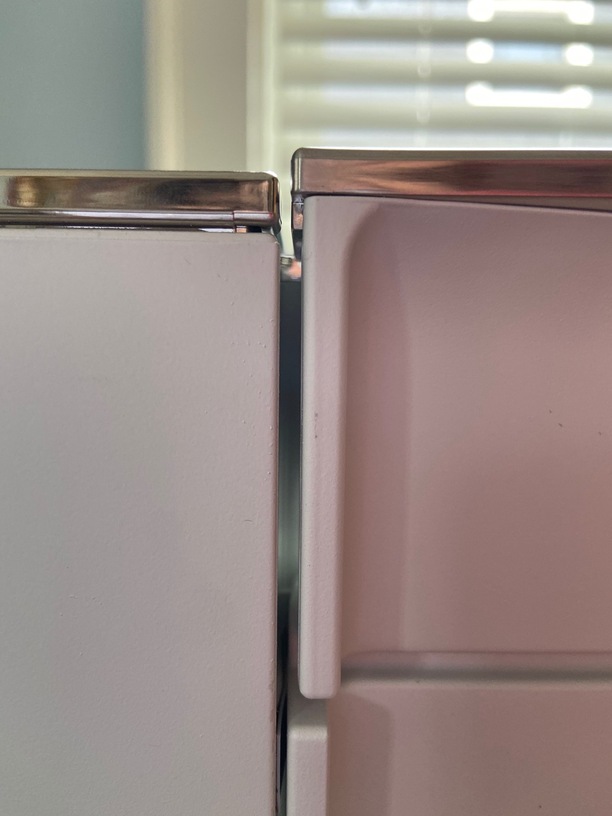
Pic #2 is the comparison side
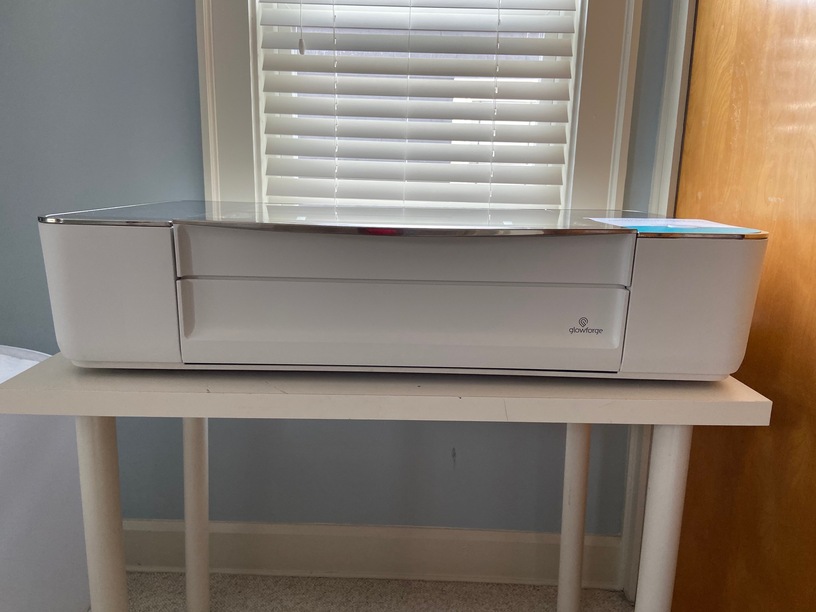
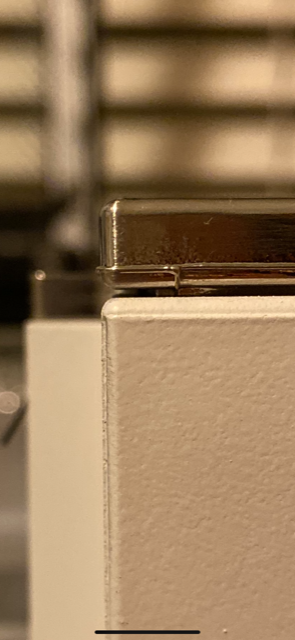
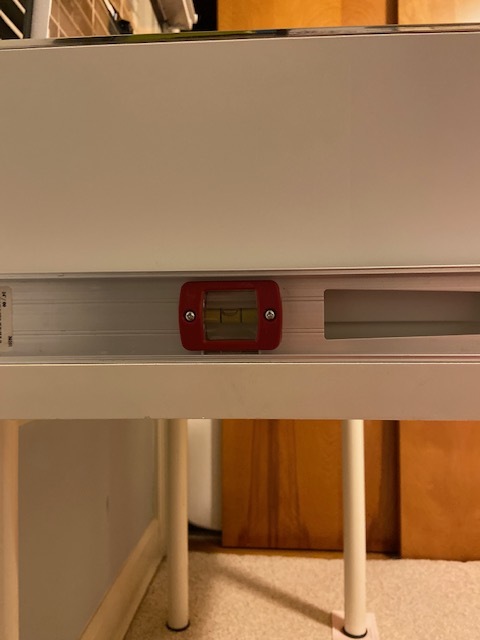
Pic #3 and #4 are just to show the table leveling. I did add shims to the front two legs because you were right, the screw on legs could be better.
I you have a carpenters level and remove the machine from the table put the table where it will live and play with the level screws at the bottom of the table until no matter where you move the level it reads as flat. If you get that right you will not need shims.
I am also concerned that the table itself is insecure as there is no "meat"to hold the legs straight. An inexpensive help fo that is to buy the biggest Command Strips you can find and use them to hold the back of the table to the wall. The command strips are special in that they will hold the back of the table to the wall and even years from now come off without leaving a mark on the table or wall.
Regular adhesive velcro is cheaper but will mark a wall.
In straight up and down the table is strong enough but any side to side pressure and it will wobble like crazy, and the Glowforge will do a lot of that as it changes direction. Velcroed to the wall however it should send its side to side motion there and be quite stable.
As in you don’t see light under any portion of the level along its length. It doesn’t have to be a level - it could be a sturdy metal yardstick on edge, just so long as it’s got a long flat surface that you can lay on the table to make sure there’s no light indicating a dip.
I have mine on a very substantial tool cabinet with a flat maple top but still needed a shim under the right front corner (.060" cardstock).
This morning I was super upset that all the pieces to my machine did not arrive at the same time, but now I’m feeling pretty grateful to have an extra day to fix these overlooked issues.
In the morning my husband and I will be putting the machine on the floor while we stabilize and level my table. Do you have any suggestions for the room being carpeted (there is no way around this issue) - and do you have any suggestions for table alternatives if my current one’s wonky legs can’t be fixed? (it is very old)
I had a piece of 1/2" foam PVC that is structural and quite flat just sitting about and put it across some industrial shelving that I only built to the second shelf so flat and level were never issues as it was suppose to hold fairly large weight to six shelves.
ANY difference in the floor will telegraph to the top of a table. The machines are calibrated on a stone slab = absolutely flat - not necessarily perfectly level. when I moved my machine to a different surface the lid rub went away…