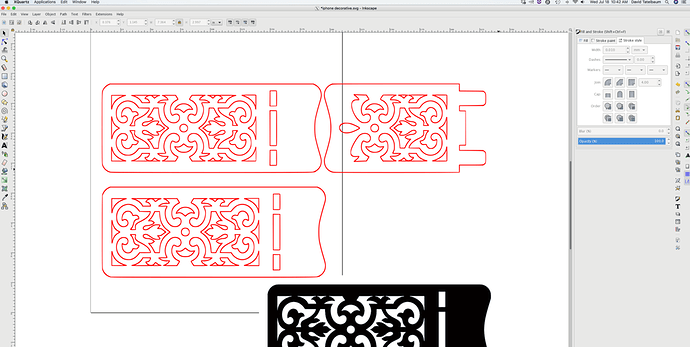
Could not find this issue in any topics, soo…I’m using Inkscape to create my svg files. I’ve imported a PNG file, but I don’t know what I need to do to select all the cutout lines. When I try to select a line or anything, I can only select the entire box that contains the lines. Itried “Object to Path” thinking that might do it. Nope. I know…it’s probably a really basic issue. I’ve had my GF Basic for about a week and I’m still getting familiar with it. Thanks!
You have to trace the outline of the object to get a cut path. You can do it manually by adding a path with the path tool (draw bezier paths and curves), the pencil freehand tool or use the Trace Bitmap path operation to get outlines (more complicated).
You came to the right place. Here is a gathering of talent, expert advice and a large group of very helpful people.
Welcome to the forum!
A png is a raster, which just means it is a bitmap or a collection of pixels. The glowforge can engrave a raster, several different ways, but all it can do to it is engrave it.
Inkscape can do some basic manipulation with a raster, like resize it by dragging one of its handles or by going to Object -> Transform and using that dialog to resize it.
As for cutting out around it your two basic options are 1) make an object it will fit into using the create rectangles and squares, the create circles, ellipses and arcs or the create stars and polygons tool (which is what marmak3261 linked to) or 2) trace it and hope for the best using the Path -> Trace Bitmap feature. If you go the trace route it will take some messing about with this feature; possibly a lot of messing about.
If you do want an exact as possible outline of your image to be cut, and you’re not having much luck with the Path -> Trace Bitmap feature, my suggestion is import it into Inkscape, resize it and then do a File -> Export PNG image. If it doesn’t need to be resized then skip this step. Make a copy of this png file. Open the copy in Microsoft Paint (or GIMP or Photoshop) and color every pixel in the interior of the image black. Color every pixel outside the image white. Want you want is a more or less solid black image surrounded by white. For example, if you have an image of a trout, the trout would be solid black and everything around the trout would be white. Now import your black and white image into Inkscape and do a Path -> Trace Bitmap. A bitmap with only two colors makes life a lot easier for the software and your results much better. That said, it can take some time to do this and maybe your image is good enough to just go straight to Path -> Trace Bitmap without any image manipulation. However you get there, once you have your outline import your same-sized png file, place it over the outline and now you can engrave the image and cut it out.
PS - Once Glowforge Support sees this thread they will move it somewhere else as they do not consider design questions part of their bailiwick.
PPS - You’ll want to practice the Inkscape tutorials in the Tips and Tricks section.
PPPS - GIMP (and presumably Photoshop) have tools that will make turning a full color image into a pure black and white image easier, but their learning curves are steep.
No need for them to take the time. Just moved this to everything else.
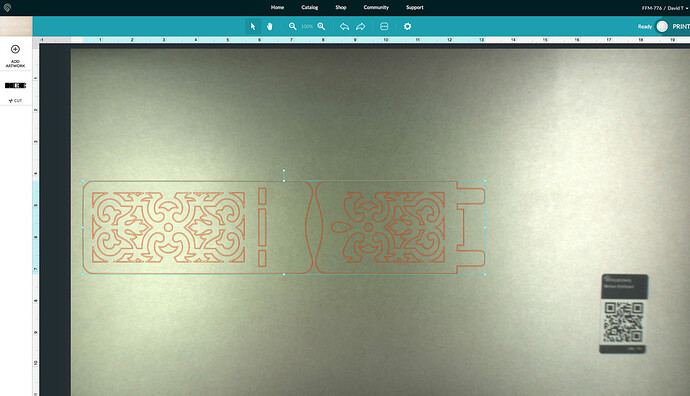
Thanks everyone for the input!! It’s been super helpful and it’s helped me move on to the next step. In Photoshop, I highlighted the part to be cut and made it all black and everything outside the cut is white. I used the Trace Bitmap tool and then created the stroke for the cut. It appears in Inkscape to be a single line, but when I bring it into Glowforge (as an svg) to print, it shows up as a double line. I’ve tried messing with some of the stroke settings but keep getting the same result.
There is a tutorial here that explains that phenomenon caused by using an Autotrace on a “coloring book” style of image. (That looks like it will be a nice phone stand.)
Yes, that is the complications of the trace. You have a good trace but you still have to break apart these lines and remove the inner or out resulting object. As @Jules pointed out, that tutorial is what you need.

