I know this is purely user issues, but I am scratching my head. Just when I think I have it all figured out something doesn’t quite work out. I have created an SVG file using Affinity Designer. It has worked well for me until now. Most of the time I am creating one little item at a time, but this time I have laid out 16 items on one artboard to send to print. I thought I had it, but this last time I uploaded it, a good number of my fonts are looking like they are going to cut(showing up in red rather than purple), rather than engrave, but they are on the same “slot” in the GFUI. BUT, it is not all of them, some are showing up as engrave just fine (even though they are all jumbled up in the UI!)
I would share a screen shot of the image, but some of my stuff has sweary words!
In the meanwhile, there are some things that you can do to make it easier on you. The inner line that you want as an engraved frame would be very easy to make as a vector engrave. That will allow you to save a few steps and get more control.
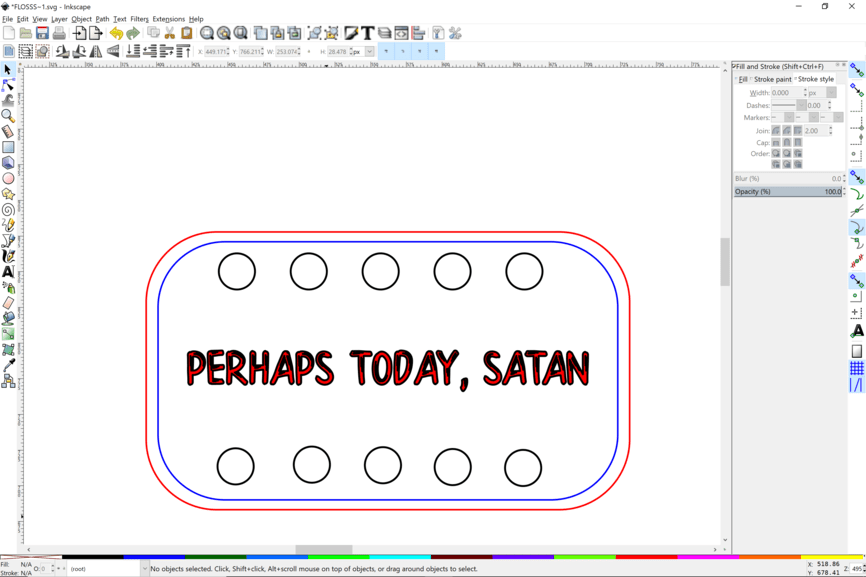
The SVG is quite strange in that it comes in for the cutouts of each shape as a filled shape object with no stroke. Then the inner outline you have is a bitmap. I would make a vector engrave for the outline by duplicating your cut outline, shrink it proportionally for an inner border, then make it a thicker stroke, then stroke to path and then fill it and remove the stroke definition.
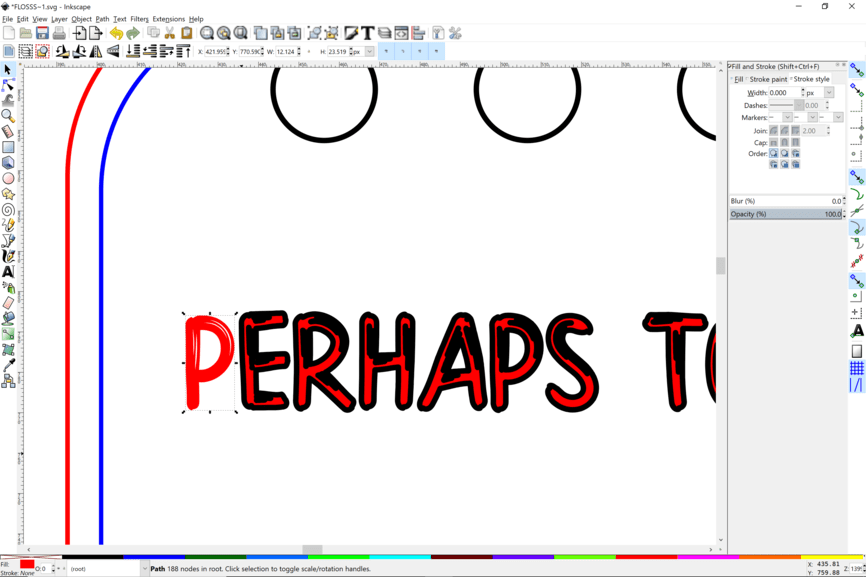
Not quite sure where to begin on this. The font’s are a bit wonky the way they come in as the svg. I know that Affinity has a different way to export text. They are filled and also have an outline with them. I hope some Affinity expert can assist. I’d remove the black stroke and keep the red fill and make them a solid vector engrave.
Since this deals with a user question and is not to open a ticket with support, I hope you won’t mind if I move this post over to Beyond the Manual. I use AD and I’m not really sure if I can even answer your question, but I opened your file and pretended it was mine and that I wanted to work on it some more. I’m confused by a few things…and they are pretty much the same things as @marmak3261 mentioned.
• Since you can set a default for text to automatically export as curves, I don’t understand why all of the text are curves already in the original file.
• Why are all the most simple of lines and basic shapes bitmaps and not vectors? Circles and other shapes don’t need to be pixel images.
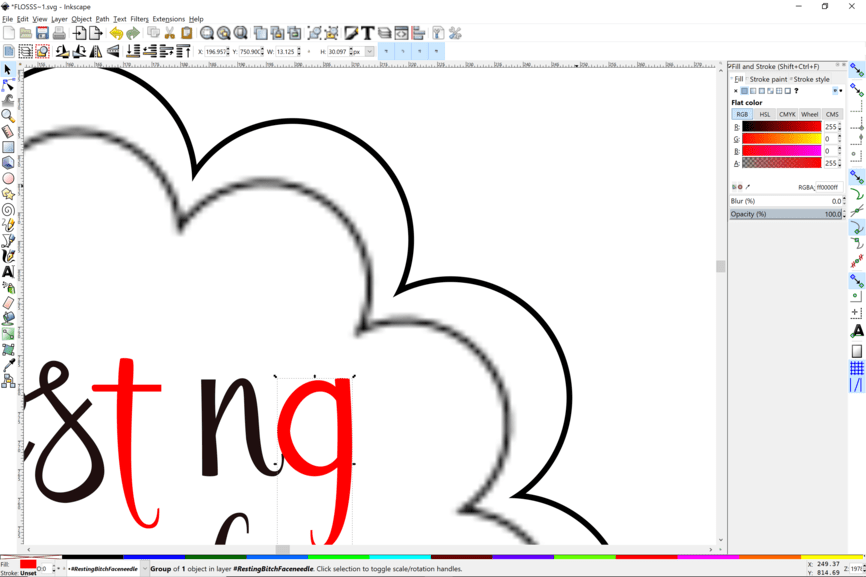
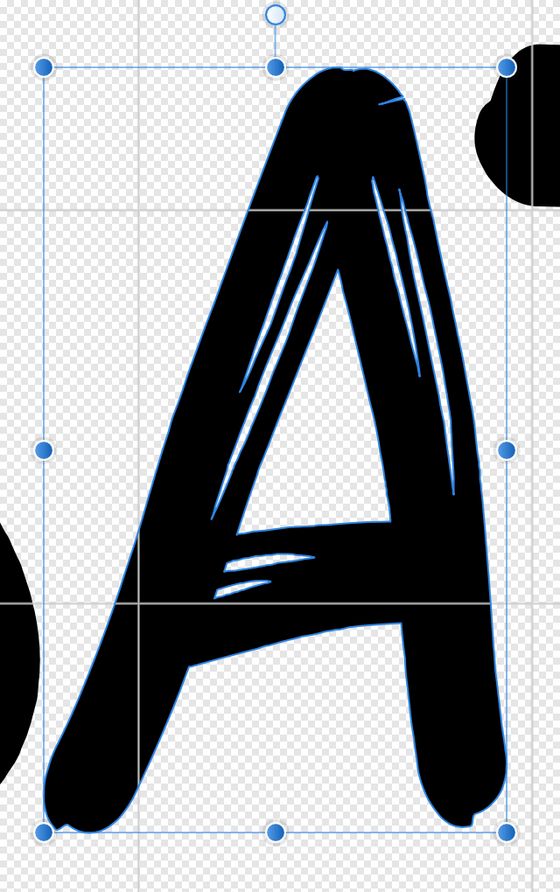
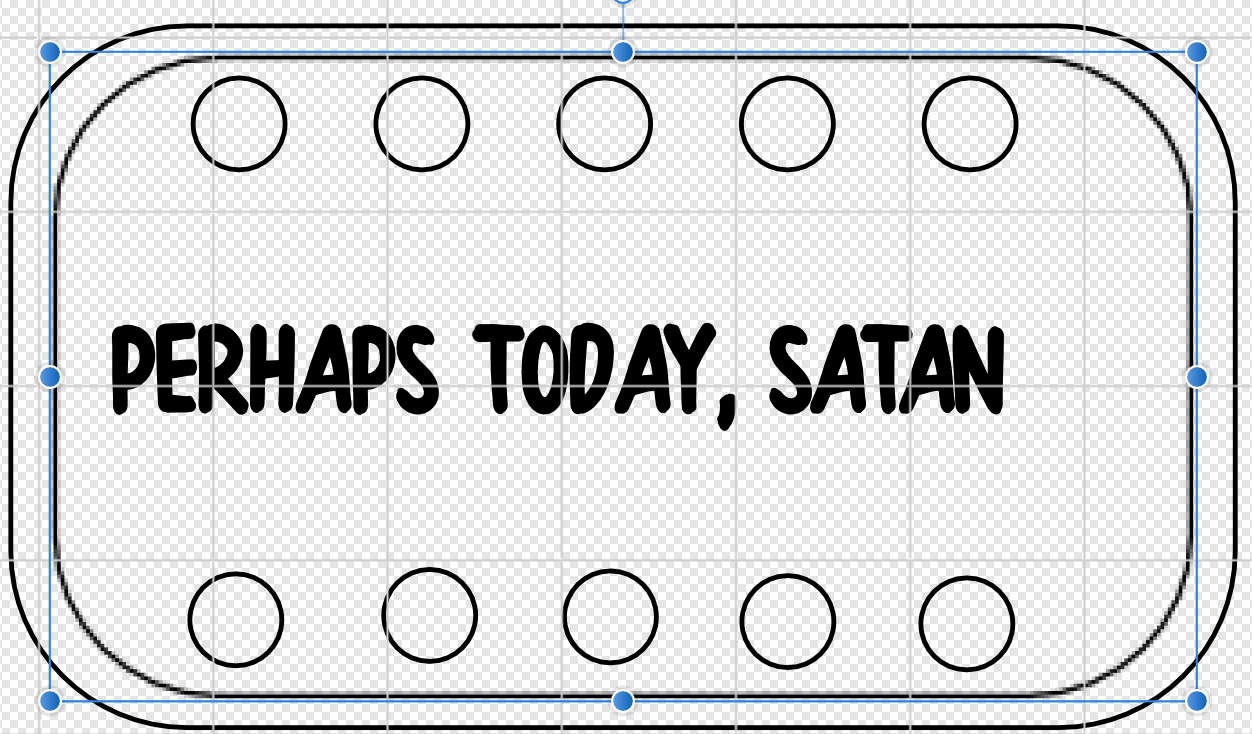
• All the letters in Satan 1 have a fill and a stroke, while all other text is fill only. Perhaps on purpose, or perhaps just an oversight? This is what the letter ‘A’ looks like if I remove the stroke.
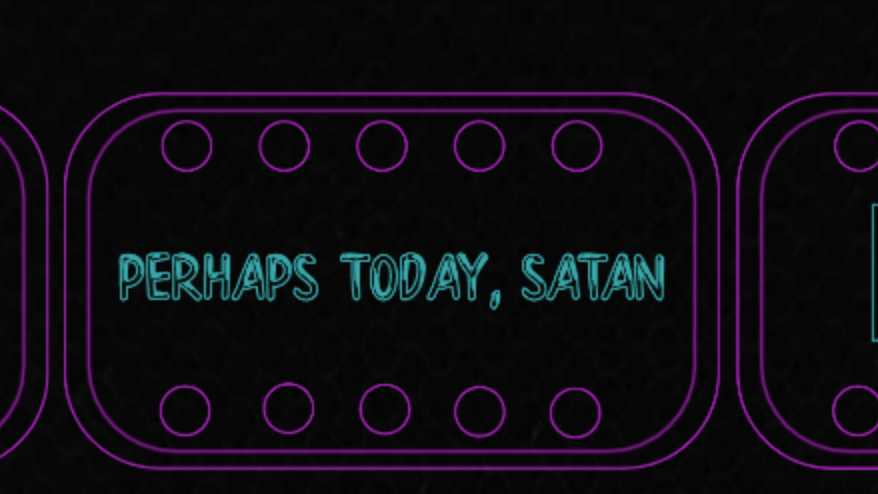
• I finally just looked at your svg in the UI. You don’t have certain things saved in different colors so that the Glowforge knows what you want to do. For instance…the inner line in this shape is a bitmap…which will engrave. If you had just made a vector shape and made it in a different color, you could have just scored it much faster than engraving it.
• IMHO, I just think you have way too many bitmaps that require engraving when they could be vectors set to score.
I think your entire file just needs to be simplified…maybe go through it and see if you can group more like things together and use more vectors in place of some things that you have now as bitmaps. Overall, this entire file is going to take f.o.r.e.v.e.r because of all the engraving.
Thanks for the input. I didn’t know that the GFUI needed the items in different colors. I assumed that the UI changed them upon import.
I think I might just “start over” with one or two of them to see if I can fix what is wrong. (Am learning AD as I am learning this, so as I said, this is totally user problem.)
You’re most welcome! That’s probably what I would do, too. I’m sure it will turn out much better second time around. I’ve had my Glowforge over 2 1/2 years now and picked up AD not too long after I had tried some other design programs…and I’m still learning stuff with it! Most everyone chooses what sets of colors they want to use. I use black for cut and engrave and blue for score. If for instance though, you have one element in your design that you want engraved at different settings that all the others, you could assign it a third color. The less steps you have is actually the better and it’s possible to make a large file have very few steps by using colors. Let us know when you get it figured out…we love to see what people make. Best of luck.