Here’s a really hard puzzle for those of you who are fans of such things or know people who are. I like it because it’s so simple – only nine pieces arranged in a simple way – and yet it is so hard I’ve given up on solving it without the solution key. Also, as far as I know, it’s completely new. I’ve never seen it anywhere and I haven’t been able to find something like it despite searching online pretty thoroughly.
The puzzle consists of nine planks each of which is three times as long as it is wide. Here’s what the planks look like.
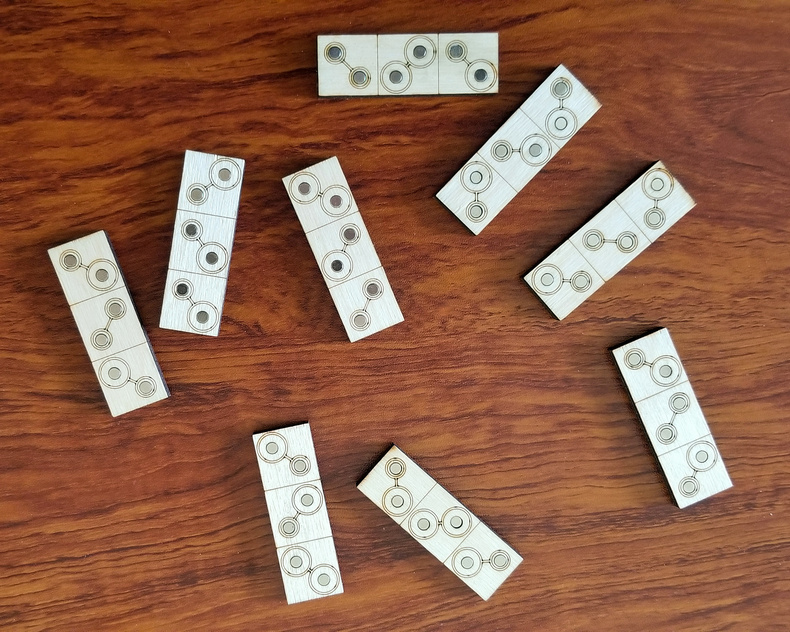
As you can see, each plank is subdivided into three square areas and in each of these there are two holes, arranged diagonally. I’ve inserted two small disc magnets in each hole, one magnet for the top face of the plank, and one for the bottom. To make it not completely impossible, I’ve marked which pole of each magnet is facing out. All the magnets whose north pole is facing out are marked with a small circle. Those with a south pole facing out are marked with a larger circle. Both faces of each plank are marked in this way.
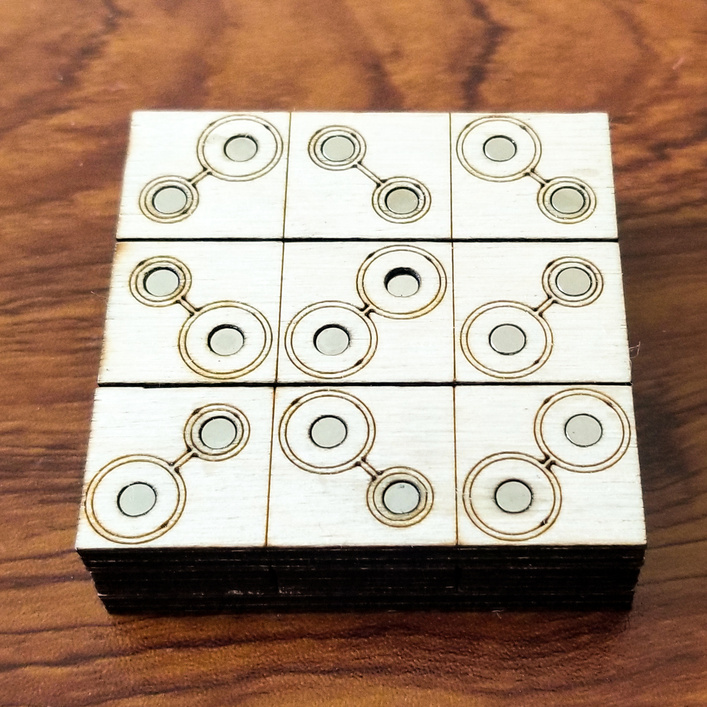
The goal of the puzzle is to put the planks together so that they form three 3 x 3 squares stacked on top of one another. On the bottom layer, the planks run in the vertical direction. In the middle layer they run horizontally, and in the top layer they’re vertical again. Kind of like plywood. The problem, of course, is getting the embedded magnets to all snap together. There’s only one arrangement that works. Here’s the puzzle put together:
The reason it’s hard, is that there are a huge number of ways to put the planks together where the magnets don’t line up: 23,781,703,679, in fact.*
In any case, here’s the svg. Nine Planks Puzzle.zip (20.9 KB). I used 6mm BB for the planks.
Use two passes to cut and decorate the planks. The first pass cuts the holes, engraves the lines between the squares, and decorates the top face. On that pass set operation that will be used to decorate the bottom of the plank to “Ignore.” In the GFUI, it’s the next-to-last operation in the list of thumbnails. In the svg, it’s the light-green one. For the second pass, use the material from which the planks have just been cut as a positioning jig. Without moving the surrounding material in the GF, remove the planks one by one, flipping each one around its long axis and placing it back in the hole from which was cut. Then in the GFUI, set the operations that cut the holes (the first operation in the list), the decoration for the front of the plank (the second operation), and the one that cut the plank out (the last operation in the list) to “Ignore” Engrave the lines between the squares and the decoration for the back.
The design is for magnets that are 4mm in diameter and 2mm thick. The hole sizes in the svg are kerf-compensated for the material I used so that the magnets will press-fit into them. Your material may be different, in which case the hole sizes might need a bit of adjustment.
The easiest way I’ve found to insert the magnets is to take a small stack of them and a plank and to push them, using the stack as a ram, one at a time into the holes that are decorated with one of the pole orientations – with the small circles, say. Then flip the stack over and push magnets into the holes marked with the other decoration. Once you’ve finished with all the holes on one side of the plank, check that the magnets are all correctly oriented by using a stack of magnets as a probe. The end of the stack should be attracted to all of the magnets marked with one of the decorations and repelled by those marked with the other. Repeat this with the remaining planks, using your first plank as a reference as to which decoration goes with which pole orientation. Then, one by one, flip the planks over and add magnets to the holes on the other side. Check your work as you go since it’s easy to lose track of which pole is which. 108 magnets later and you’re all done!
Try assembling the whole thing to see how hard (and confusing) it is. Then assemble it using this handy dandy solution key:
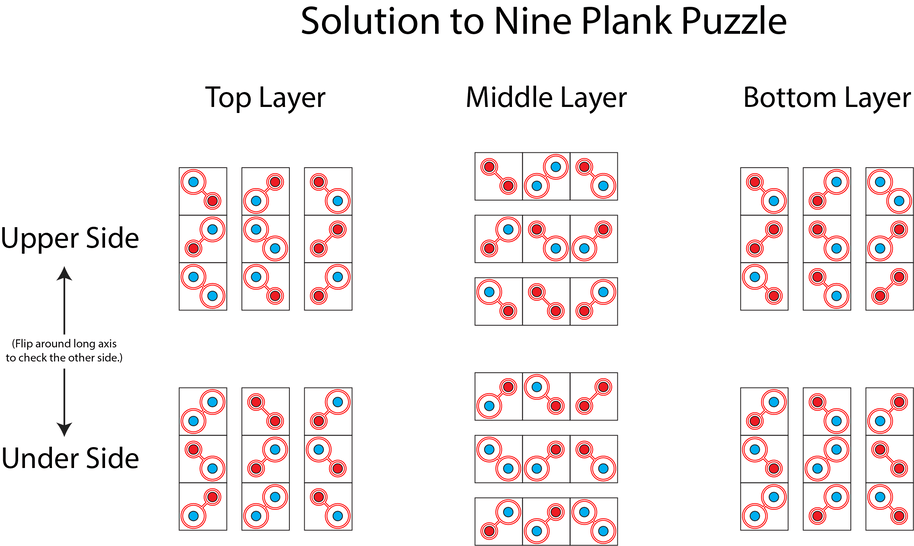
Let me know if you can find someone who can put the puzzle together from a scrambled state without looking at the key. I’d like to know how they do it.
----
* Here’s how I calculated the number of ways the pieces can be arranged. Each way of assembling the planks into positions is a permutation of nine things in nine slots. That’s 9! = 362880 ways of assembling them. On top of that, for each assemblage each plank can be oriented in four different ways – rotated top to bottom or not and face up or face down. That means that for each of the 9! arrangements of the planks they can be reoriented by flipping and turning in 49 = 262144 ways. So, the total number of ways to put the planks together is ((9!) * 49) / 4 = 23,781,703,680. (The divide by 4 is because we don’t count rotating or flipping the whole assemblage as a different solution.)


