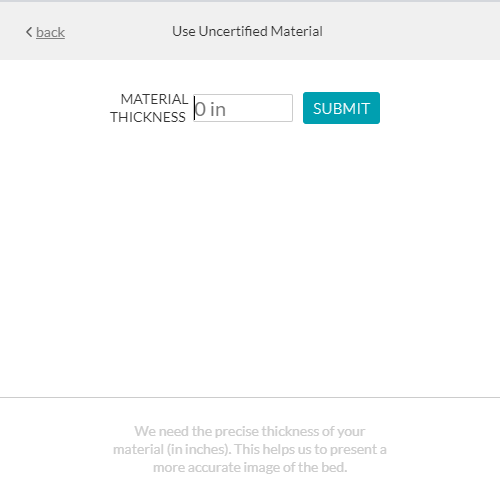
I got plywood at home depot this first time to try non gf. I bought caliper and it read .0195 in. in submit and nothing. I am in putting it wrong . wont show the say no art work.
You must mean 0.195?
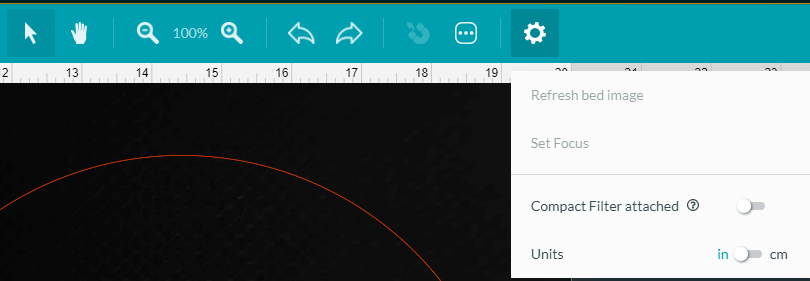
Look for your artwork somewhere off the bed of the glowforge by zooming out as far as possible or until you see it. Drag it onto the bed and use “set focus” rather than the measurement you took with the calipers.
3 Likes
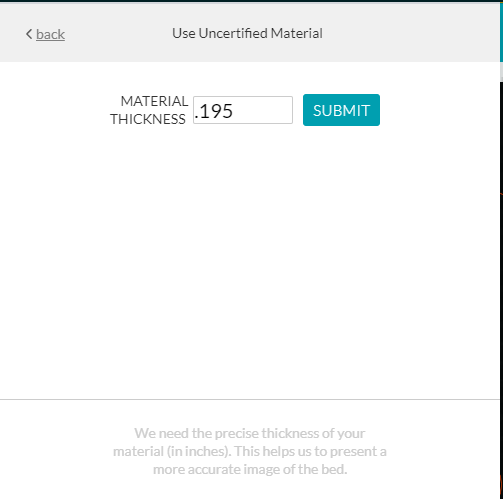
set wont take .195 as thinkess
When you click on use uncertified material does it look like this? Specifically, 0 in?
If your glowforge is set to cm, 0.195 may be too small (as well as wrong.) I had no problem entering .195
If your glowforge doesn’t like it when you click submit, have you tried using Set Focus. Click on the gear icon, click on Set Focus and then click on where you want the glowforge to measure the height of your material. If you use Set Focus you do not have to manually enter the material thickness. Note: if you lift the lid of your glowforge you have to do Set Focus again.
3 Likes
thanks ill try set focus
1 Like
set it, I can see art work but say its not there
1 Like
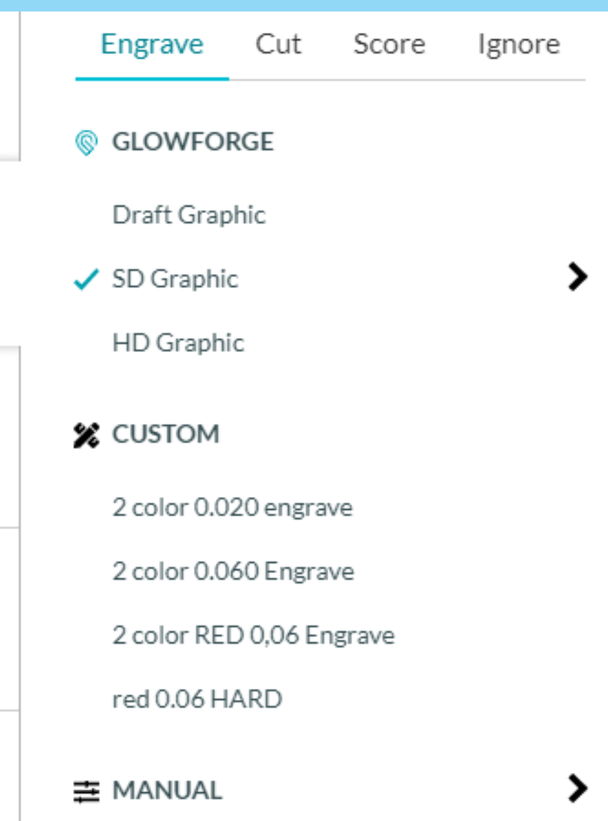
Have you defined any operations (cuts, engraves, scores)? For non-PG, until you define an operation by applying it to a color you’ll see No Artwork in the right corner.
1 Like
Of course it will. You can enter any number up to .5 inches.
Where do you define it at. Think iam missing something on my learning yesterday made a box today soent 5 hrs trying to do anything on non gf.
The only difference between PG and non-PG is you entering the commands to make it cut/score/engrave
So
1 place your material
2 enter your measurement/use set focus
3 click on your art on the list on the left
4 select your command (cut/score/engrave)
5 enter the individual settings
6 place your artwork on the wood using the visual interface
7 click print
with PG you get to skip step 5, but everything else should be the same
2 Likes
Click on the thumbnail for the engrave or cut operation in the left column, then enter the speed, power and LPI settings. If you do not know what settings to use, because using the wrong ones will potentially cause fire, you can start by selecting a similar material (same kind of wood or acrylic, same thickness) from the dropdown box in the Unknown Materials button at the top of the left column, and then using the Proofgrade settings for that material. (0.195" is Thick Plywood.)
Be sure to watch the entire print when you are experimenting with unfamiliar settings. Things can and do catch fire.
2 Likes
When you use non-proofgrade material you have to do two things. The first is set your material height, either manually or with Set Focus. The second thing is you have to enter your cut/score/engrave values. Until you enter your values it will say No Artwork.
To enter your settings click on the first one in the list on the left-hand-side:
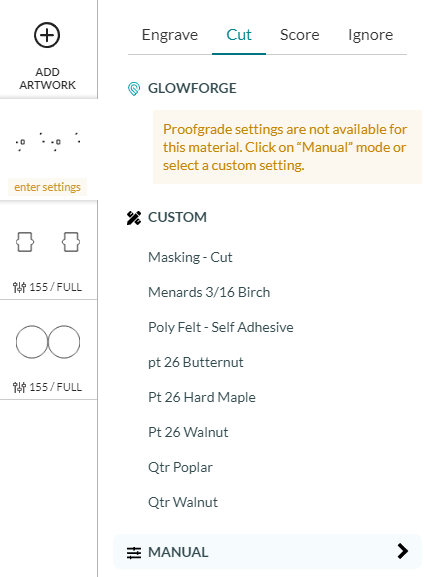
Then click on Manual. Notice that I have already defined some manual settings for non-proofgrade material. You will not have any of these saved settings because you have not made them. When you click on Manual you will see this (if it is a cut or score):
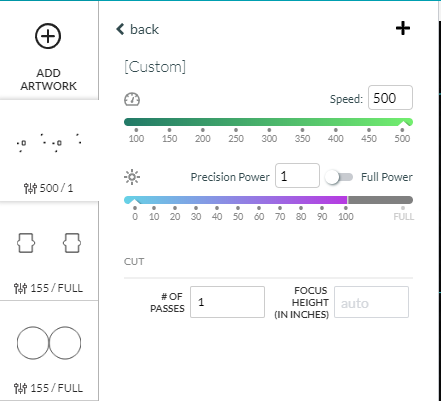
For engraves you will see settings that are a little different.
Because you are using non-proofgrade, the glowforge doesn’t know what the settings should be. By default they use the lowest power settings possible. In order to find out what settings you need for your non-proofgrade material you will have to experiment. There are templates in Beyond the Manual,like this simple one by evansd2, to help you figure out what the correct settings are.
The next question is probably, where do I start with settings? If you lie to the glowforge and tell it you are using proofgrade, then you can click on the setting on the left-hand-side and see what the proofgrade setting is. This is probably not the right setting, but it is a place to start your experiment. You can also search the Beyond the Manual section for similar materials and see what works for other people.
Note: I use non-proofgrade material all the time. Non-proofgrade materials are inconsistent because they are made for cutting with a saw blade and not a laser. Therefore, your “perfect” setting will usually only work for 99%. This is manageable, just understand that there will always be more issues for non-proofgrade woods and plywoods.
4 Likes
Thanks for help when lost, this isnt fun Iam trying.
1 Like
A month from now it’ll be old hat to you 
We all started at the same place.
4 Likes
Wait, you can save custom settings now‽
2 Likes
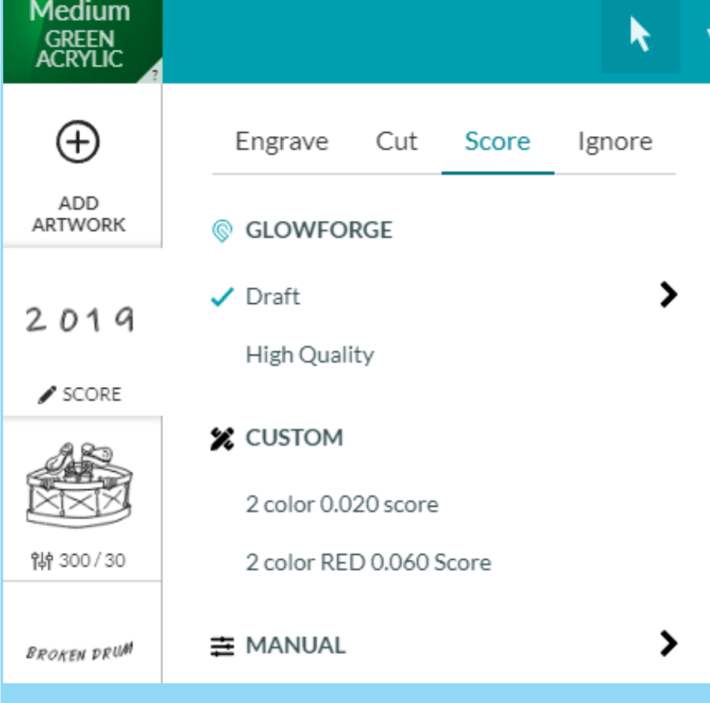
Will look like this when saved.
Some limitations inherent since they consume available UI screen space.
2 Likes
Sure can! Instructions are here, and they show up where @brokendrum illustrated :
2 Likes
Yeah, already figured it out. Just saw the entries in the post above and didn’t realize it had been added.
1 Like
This topic was automatically closed 32 days after the last reply. New replies are no longer allowed.