When you use non-proofgrade material you have to do two things. The first is set your material height, either manually or with Set Focus. The second thing is you have to enter your cut/score/engrave values. Until you enter your values it will say No Artwork.
To enter your settings click on the first one in the list on the left-hand-side:
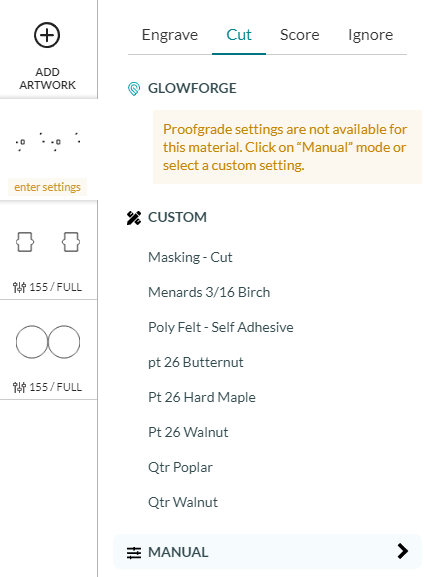
Then click on Manual. Notice that I have already defined some manual settings for non-proofgrade material. You will not have any of these saved settings because you have not made them. When you click on Manual you will see this (if it is a cut or score):
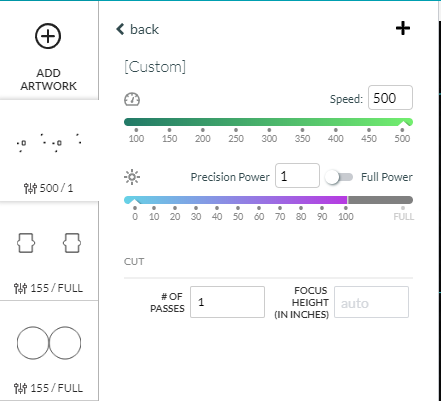
For engraves you will see settings that are a little different.
Because you are using non-proofgrade, the glowforge doesn’t know what the settings should be. By default they use the lowest power settings possible. In order to find out what settings you need for your non-proofgrade material you will have to experiment. There are templates in Beyond the Manual,like this simple one by evansd2, to help you figure out what the correct settings are.
The next question is probably, where do I start with settings? If you lie to the glowforge and tell it you are using proofgrade, then you can click on the setting on the left-hand-side and see what the proofgrade setting is. This is probably not the right setting, but it is a place to start your experiment. You can also search the Beyond the Manual section for similar materials and see what works for other people.
Note: I use non-proofgrade material all the time. Non-proofgrade materials are inconsistent because they are made for cutting with a saw blade and not a laser. Therefore, your “perfect” setting will usually only work for 99%. This is manageable, just understand that there will always be more issues for non-proofgrade woods and plywoods.