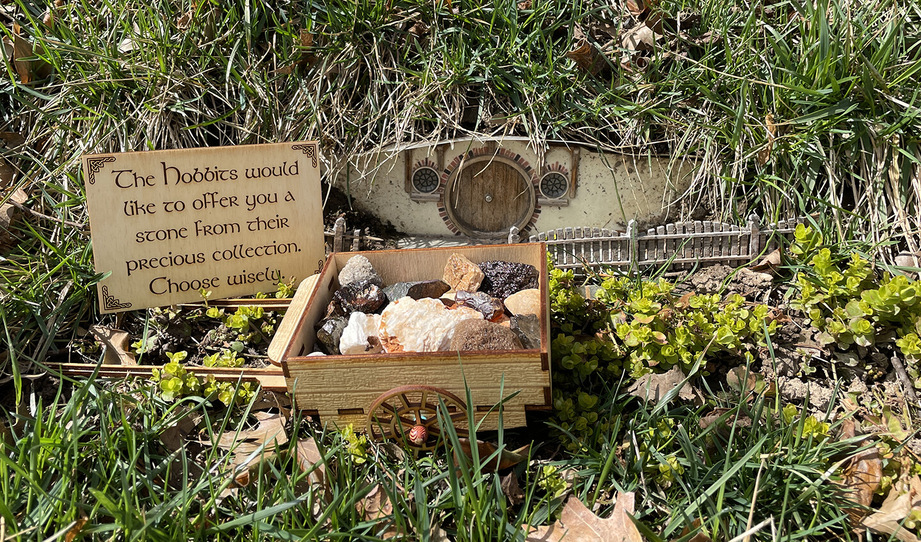
So here’s a fun thing I’ve been doing lately. There is a slight connection to Glowforge in that I’m putting these rocks in the hobbit cart I made, to give to the neighborhood kids and passersby.
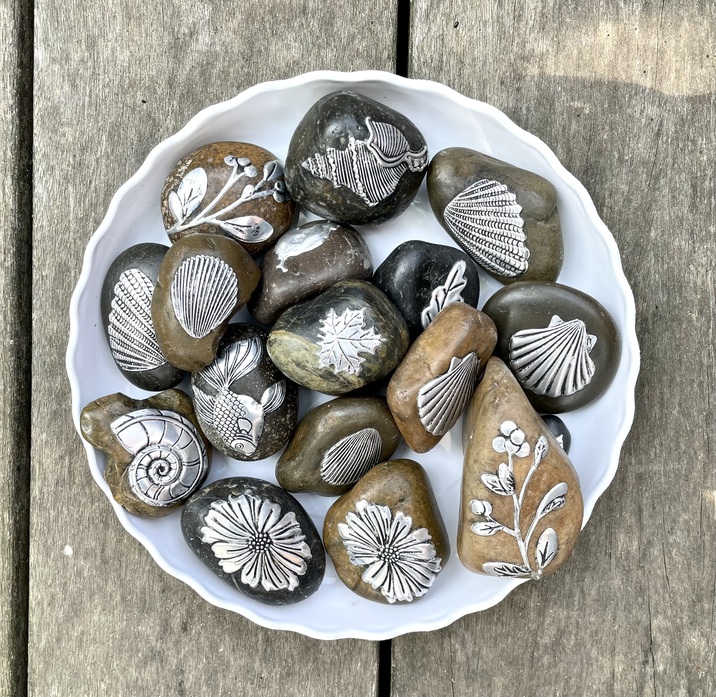
The way I make them is by using embossing folders that have matching dies, like this one. I die cut the shapes from [tooling aluminum](St. Louis Crafts 36 Gauge Aluminum Metal Foil Roll, 12 Inches x 10 Feet Amazon.com) then run them through the matching embossing folder. I fill the back sides with a wax mixture containing beeswax, carnauba wax, and pine rosin, then attach them to the rocks by heating with a heat gun. These rocks came from Michaels with a waxy coating already on them, so they bond pretty well to the metal cutouts. After some cleanup of the oozed wax, I paint over the metal with black gesso then rub most of it off; it gives a nice contrast.
Here’s a photo of the cart I put them in, containing other rocks:
The Fairy Doors (or whatever you would call them) were eventually stolen from my yard. So few people walk out on this street anyway, I just have to wonder…
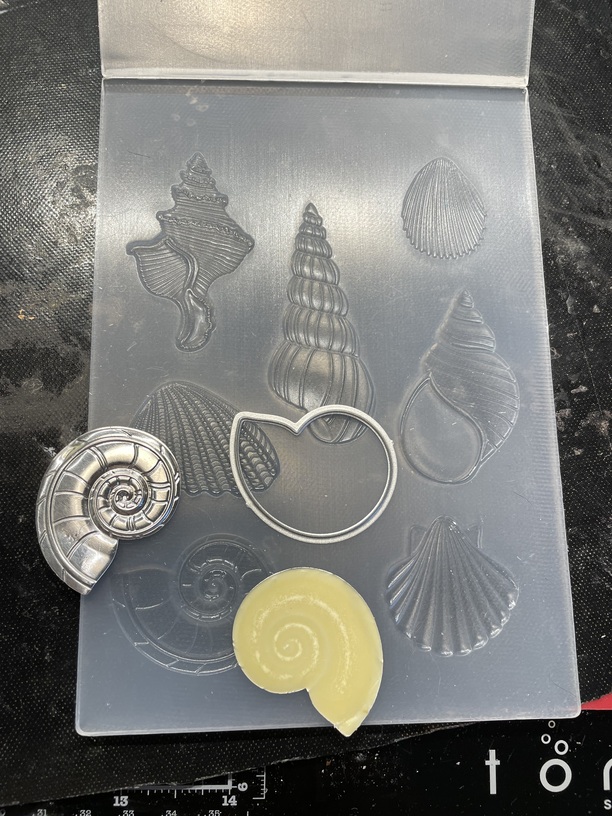
Not really, I’ve not seen this done anywhere before and I didn’t take in-progress photos, but here is one showing the embossing folder, die, and wax-filled back of one of the shell shapes:
Do you see that little metal shape above the wax filled piece? That’s the die. You do need a die cutting machine (I use a Big Shot but there are many others). You place the die cut surface down on the aluminum, sandwiched between cutting plates, and turn a crank to pass the assembly through pressure plates in the machine, which cuts the shape. The same machine is used to do the embossing: you put the die cut piece in the embossing folder in the spot that corresponds to that shape, and run it through the machine.
The whole process is my cheater method for doing metal embossing art, like this:
Those turned out really nice. What a wonderful way to share some fun with those in your neighborhood. I’m sure you have “regulars” who come by to see what’s new and different to add to their collections. I used to do a lot of embossing when I did a lot of card making and scrapbooking, but that was years ago. Never would have thought to do metal. That would be a great way to add texture to wood pieces done on the GF too. Hmm…
These are LOVELY!!!
Did you know that you can etch into the rocks with the Glowforge?
I’ve done a ton of them, it works better on flat rocks but it will also still work on curved rocks, the design just kind of fades off when you get toward the sides. I actually kind of like that effect.