I have to help on this one, you’ve got a hedgie in there. ![]()
It’s pretty simple if you are wanting to engrave the frame and silhouettes on the acrylic. It’s a little more complex if you want to actually cut out the silhouettes though, so since you said you wanted to engrave it, I’ll give you the steps for that.
If you are wanting to just engrave the silhouettes, what you do is this:
-
Open a new file in Inkscape. Make the canvas size exactly 20" x 12" when you create the new file. (Always start with a 20" x 12" canvas to avoid scale issues.)
-
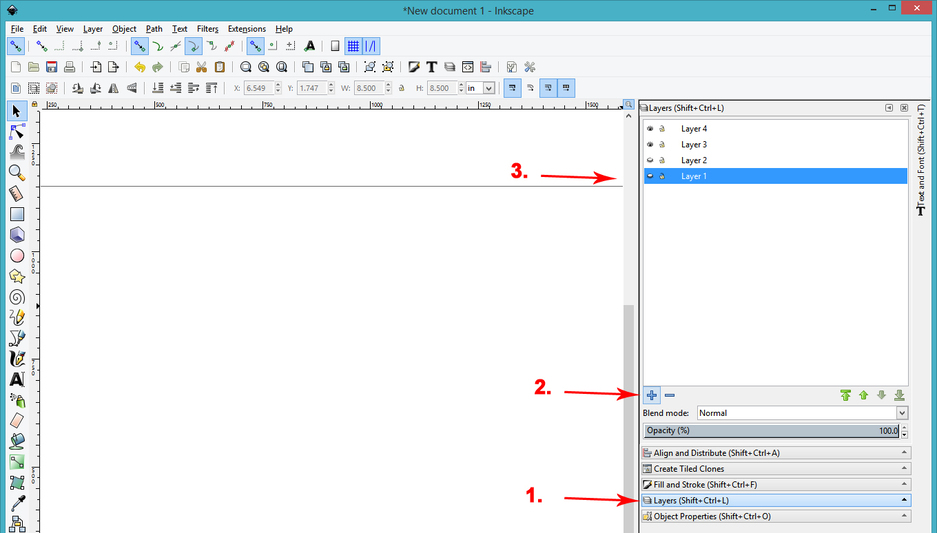
Create a few Layers to use in the design.
-
Decide how large you want to make the plaques. (For example: 8.5" square.)
-
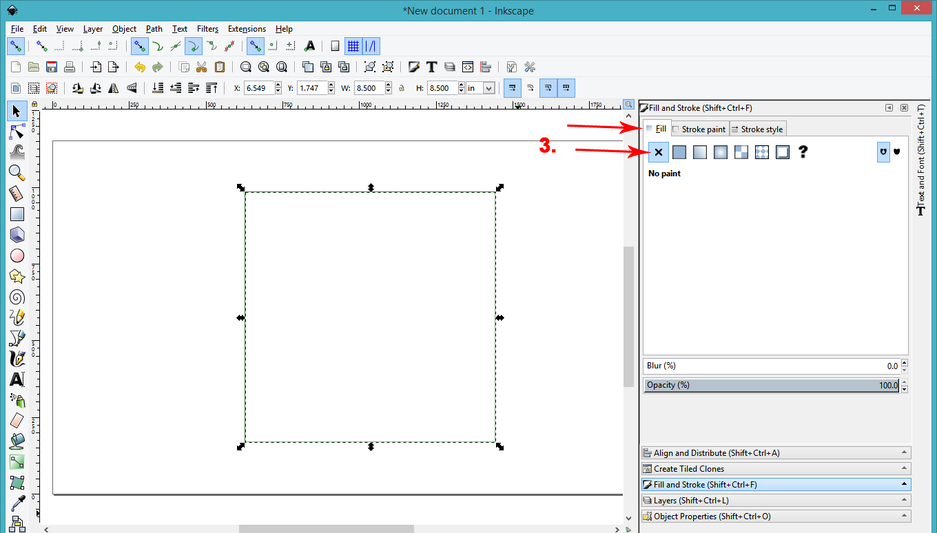
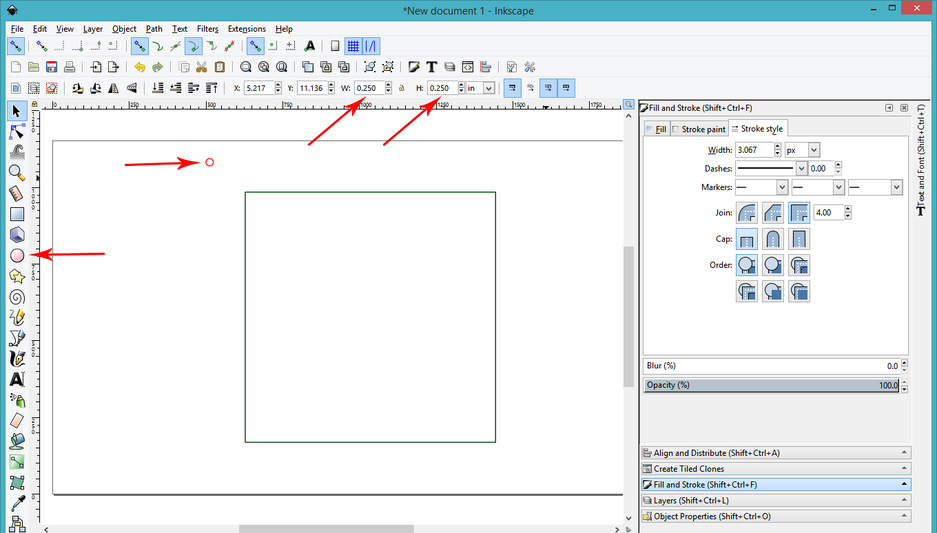
Drag out a vector Rectangle to use as a Cut line. After dragging it out, set the size to be exactly 8.5 " by 8.5". Give the Rectangle a solid Stroke color, but no Fill Color.
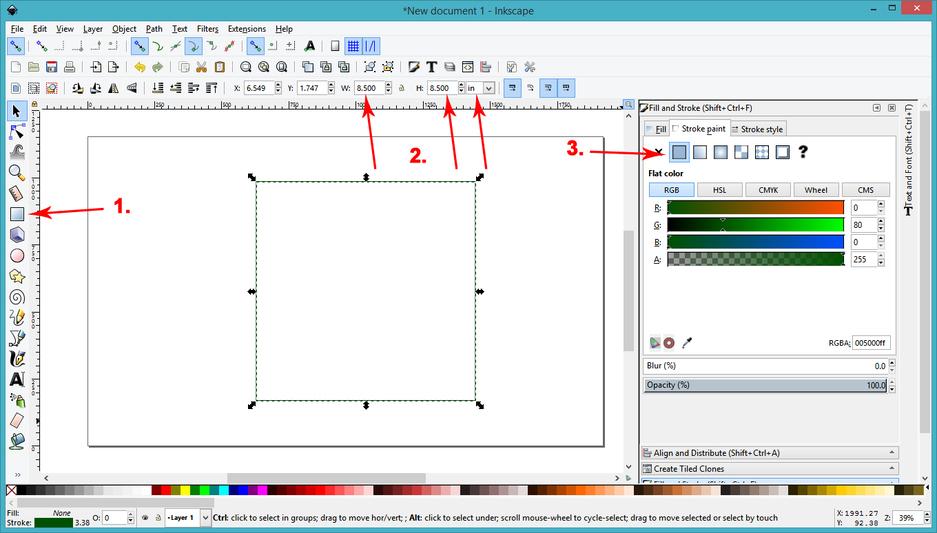
(Note: Stroke Style does not matter to the laser, you can make the stroke size big enough to see it…I like to use 3 or 4 pixels.)
Click on tabs to switch between Stroke and Fill color.
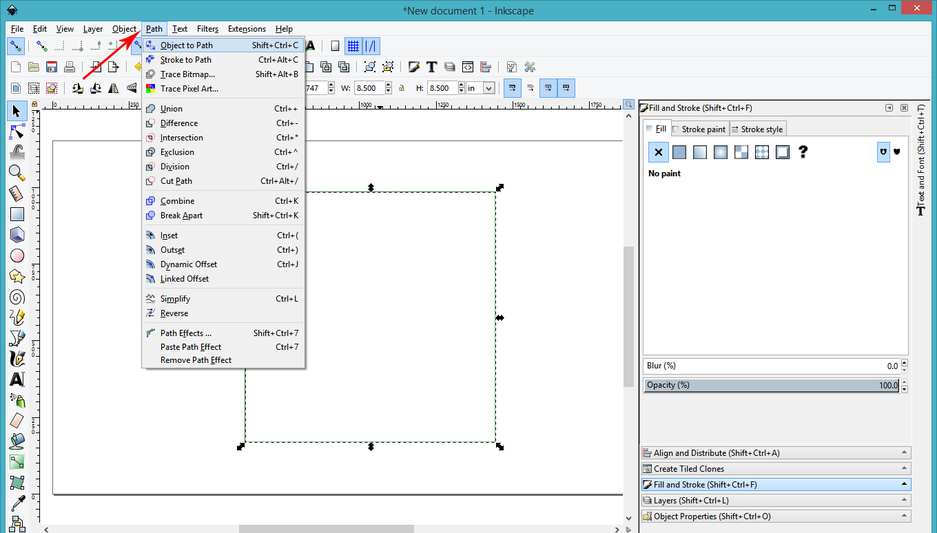
- After you have set the Stroke color, you need to Convert the shape to a Path.
Select it, then Path > Object to Path. This turns it into a cutting line for the laser.
-
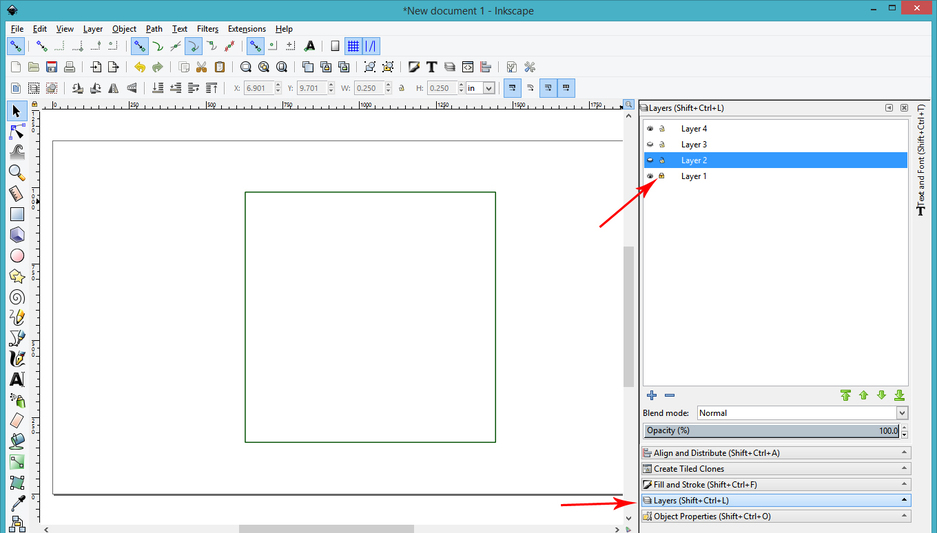
Shift the rectangle path to Layer 1. (So you can lock it.)
Right click on it> Move to Layer > Layer 1 -
Lock Layer 1 by clicking on the Layer palette and clicking the little lock icon next to Layer 1.
- Create a single hole for your Chicago Screws using the Circle Tool. Set the size to be the diameter of the shaft on the screws. Give it a different Stroke color than the color on the rectangle, and no Fill color. After setting it up, Convert it to a Path, then Move it to Layer 2.
-
Copy the circle and paste it to create more screw holes.
(Right click on it to select it> Copy.) Then Right click>Paste. -
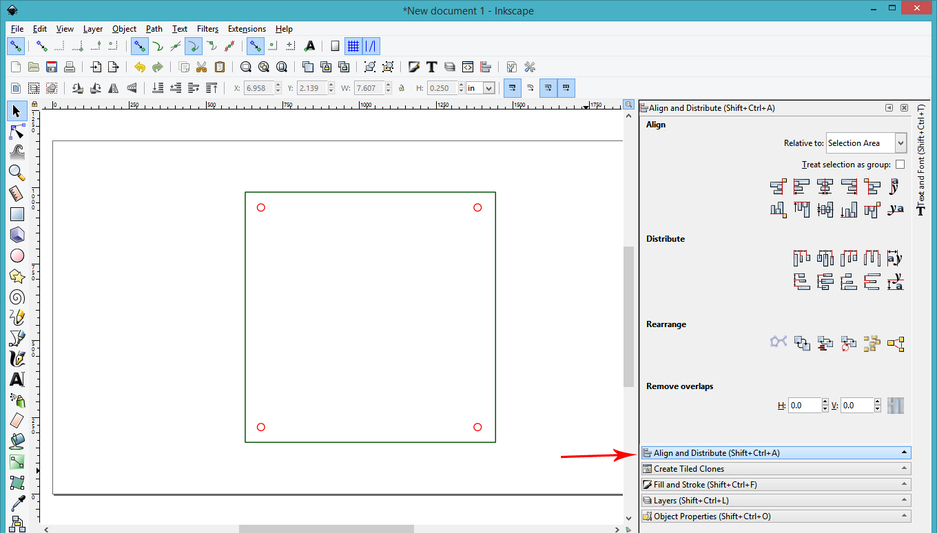
Use the Align and Distribute pallette to place the screw holes evenly inside the rectangle. (Since it’s locked, you won’t accidentally select it.)
-
After you have the holes distributed where you want them, group them and then lock Layer 2. (Right click > Group.)
-
At this point > Save the File as your base svg file. You will create each of your subsequent frames on this base, it will keep things aligned perfectly, since you are using the same cutting lines for each frame, and they are locked into place.
Example: Name it “Schneider House Frame - Base”.
- To use the Base…
-
First go to the Layer Palette and click on Layer 3 to select it as the landing layer. (Where the image is going to land when you place it.)
-
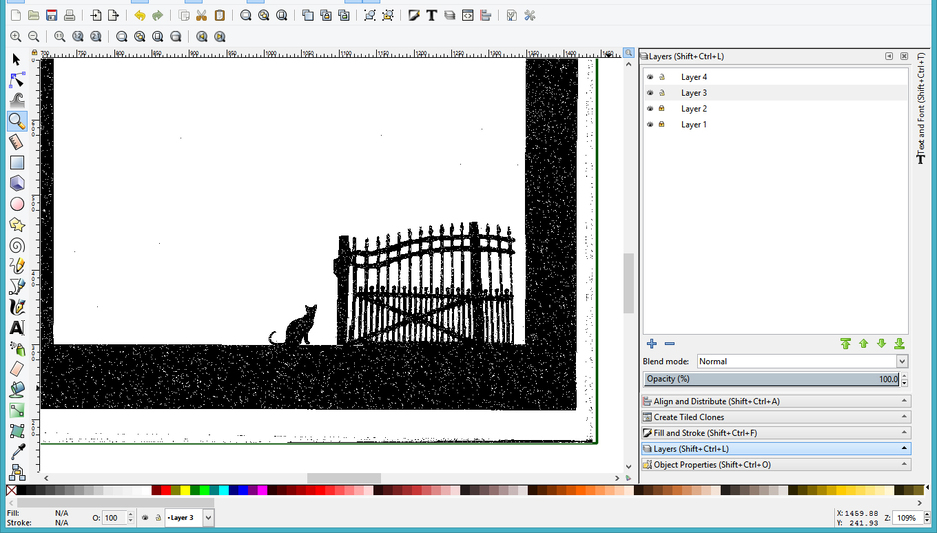
Then take your first engraving image and drag it onto the open Base file, and let it go.
(Note: I would not try to use a PDF file for the bitmap image, the resolution is going to suck big time, and I’m going to show you why in the example below since you provided a PDF. Use the original source file in either JPEG or PNG format, and it might require cleanup before engraving it. That’s a different problem, that you would need to fix in Photoshop or GIMP first.)
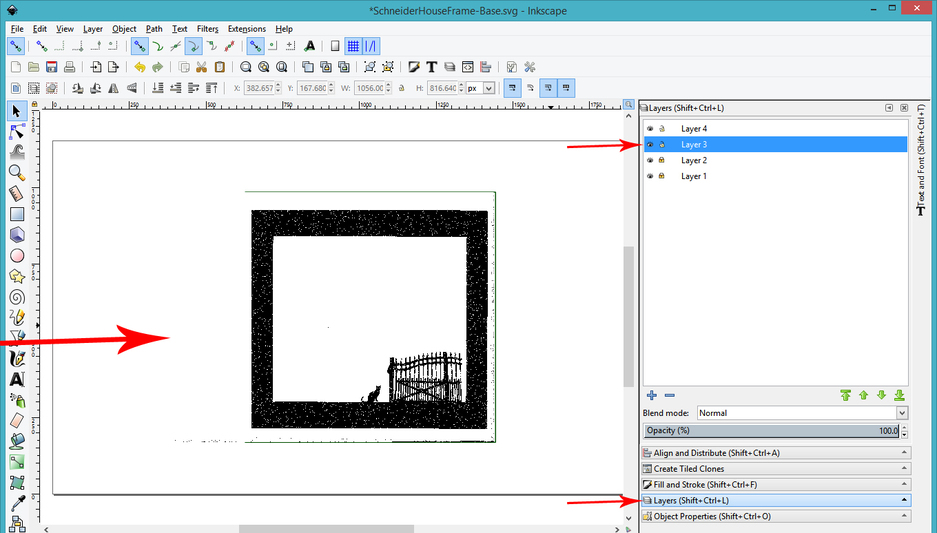
Any little specs and flecks that you can see on the image here are going to be reproduced exactly (the laser will give you exactly what it sees and it can “see” a lot better than we can.). We call that “noise”.
In addition, you’ll want to crop all of the excess white space out from around the frame when you have it open in either Photoshop or Gimp. Make sure that each of the frames you are showing is cropped to the exact same size to make them overlap correctly.
Anyway, I’m going to use this one since it’s what I have…
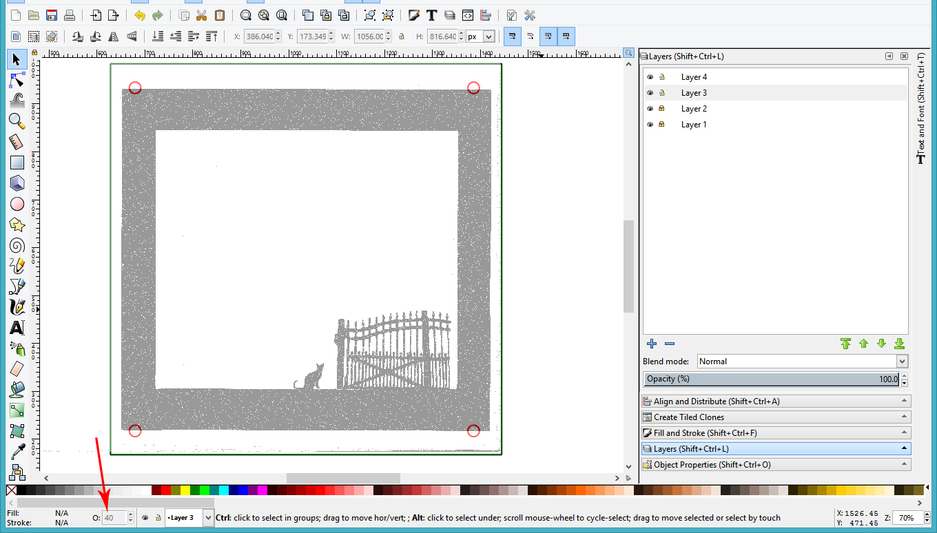
- Lower the opacity on the image by setting the little Opacity window on the bottom row to something less than 100%. (40% or 50% percent should work pretty well to see through it to the base file underneath.)
-
Then simply place the image where you want it in relation to the base cutouts you created earlier.
-
Once you have it where you want it…reset the Opacity on the image file to 100%
-
Then SAVE the FILE as an SVG file with a new name.
(I like to just tack a number onto the original file name - so this one for example would be “Schneider House - 01”. The next one you create will be Schneider House -02. And so on.)
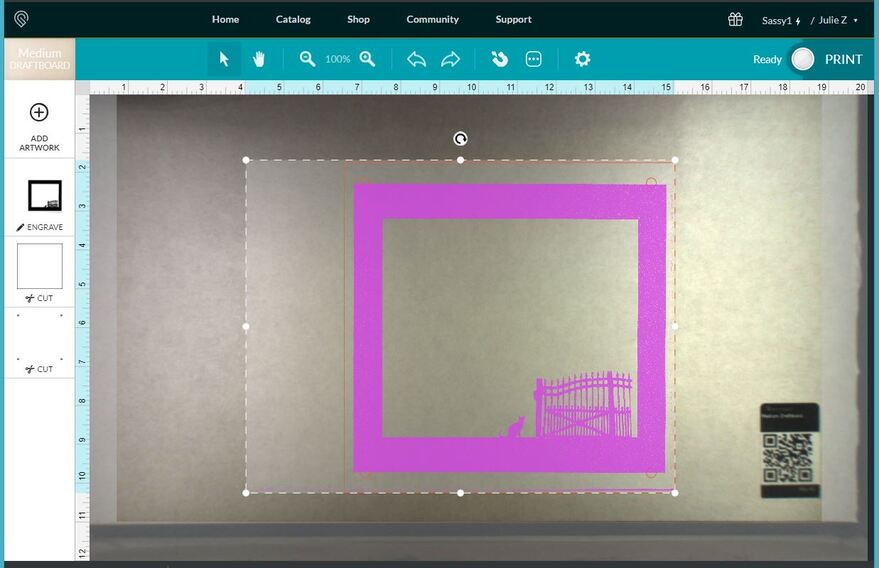
You can drag and drop this SVG file onto the Dashboard of the Glowforge interface and it will open up correctly set up to Engrave and Cut exactly what you want.
Couple of tips here to make things a lot easier for yourself…
- You will want to crop the image files first that you are using to create your frame so that there is not a lot of white space around it. And they all need to be the same size exactly. You can do that in a program like Photoshop or GIMP, by opening one image per layer, making sure they are all aligned the way you want them, then cropping the whole thing and saving each individual layer as it’s own JPEG or PNG file. (Just turn off visibility on the unused images).
When the images are loaded from the PDF file that you supplied, you get a lot of wasted “engrave” space out to the left side of the actual part that you want to engrave. The laser is going to engrave any noise from that area all over your material, and take a long time to do it. So crop the image files first.
-
Second tip: TEST the file first on something like draftboard (safer for beginners) or cardboard if you know how to use cardboard for testing. You can scale it down smaller to print it…but you’ll want to check to see if the laser puts a lot of noise on the draftboard before you try it full size on acrylic. (Otherwise…you might not actually like the results, and you’ll have burned through your acrylic.)
-
Okay, you will create five different files, starting over with the Base File that you saved, and saving each one with a new name. Just start each file at Step 13.
Hope that’s what you were looking for. It is the easier of the two processes.
There are some tutorials here that help beginning designers to get started with using the laser…they make very good “kill time while flying” reading.