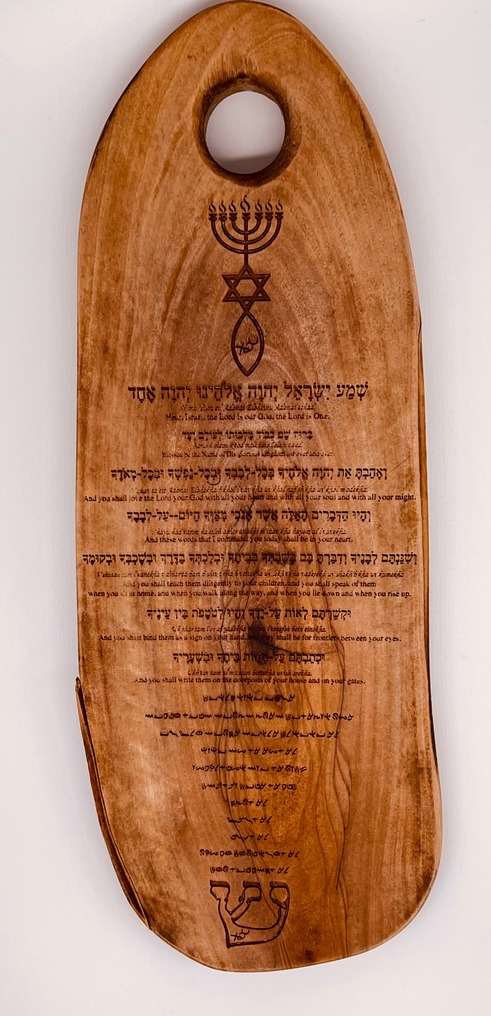
Here is another try at a .5" olive wood cutting board.
23 Likes
The wood is beautiful and the file well placed. I can’t speak to whether or not it is legible, because I can’t read it. Are you well satisfied? Did you finish or seal it after engraving. Do you produce the boards yourself?
2 Likes
Wow, i think this came out beautifully! Good job!
1 Like
Mazel Tov,
You did this on a Pro, can you take us thru the steps how it was done?
Jonathan
A half inch material would not fit through the slots so it would have had to be engraved on its side. I have several pieces of olive wood waiting for a design worthy of them.
can you be more specific? I don’t grok!

Jonathan
The slots on a Pro are able to work material no more than 5/16" high, maybe squeeze in 3/8" but for 1/2" wood it is a basic and might need to remove the crumb tray anyway. I engraved a piece that was 0.51 but I had to lie that it was 0.5 to get it to engrave.
2 Likes
AHHHH ok, now I understand!!
Thanks, the ‘one the side’ comment completely confused me
*which is my state most of the time anyway!
1 Like
I’d love to know what the Hebrew says!
it says it in English under each sentence, but its too tiny to read
maybe @pedrojsotelo will post the verbiage.
1 Like
It’s fairly legible if you download the full-size image.
1 Like
Thank you for all the great comments. The modern Hebrew engraving is what is called the Shema found in the Bible in Deuteronomy 6:4-9. The Porto-Canaanite (ancient Hebrew) engraved at the bottom are the ten words (Ten Commandments).
This was done on a Glowforge Plus and using Inkspace to create the SVG. After working with the laser for a while now I’ve come to realize that the SVG file needs to be work on properly in order to get a good engraving. Next is taking the breadcrumb tray out and ensuring to put the wood at the right height for the laser to work within the right parameters. For example, most of the material sold by Glowforge is around .125” thickness. So basically the wood need to sit, in this case, on something flat and leveled that is 1.125” thick. Then look at every one of the settings for the engraving to make sure they are compatible with the wood. Olive wood is almost as soft as basswood so the settings used for that are a good place to start. Grab a few small pieces of the wood and do some testing to see what works best for the art you are creating .
I hope that helps!
7 Likes
This is a gorgeous piece!
The color is so rich. It looks fabulous!
1 Like
Thanks for the translation!
Thank you! I have several pieces of olivewood likewise looking for a design worthy of them.