I see that people recommend making a custom drawing template in OnShape that is the size of a Glowforge bed. I can’t figure out how to change the size of a custom drawing template.
Does anyone have one they can share with me? (I prefer one in mm, but either one is ok)
Sorry, I don’t know as I’m a Fusion 360 guy but I’ll summon a couple of super heros that between them should. @henryhbk @marmak3261
Do either of you know how to help alan?
I don’t generate drawings. I use the KiriMoto application extension to slice the file into SVGs. It works very well. Tried using drawings made by Onshape, dxfs and pdfs and the results were not what I needed for further vector editing, especially in coloring and filling lines and shapes.
I assume you are referring to this process:
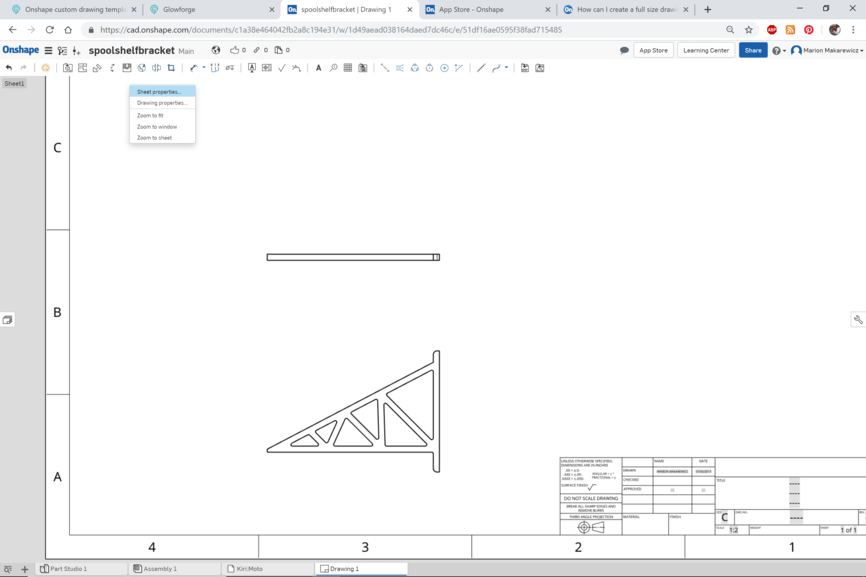
I have not done this, but as I am trying to figure this out, you click on the part you want to make a drawing of and then as you make a drawing, you are give the option of making a custom template. Do that. It won’t allow you do change the dimensions there, but once you do the drawing, you can change the sheet properties.
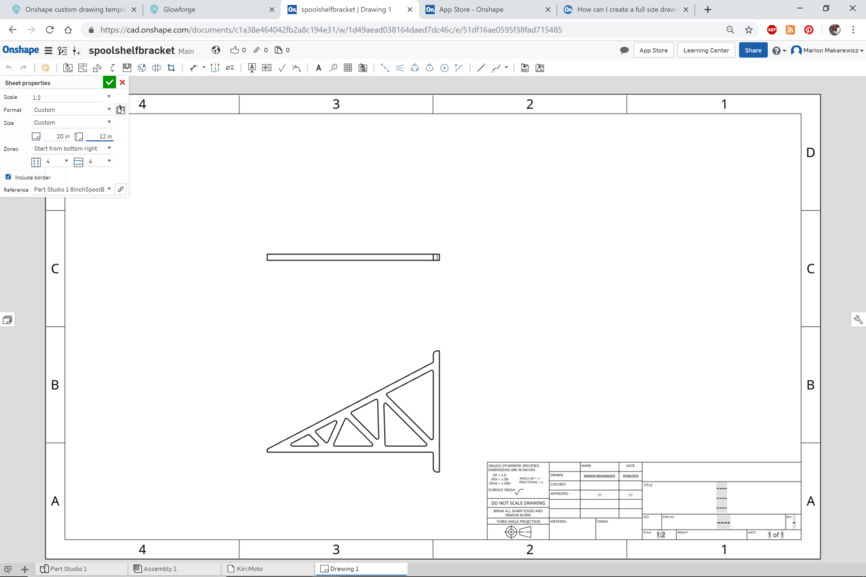
Once you make the drawing. You can left click on the sheet and go to sheet properties.
Then do custom size. It will default to metric if that’s what your preference for design is set for global preferences. I just happened to do this particular drawing in imperial. 20" x 12"
If you started from your own part already in metric, you should be good to go.
Hope this helps. Again. It’s not something I have used at all after the first couple times of messing around with Onshape. Once I got the KiriMoto plugin, those SVGs were all I needed.
I am totally unfamiliar with engineering drawings and the constraints that are part of this. It was quite challenging to use them productively.
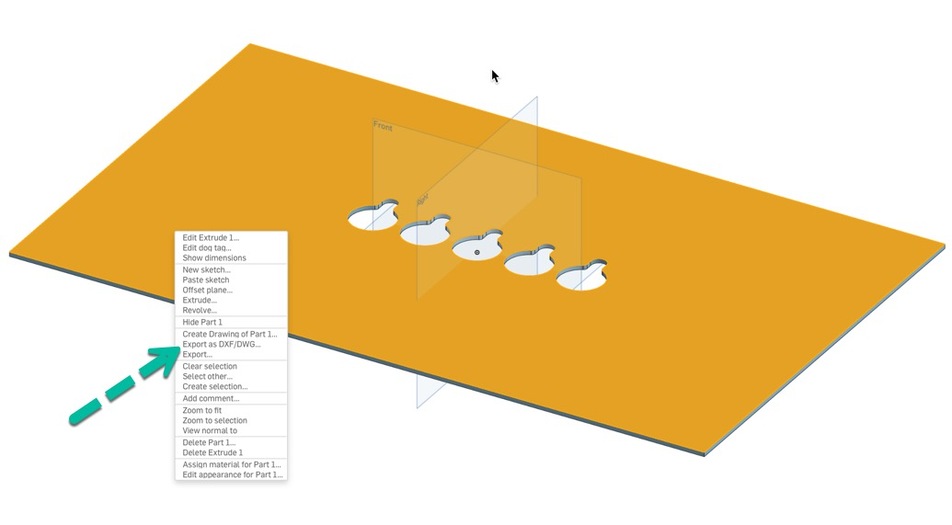
Why are you making a drawing at all? Drawings are not designed for the laser workflow, but rather for sharing old-school paper style. (I mean unless cosmetically you want to engrave like a blueprint). A way better workflow is to make your object in 3D like you always would and then highlight the face of the part (name your part or the file names are terrible) and right click on it, and select export as DXF. Then on import assuming you used inches in OnShape, select the scale 1:1 as inches in Illustrator.
PS: make sure you only have that face selected or you will not get the export choice. And note the paths are not joined, which doesn’t bother the GF sof.tware but bothers me. (and leads to some weird path routing in the GFUI) So I always select each path and join them in illustrator
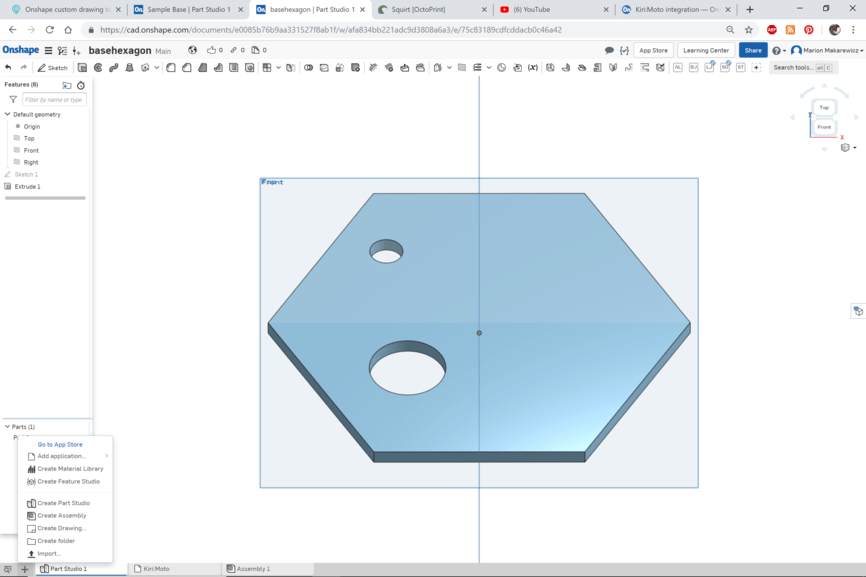
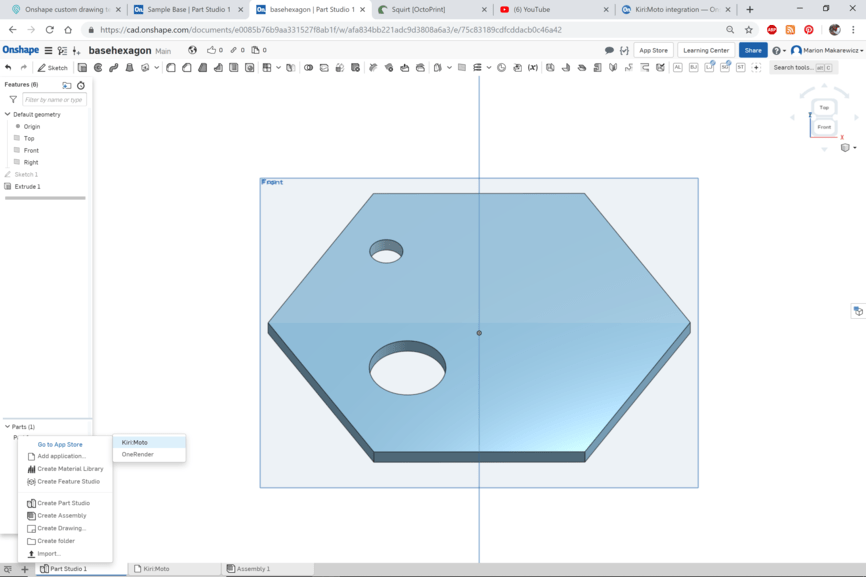
Ok. This gives me an idea of the part. I recreated it approximately for my how to since I can’t get dimensions or edit it.
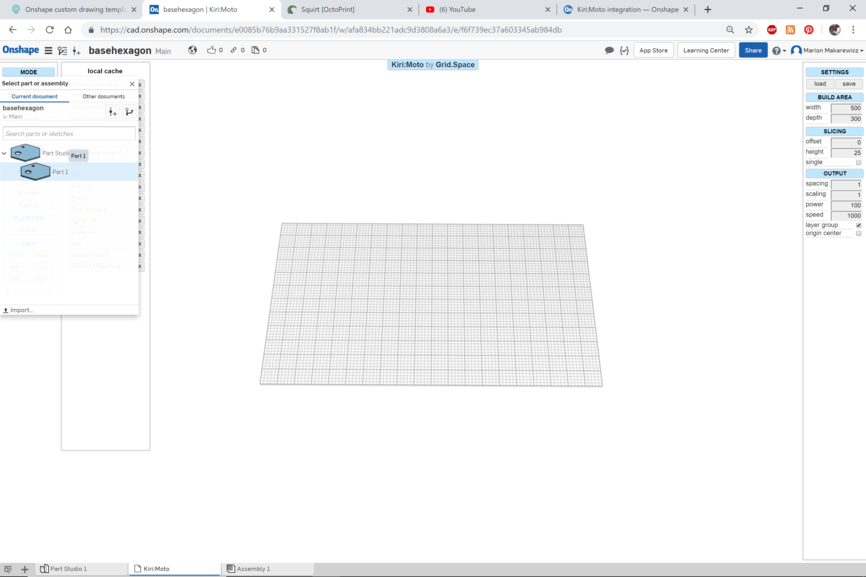
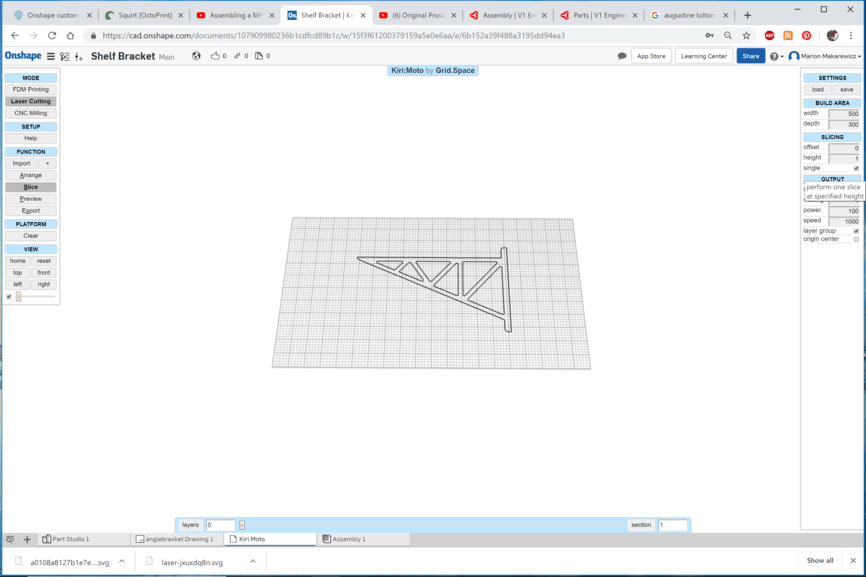
First is install the application Kiri:Moto. You get it from the app store. It’s free. The app store button is up on the top right of the top title menu near your user name and learning center buttons.
Once you have Kiri:Moto installed.
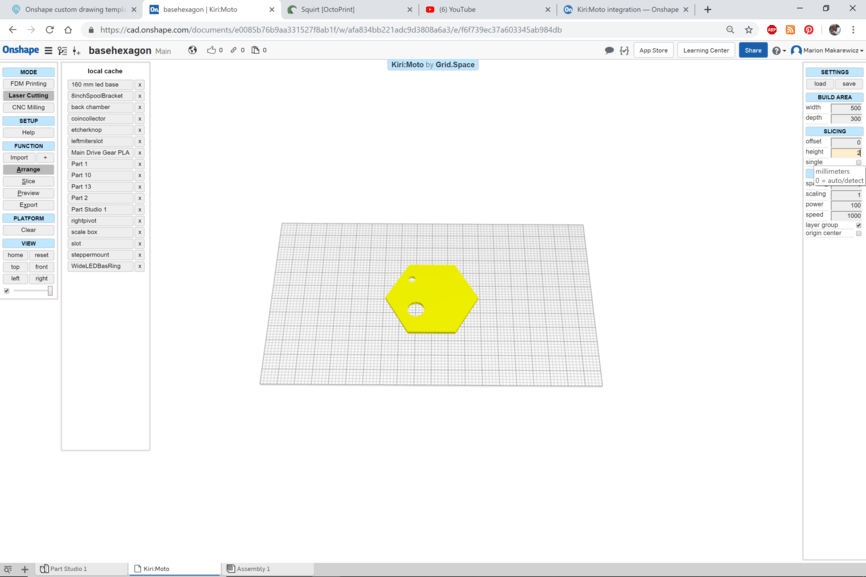
Click on your part. Then click the little plus/add sign on the bottom left of part studio to add a new element.
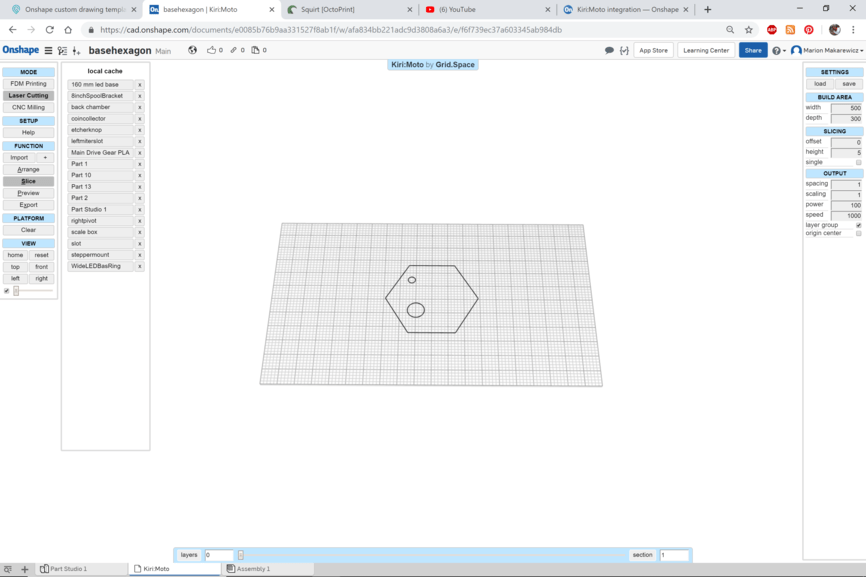
Then click export in the left margin settings column. The save dialog box pops up. Name it appropriately as it will always have something there. You can change that default name in the settings for Kiri:Moto.
Then click download and the svg will go to where your downloads default.
Then you can import that SVG straight into the Glowforge, or if it is complicated and you need to treat the design with different settings, bring it into Inkscape and color the lines and do fills for engraving.
I really like this workflow because it doesn’t mess with DXFs
I must be doing something really dumb. I got this to work on one computer but failed on two others. When it fails, it doesn’t go to a vector when I change the slicing height and then when I slice it nothing is there. Any idea what I might be missing?
I do know that if you put the height in greater than the thickens dimension of the part you are slicing, you won’t get an SVG.
One feature I didn’t talk about was the offset. You can compensate for the kerf by putting in the offset of 0.1 mm say for thick plywood. then your part is should be pretty tight. I did that a couple times and that is nice to be able to design exactly in Onshape and let the slicer compensate.
Finally, there is a feature that I hadn’t noticed before, Perhaps it’s new or maybe I just didn’t look. Check the little tick box for Single at it will do only one copy at the specified distance. That is good because it doesn’t generate multiple objects.