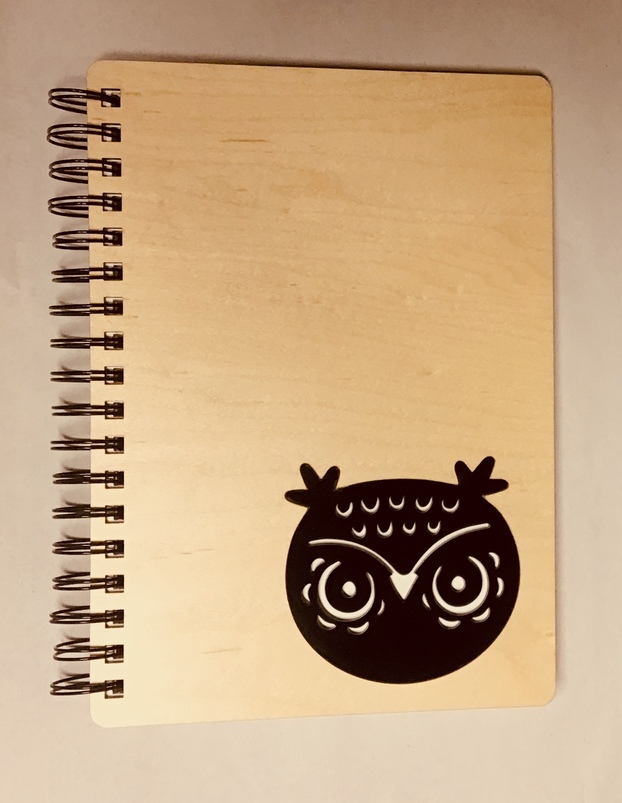
Not sure what I was thinking, this was my 3rd print ever and I decided I wanted a maple journal with an acrylic owl. Six owls later…before I figured the kerf out. It ended up being .003 but still needed a tiny bit of sanding. Never adjusted kerfs before there is probably an easier way than changing the stroke width 6 times (feel free to share any kerf secrets you may have) I guess everyone gets an owl ornament with their presents this year : )
31 Likes
Pretty awesome, thanks for sharing
1 Like
Stroke thickness is how I do it too. The thinner the material, the smaller the kerf is because there is slightly less burning needed to cut through. .007 is my general measurement for medium plywood.
It’s a process always and different materials can throw you since they get different settings.
Looks nice though.
4 Likes
I get it…been there done that, myself. Took me a long time to understand AND to make copious notes about kerf…but, after lots of testing, wasted materials (not really wasted when you learn from it) I finally figured it out. I felt immense self-satisfaction, then. You’re already part way there. Your journal looks great!
5 Likes
Looks nice!
One of the best kerf tips is to remember that a laser cut channel doesn’t have perfectly straight sides. Because of various factors, it’s more V-shaped.
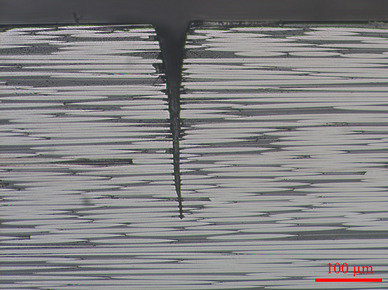
So when you’re going for a nice snug fit, flipping one material over will make the wall angles align. Your tolerances can be a bit tighter, it will be easier to press together, and you’ll get slightly better results.
13 Likes
I did not know that thanks for letting me know. I thought it was strange that it wouldn’t go in from the front but went in snuggly from the back.
5 Likes
This is adorable! Very well done
2 Likes
Congrats on working through your kerf requirement!
1 Like