Very cool!
This is very cool and one of the main reasons I wanted the Glowforge. Being able to do this with paper just adds another level to how I wanted to do this. The link below is a great resource for making map layers. Can’t wait to see everyone’s maps.
11 Likes
Google Map Style is amazing! That makes all the difference in the world for making these easy to make. Thank you!
BEFORE
AFTER
21 Likes
I’m hoping since you can engrave on the paper, that I’ll be able to engrave the street names too. It would have been fun to do this with wood, but I think paper lets you do layers and a lot of other things you couldn’t do easily with wood.
If you want the street names, landmarks, etc. that’s great, but either the UI or a vector drawing program needs to be able to decipher between the cut and engrave lines, and it’s very difficult to do that with all those words and symbols breaking up the street lines. You could certainly create the map with the street names and without. Do the engraving of the names first and then use the plain map to cut it out.
2 Likes
I would make the text a different color, so it is easy to separate that into a layer of its own in Illustrator.
I haven’t had much luck with that process. The color selection tool isn’t perfect. It’s also common for the text to cross lines you want cut. In Google, the words are actually larger than the roads in most cases. You can see that in the image I posted earlier. That means that you can’t cut the road lines without cutting off the top and bottom of the names.
1 Like
not to mention, most of the time these are relatively not that that complicated (relatively speaking, i mean, for a map) so worst case scenario you can add the labels you wish. plus i tend to hate most map fonts so i’m liable to do that anyway
1 Like
To each their own.
I’ll probably start with something like this, with a high contrast map. Separate the colors into layers, then invert the colors, so it cuts out everything but the roads. I can easily turn off the street names, but if I’m using light colors, I would probably make the words an engrave. Then spray glue the layers together making a layered map. I plan on doing small versions of these for everywhere I’ve lived, and frame them for a wall in my office. Should be nice.
1 Like
Also, I forgot about the fact that if you have a big screen, you can screenshot a giant picture to work with, then shrink it to the size you want. This should work great. I’m can’t wait to get my delivery email.
2 Likes
Good luck! I’d love to see what you come up with.
1 Like
i think you mean high resolution. physical size won’t have any impact on your screenshot, just so others are aware (i bring it up mostly so that people don’t go try to screenshot their televisions unnecessarily).
1 Like
Awesome, and great Instructable, BTW.
I have done this exact thing.
Exact-o cutting lots of small details is time consuming and hard on the hands.
I eventually got a Silhouette for this and for the other projects but the size and speed are limited.
I also prefer to use colored papers, which are a little thicker, or cardstock, which both tend to jam and tear in the Sihouette.
Can’t wait to apply this to the 
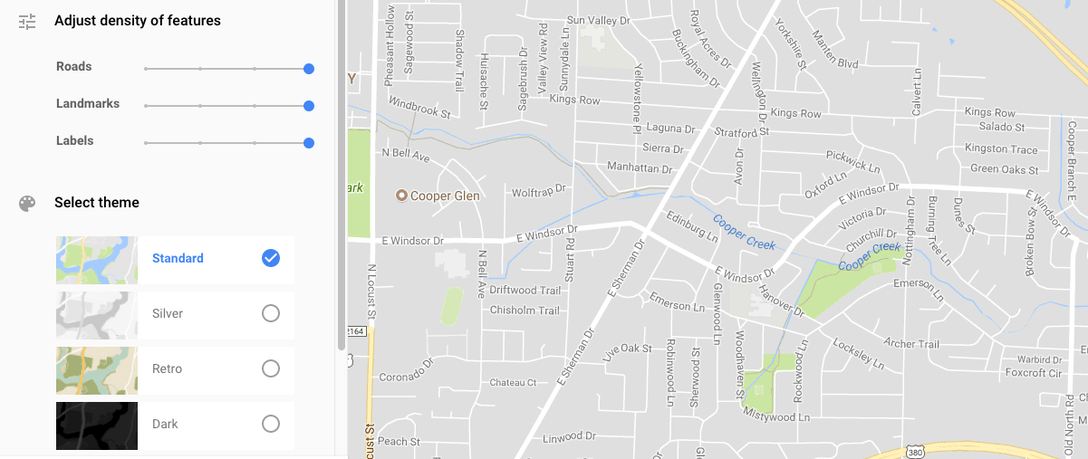
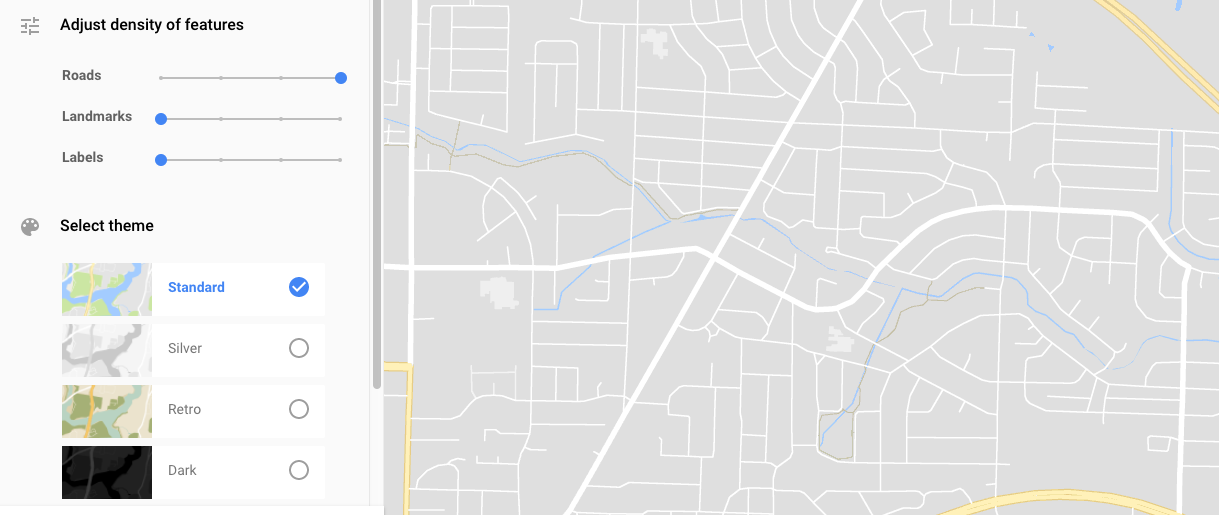
You can also use the Google map API to get a map without labels.
There are other places too that Google maps to generate high-contrast versions.
12 Likes
Both are very good resources. Thank you for sharing.
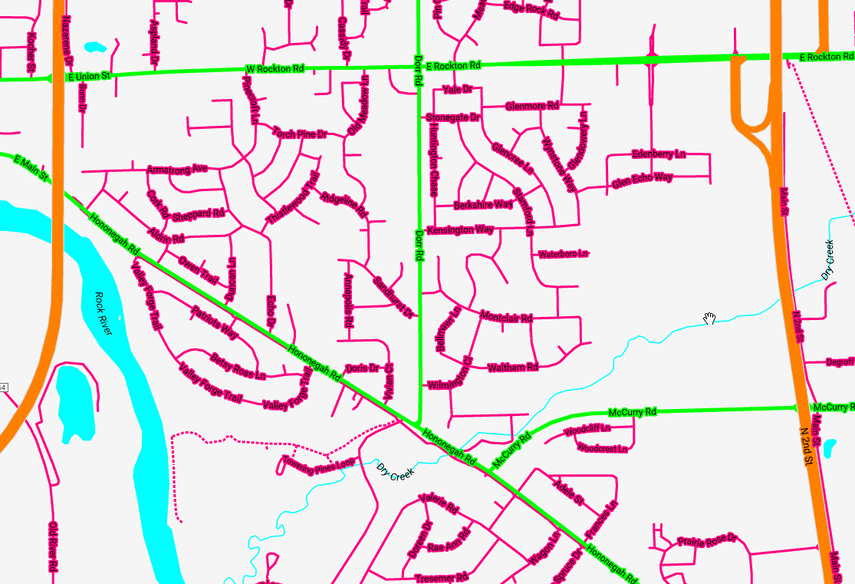
I have never used this since there is no mac version and I have not wanted to bother with parallels, but it looks like a great way to get editable vectors out of open street maps and into Illustrator (or any other vector editor).
http://maperitive.net/
4 Likes
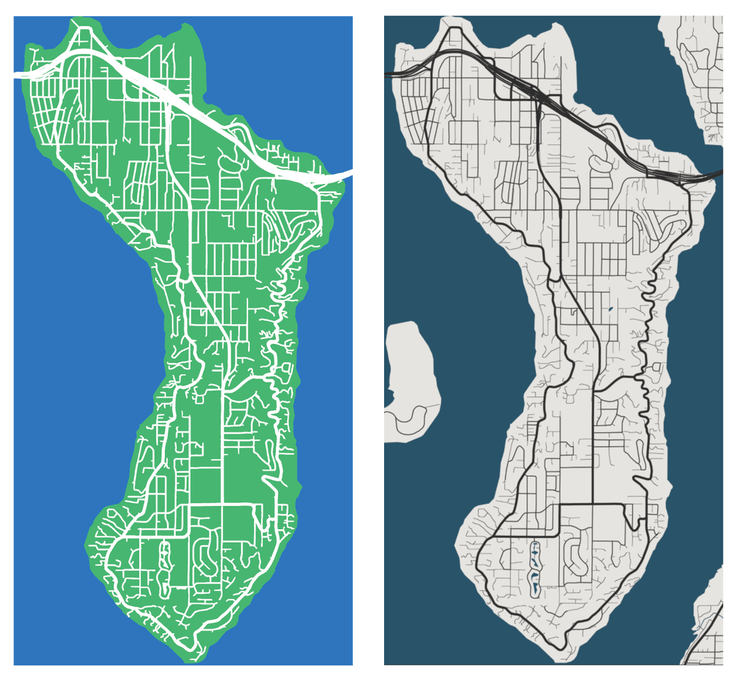
Wow, that was quick and easy. One on the right is a screenshot from @hughdint’s second link, one on the left is a vector that’s ready to print/engrave/etc.
13 Likes
That’s so cool. Very nice!
My Glowforge is literally going to pay for itself in one small project now that it can do this. Provided the wait doesn’t kill me first. 
6 Likes
That second link is wonderful. I’ve spent hours trying to learn how to do this very thing. And forgive my ignorance since I’ve no laser experience at all, but is it really as simple as running a trace on a screenshot?