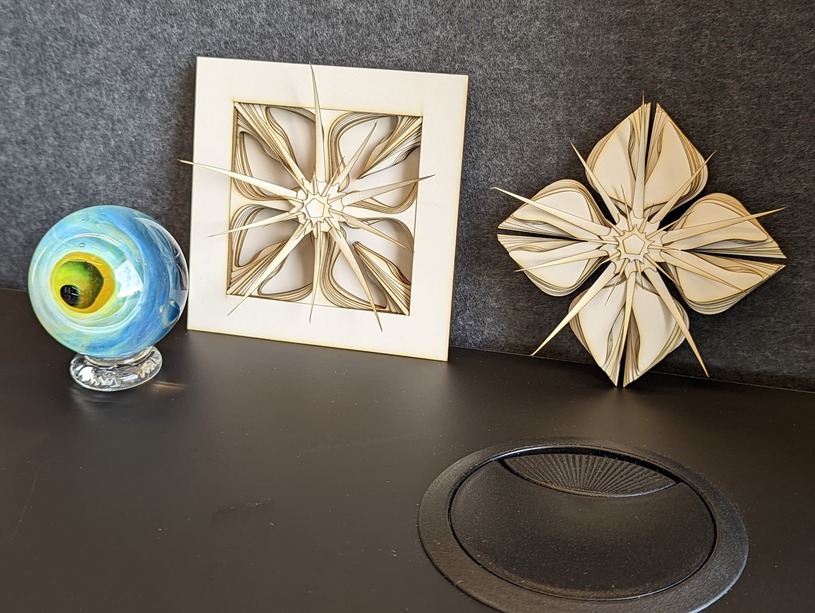
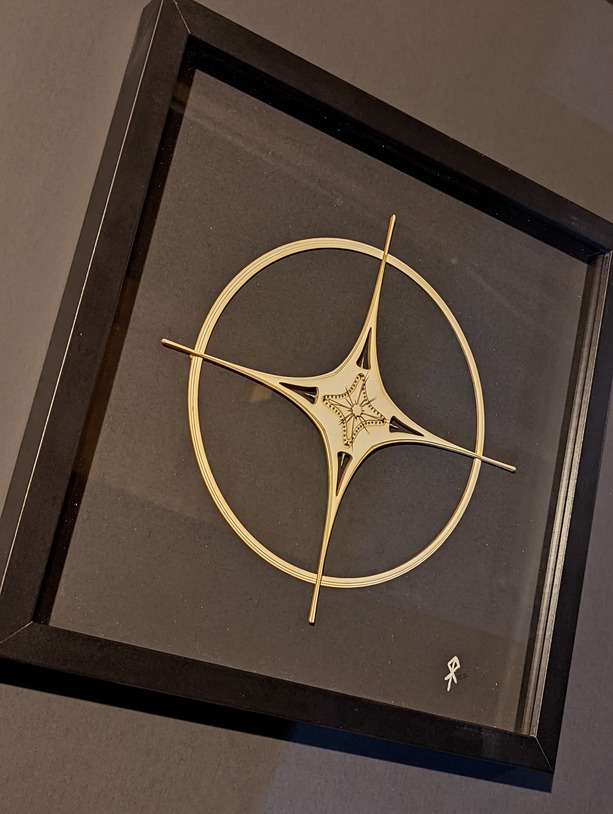
Lately I’ve been obsessed with multi-Layer paper sculpting.
I have some other projects I’ve done on Instagram under @artofeskay
Lately I’ve been obsessed with multi-Layer paper sculpting.
I have some other projects I’ve done on Instagram under @artofeskay
Very nice! How many layers are those? Very time consuming I’m sure, but they look great!
these turned out beautiful. Lots of time and energy but they look so cool!
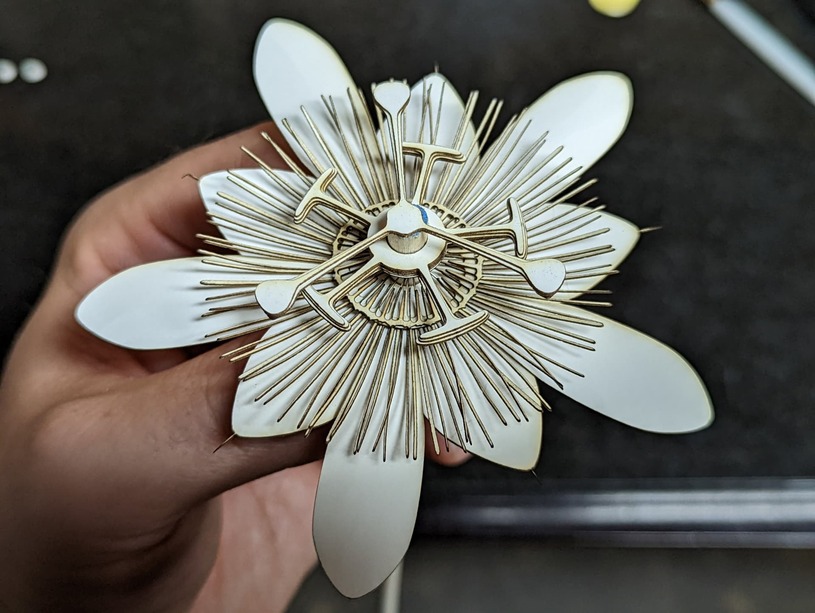
Most of those are between 12-16 layers, but the thicker version ended up being closer to 40 or so.
Design time took about 2-4 hours depending on the complexity, prep time took about 30 min, cut time about 30 min (as long as everything was prepped properly), I did a dry fit to make sure everything aligned properly and I could finalize the design which took about 30 min, and the final gluing of everything took a the longest at about 2-3 hours (mostly to make sure everything was aligned perfectly)
Now that I have the process down, I can cut a lot of time off of this and I can get a few of these going at the same time.
Wow - that requires a lot of patience! These are beautiful!
Very interesting and beautiful.
can’t believe those are paper! i have done some relatively complex origami (and very simple origami in metal clay) but these are amazing. Congratulations!
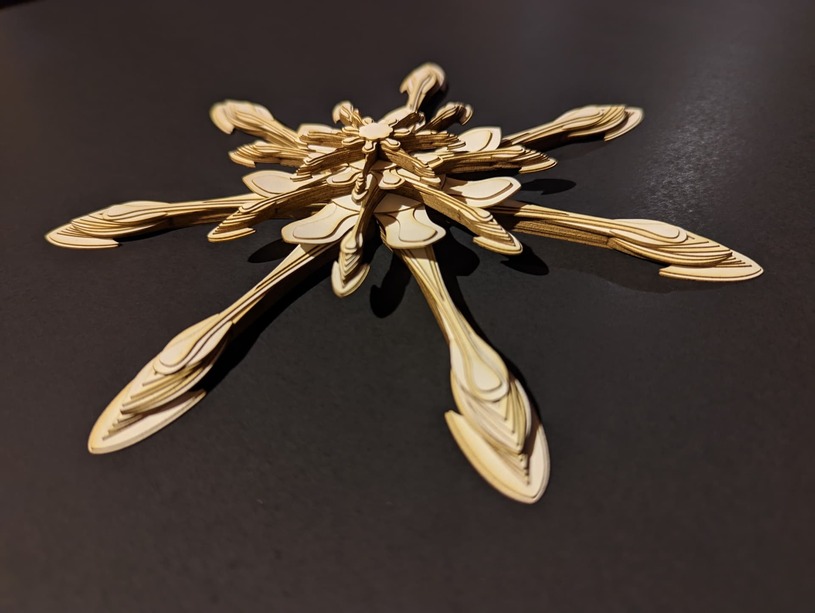
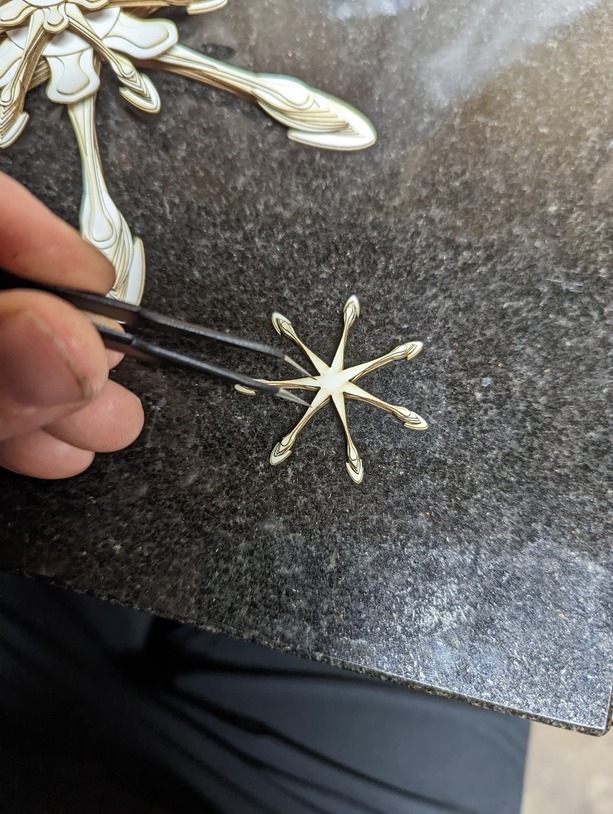
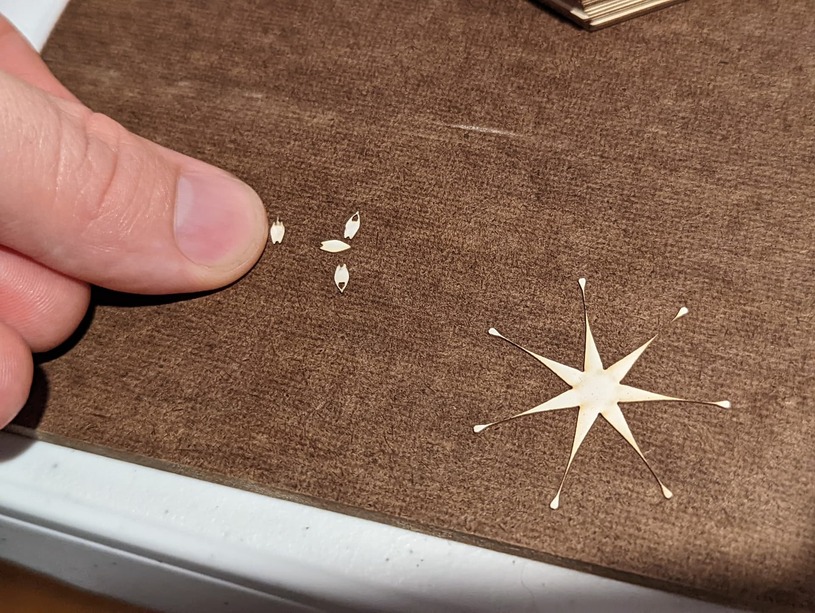
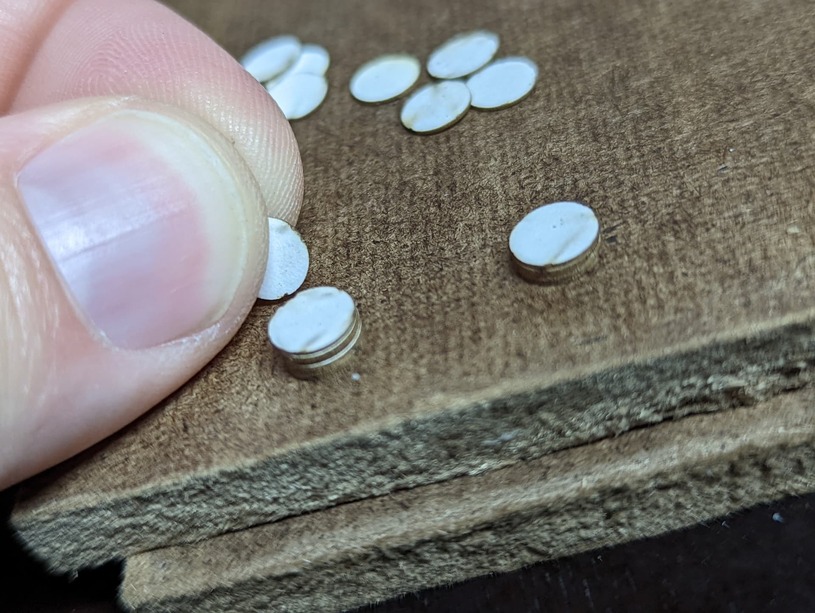
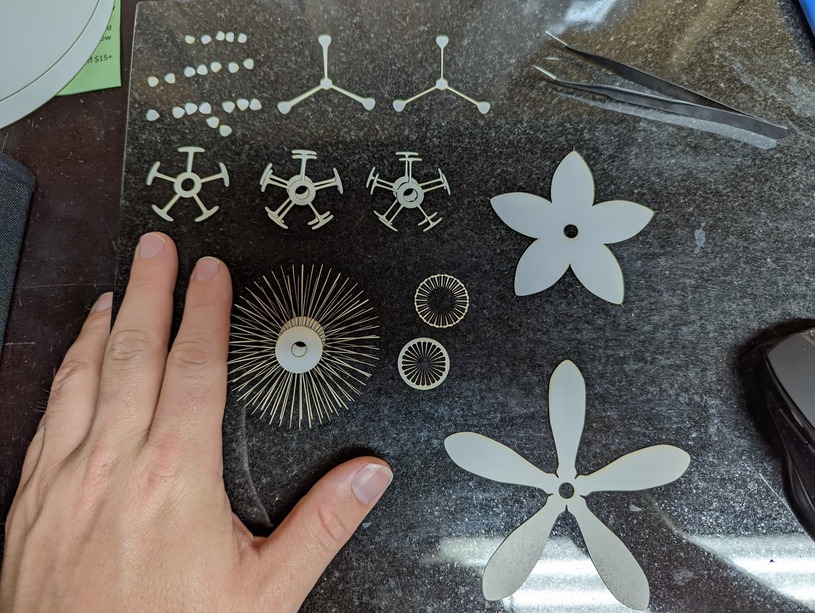
I’m realizing that I need a magnifined glass to work on some of these smaller pieces. Also ended up needing to resort to tweezers to handle the pieces so I don’t glue the pieces to my fingers and can line them up properly.
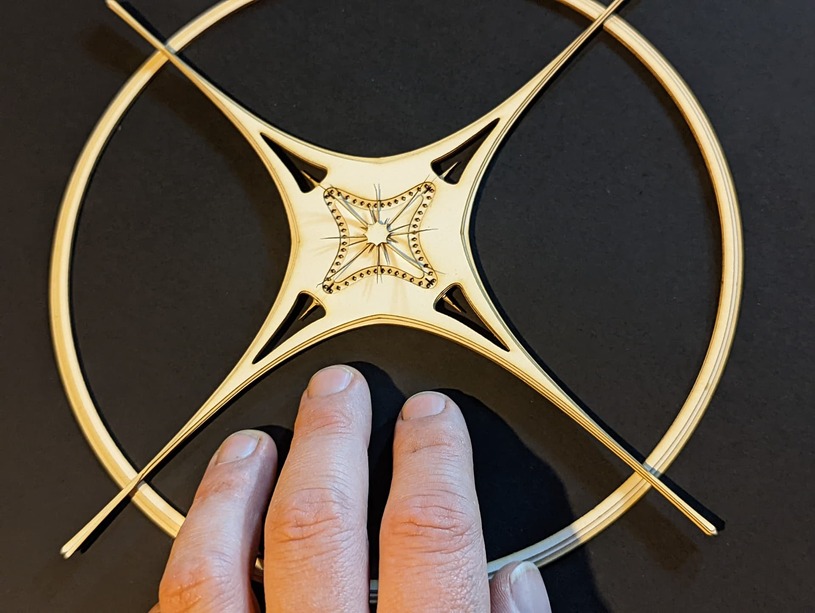
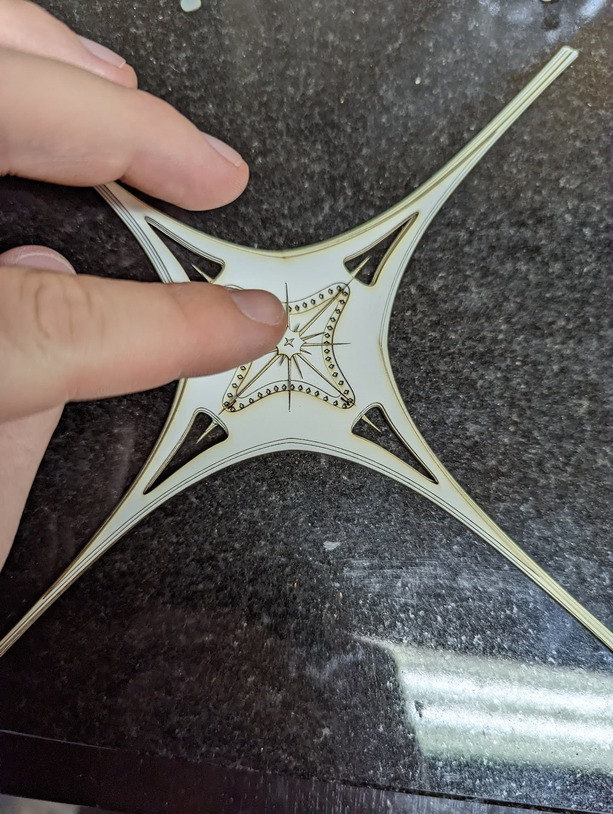
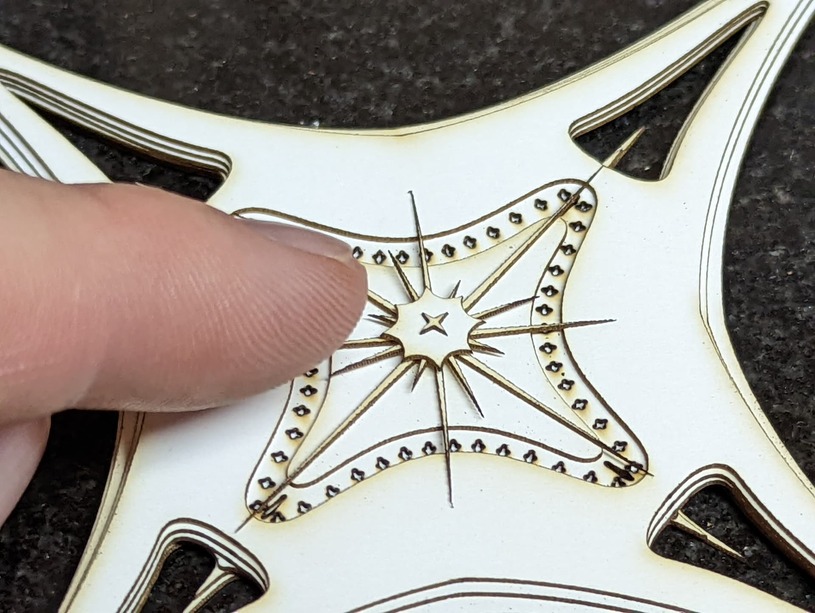
Here are some additional pictures of some of the dry fit process with some of the smaller parts.
Whoa, that increases the difficultly. Very cool artwork.
That’s a real labor of love. I didn’t realize that they were so small.
Definitely more time-consuming than I have the patience for!
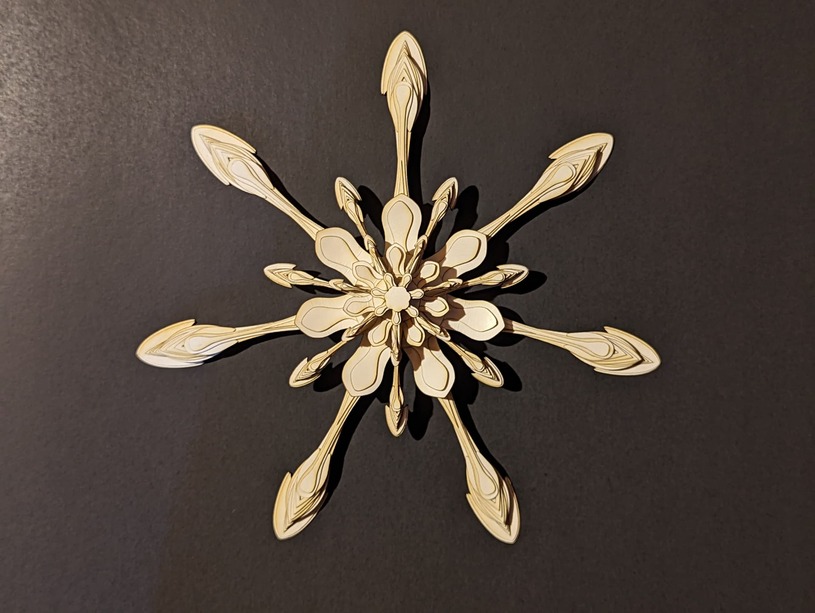
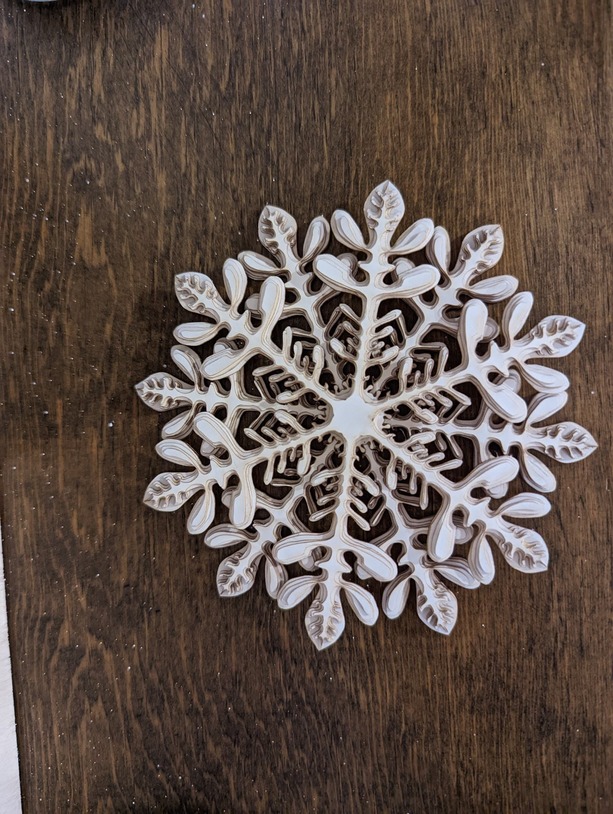
These are quite nice. How much paper did you use for the snowflake(?)
1 sheet of 11x17" paper. I had them set at being a 6" piece origionally but I would have had to go through multiple pages and for a test piece I decided to keep the material use rather limited, so I ended up making them 4" instead so I could fit more layers on a sheet. Now that I have a lot more of the details ironed out, I can make them much bigger, but it will go through a lot more material because of it being multiple layers.
Also, because I enjoy torturing myself and seeing what kind of detail I can get out of the kerf and the required power to cut through the piece.
This all used up about 1/2 sheet of 11x17" paper
This one was just a test to see what kind of scale I could operate at with some of the details. This was the second go around after realizing that 2/3 of this scale would just burn and not cut any more.
Oh, shoot I thought you were talking about another snowflake I made that I didn’t post on here. The one I did post was about 2 sheets of 11x17"
This is the one I was mentioning earlier.
Beautiful work! Paper is an incredible medium.
These are beautiful!
What weight paper do you use…regular copy paper, cardstock?
Really nice!
Did you use Engrave or Cut for the operations?
How did you hold the paper down?
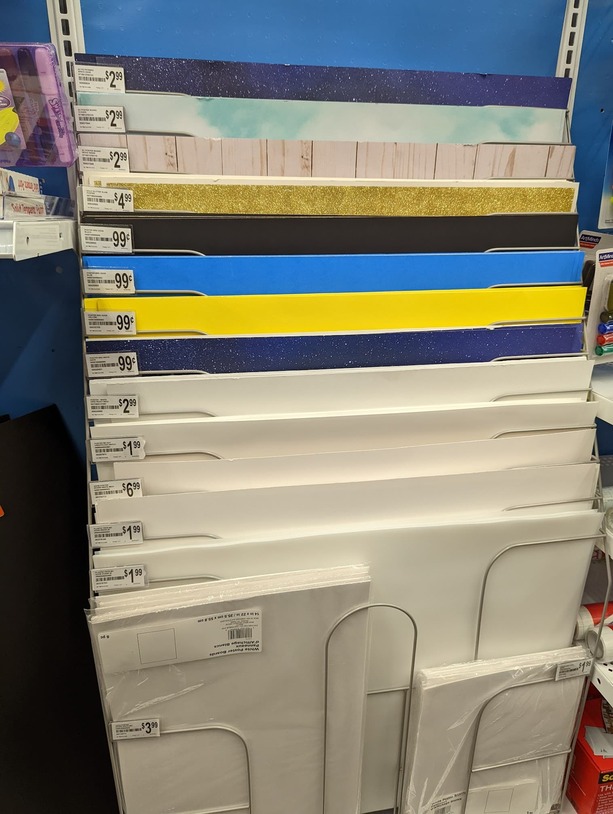
Thanks! I use the cheapest poster board I could find at the store. Since this is still a learning experience, I figured I’d learn on the cheap at around $2 per sheet. (22"x28" which if you cut them down properly into 11"x17" sheets, you can get 3 sheets worth.)
I also found that this stock ends up being 0.0125" per sheet. (important for me because I need to know how tall the final piece will end up being with each layer.)
It leaves a brown stain on the edges because the white has a “sheen” on it, but like I said, it’s all about learning more so than the polished look.
I use cut for these. I was trying to use plain copy paper, but the fan pressure is too high. When I use posterboard, I was originally using magnets to hold the edges down, but found I don’t need to do any hold down on them because the pressure isn’t high enough to make the pieces go anywhere.