10, are you sure?  Had my cutting and scoring tests with 1 cause everything else was just burning off…
And hi kitty 
10, are you sure? Had my cutting and scoring tests with 1 cause everything else was just burning off…
And hi kitty
Depends on the speed used. What speed did you use?
Different. But usually maximum, I think it’s 500?
Edit: it’s not allowing me any new posts as a newbie, here‘s the reply
It‘s 80g/m^2, dunno again what that might be in inch. Just the regular copy paper for everyday use. The same I achieved the results above and well, the same for these ![]() these were some of my first attempts and you might get the feel, why I was calling for aid ^^
these were some of my first attempts and you might get the feel, why I was calling for aid ^^
I’m not sure how thick the paper is, but if you think that’s going to char it too much, you can start at your normal settings for cutting. Those are my cut through settings for semi heavy paper.
Okay if that’s copy paper, you definitely want to stick to 1% power and fastest speed.
The changes in the file might cause it to not burn quite so badly next time…just try it tomorrow and see. If nothing else, you know you can engrave through it, even with a third pass - for shapes that small it won’t take long. 
We found that engrave settings are better than any cut settings using glowforge for paper. It basically disintegrates the paper where you would typically cut. Set size at 0.01 - fastest speed.
One more possibility to work on when doing this kind of engrave: White leaves on a colored background. Because you don’t really care how much paper you zap away outside the leaves. And you may get cleaner corners while still burning through OK. Also, you might want to try the very most careful shimming, because you would like to get the paper surface as close to the actual focus point of the beam as possible. (I haven’t done much copy paper, but I do know that I can get a couple different tones of brown before cutting through…)
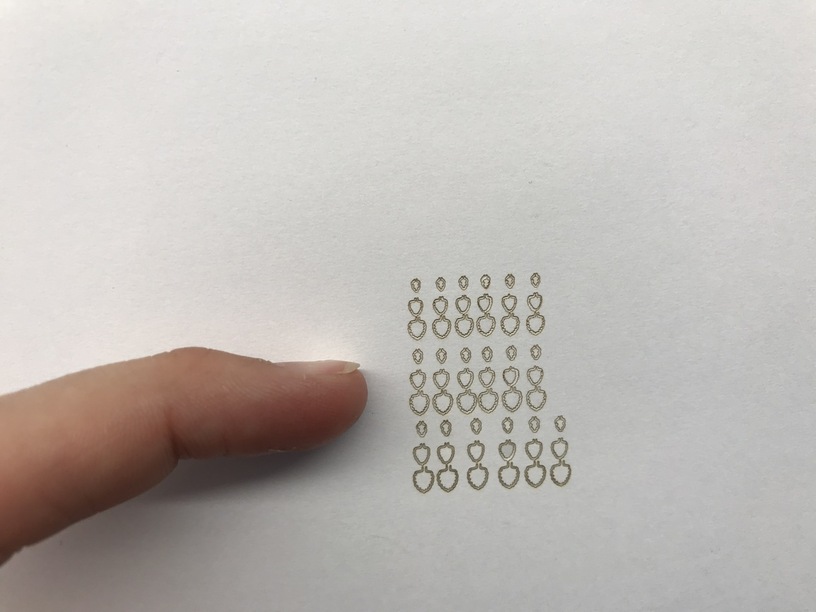
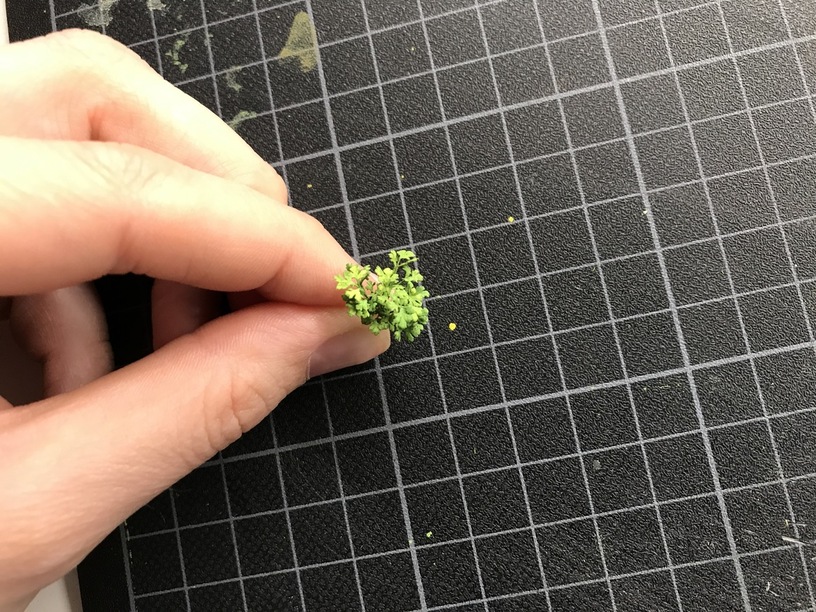
I have tried a simpler design today, leaves for a shefflera. I think the 275/7 score settings work out quite well (leaves are missing cause they got stuck on my adhesive sheet underneath ![]() was too impatient this morning to wait for it to dry properly before using it). They’re not too burnt but yet entirely cut through.
was too impatient this morning to wait for it to dry properly before using it). They’re not too burnt but yet entirely cut through.
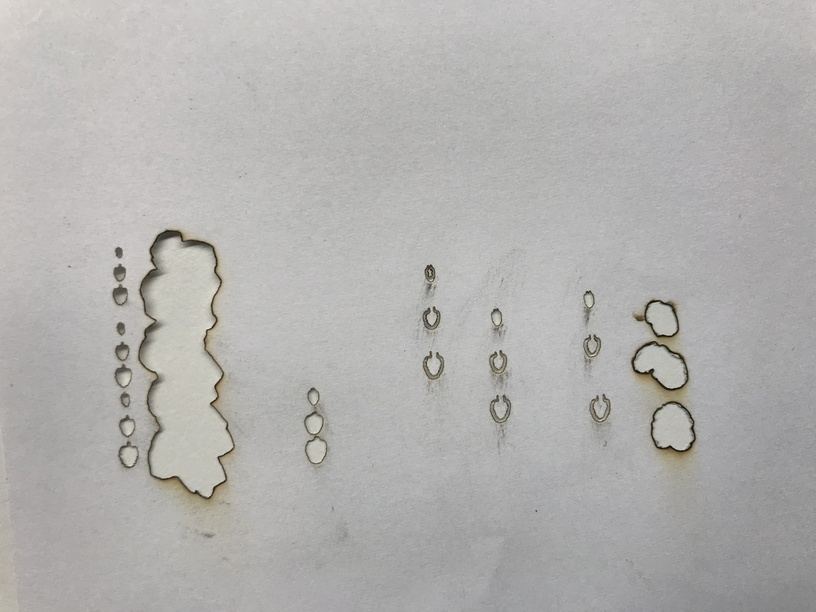
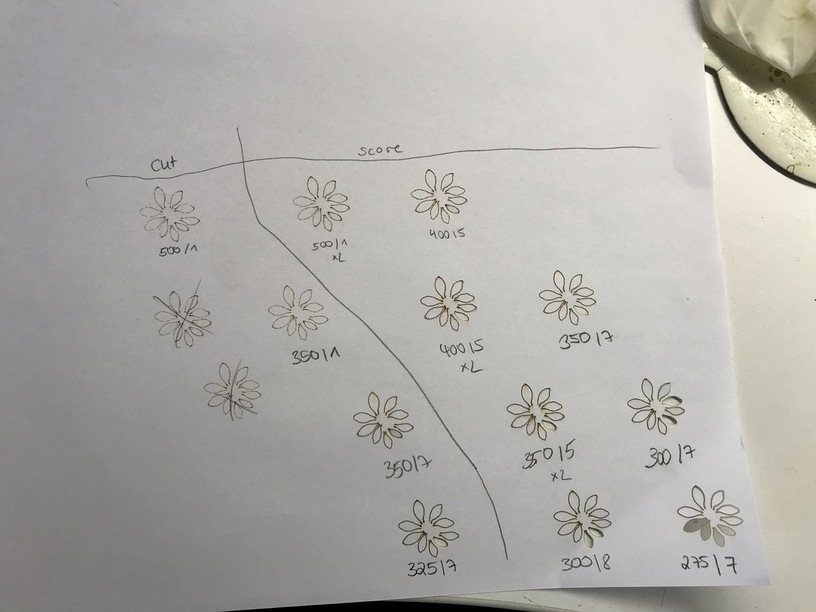
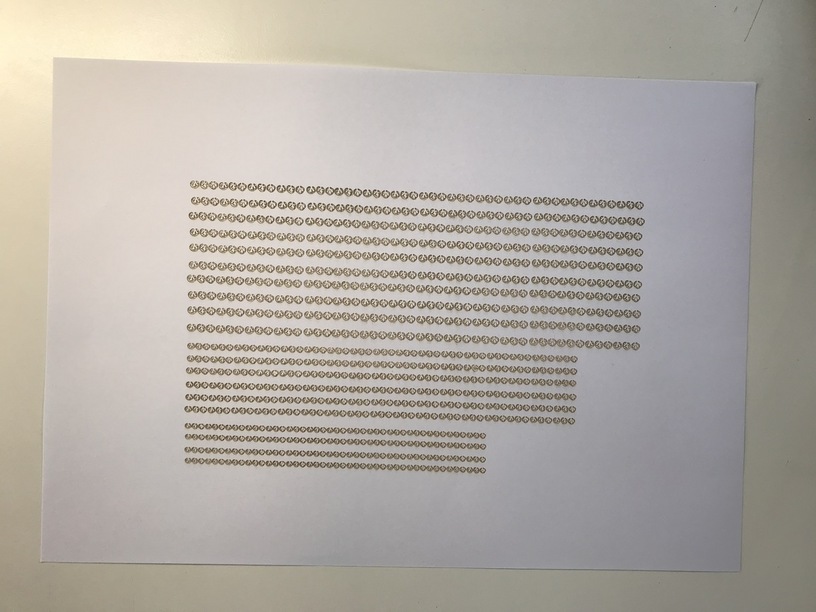
The results for the more complicated leaves, oh well. I tried different score settings, all with a high speed and a minimum on power (5 was the highest and this was really bad ![]() ). 500/1 was the best but not satisfying. Maybe I need to redesign it entirely in inkscape and try again. Otherwise I will need to go for the engraving settings, but they take sooo much more time than scoring… 3 leaves engraved: 6mins 3 leaves scored: 12sec
). 500/1 was the best but not satisfying. Maybe I need to redesign it entirely in inkscape and try again. Otherwise I will need to go for the engraving settings, but they take sooo much more time than scoring… 3 leaves engraved: 6mins 3 leaves scored: 12sec ![]()
The first batch of leaves I will actually turn into a plant!
I have chosen to stick to engraving, it’s not as burnt as scoring and if you arrange them properly, the printing time is also shorter. 13mins for all of them, while testing I needed 9mins for 3 leaves at the most ![]()
These settings are now: 500 speed, 70 power, LPI 1355
@Jules You really need to tell me what you did to the engraving file please! I’ve seen you somehow thickened the line or made it 2 lines? Guess that’s the key! I started drawing with Inkskape now, but haven’t found out how to do that yet…
I’m so relieved this is finally working out somehow! ![]()
I’m glad it’s working! ![]()
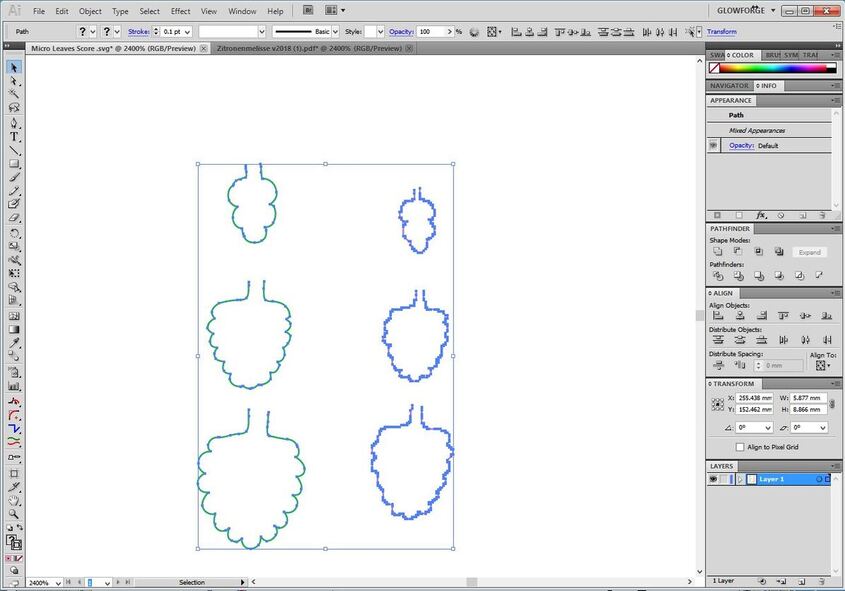
I just did a little cleanup on the files to make them easier to cut with a laser.
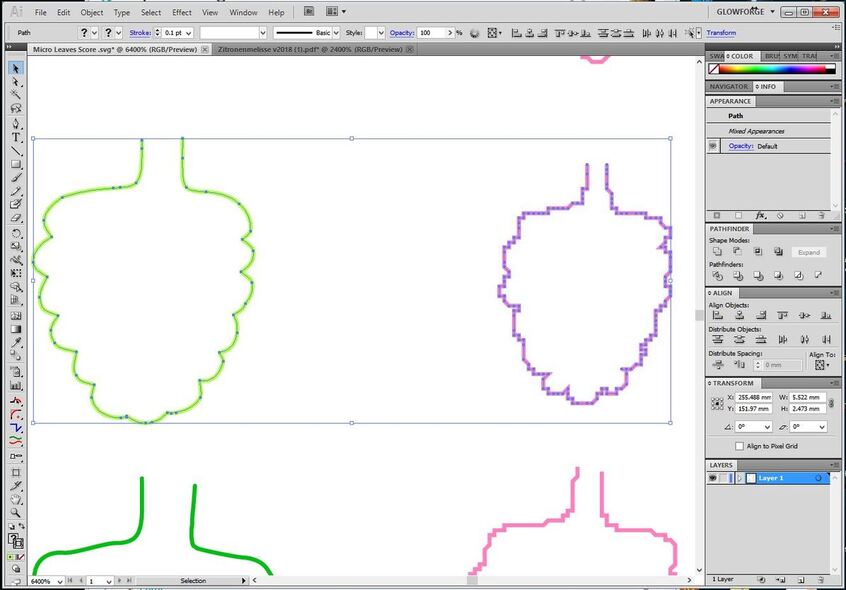
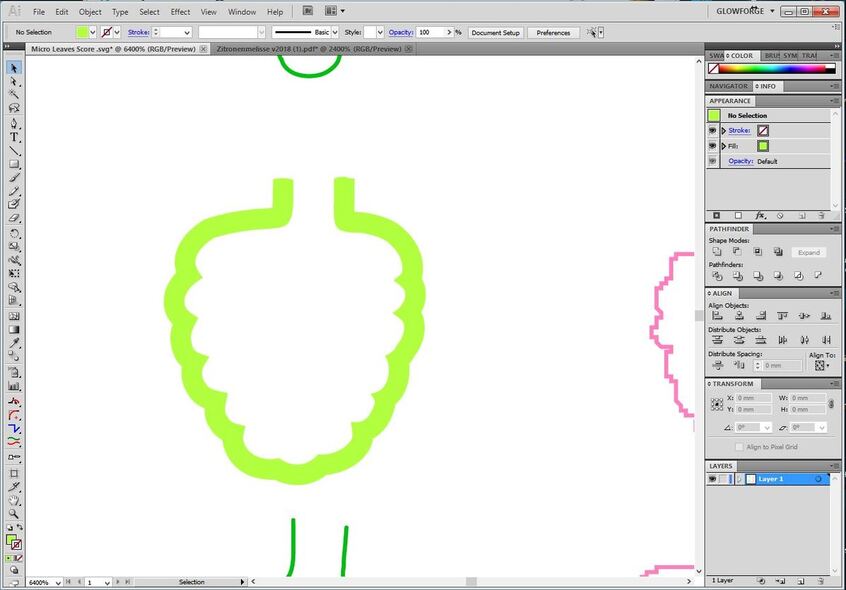
First step was to simplify at 100% accuracy to remove a lot of the excess nodes - If you zoom way in on the originals you can see somewhere in the neighborhood of 170 nodes in each of the originals, and that gets reduced down to about 20 or so each in the reworked ones on the left. (Inkscape probably has a simplify function - I was working in Illustrator.)
You’ll also see that your original consisted of a lot of short connected segments, instead of smooth Bezier curves - that can be a function of the design program. I’ve never used Vectorworks, it might create curves by using short choppy segments, but those are not as good for lasering something this small as Bezier curves, and you might want to smooth those out in Inkscape before saving the SVG file. Your details will keep their resolution better.
Last thing was to expand the size of the reworked ones just a little bit, to adjust for the width of the laser beam, and to exaggerate the scallops. Your scallops are small, the ones I created are a little bit deeper, and they end in a node, so that if there is overburn during scoring, the burn will happen in the point of the scallop and not all along the leaves.
The laser during scoring moves from point to point, if there are a lot of excess points or nodes in a design, the laser can make a slightly darker mark there. So you get a lot of overburn on the design on the right - look at all the nodes.
For engraving, that doesn’t really matter as much, but you’ll see better results with deeper scallops.
What I would do with your remaining files is this - just draw a simple rectangle around your leaf shape and engrave all of the area around it, or give yourself a slightly thicker stroke, set it outside of the shape, expand the stroke and then engrave that.
Make all of your original shapes larger by 0.1 mm offset to account for kerf. Then you can do something like this:
That’s a slightly wider engrave than I had set up for the original that I posted the first time above. ![]()
Awesome, thank you! 
Actually Vectorworks has Bezier curves and all this, but when I was drawing the leaves in the first place, I imported a pic of a real lemon balm leaf and draw the outlines with a freehand tool. It automatically smooths the edges but ends up with lots of points though. I used to print the shape of the leaves and cut them by hand, so that really did not matter at all. The shefflera leaves I’ve done this morning are drawn in Inkscape and only have very few segments per leaf, I was already paying attention to that. I think drawing a circle around the detailed leaves and engrave that too might be the easiest way for me and it makes painting them afterwards much easier^^
Btw, Vectorworks is a professional architectural design programm I’ve used a lot while studying architecture several years ago. I’m so used to it and it’s very handy for everything I do, but I might get along with Inkscape one day  Especially as it’s freeware and Vectorworks is very expensive…
I will try some new shapes of leaves the next days and post my results, if they’re worth posting 
Moooooooore leaves! This time it’s flat leaf parsley (italian parsley). Same settings but printing time was 2:39 ![]() For some leaves
For some leaves ![]()
And this is what it looks like finished ![]()
Nice work Lami!
As another Vectorworks user I am guessing that all those extra nodes were created in the export to PDF. Since VW doesn’t save as SVG I’ve taken to copy and pasting my designs straight from VW into Illustrator. It maintains scale perfectly, saving as an SVG in Illustrator, and then uploading to GF. That might also work with Inkscape but I haven’t tried.
Inkscape/Illustrator are definitely worth learning…but Vectorworks is hard to beat if you are already familiar with it.
Sweet! 
You ought to post the finished project in the Made on a Glowforge category so everyone can see it.
Hurrah! And yeah, once your paths reach a certain level of intricacy, especially at small size, engrave is at least as fast. Weird but true.
Thanks for the interesting paper cut topic. I found a German source for the hold down mat: https://www.cameo-laser.de/shop/laser-zubehoer
Hi Andrea,
I already found a different supplier in Germany and ordered one for appr. 60$  Still waiting for it to arrive though so I’m still using my spray glue atm
  They’re actually several suppliers, for most of them you need a business account to order, but that’s no problem for me But thank you very much for your effort!
WOW! This is amazing and must take alot of time and patience! Looks Great!
Hello Lami,
I just received my Glowforge and spent yesterday runing tests on paper card.
I printed charts on a A5 rectzngles, changing one measure at a time.
For exampleI started with only cutting, then only engraving.
Cut : 200 speed+35 power, then 300 speed+35 power.
When it’s cut, I write the setting on the paper with a pen, so i can compare each cut with its settings on the paper.
Engraving : 250 speed + 10 power, then I vary the lines and liked 105 lines/cm the most.
Hope it helped 
Caroline
I also purchased a GF in order to work tiny. I want to cut (after reading this thread, engrave) leaves, doilies, etc. in several “dollhouse” scales. I know it can be done, because I’ve spent a small fortune ordering this very thing from suppliers who do this. What I’m trying to find is how to attach things with tiny “stems” so they stay attached to the paper instead of blowing around (I am going to get one of those sticky mats). Just about everything laser cut I buy in any scale is still attached to the motherboard with stems. I’ll start a new topic, but I had to comment.