I’ve long been fascinated by the aperiodic tilings of the plane investigated by Roger Penrose (and others) in the 1970s. (See the Wikipedia article Penrose tiling.) Over the years, I’ve made sets of his P2 and P3 tiles just the explore how they work; I still think they’re sort of mysterious and beautiful. One I particularly like is the P3-based “Penrose flowers.”
Being in a puzzle frame of mind, I thought I’d see whether that Penrose tiling might lend itself to being cut up into an interesting puzzle. After trying various dead ends, I settled on one I like. It’s not overly hard to find a solution to, but it’s not simple, either. If you keep playing with it, you’ll discover the constraints that govern where key pieces have to go relative to the puzzle and to one another. A bit more fooling about and you’ll discover all 4 distinct ways of putting it together.
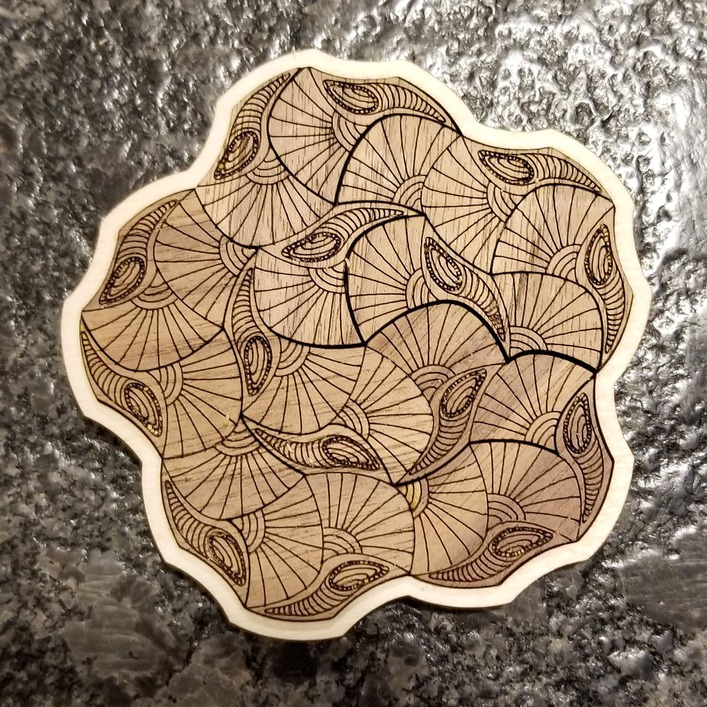
Here it is assembled in its frame.
And here is the .svg file.

Cutting Instructions
The design uses two types of material, 3mm for the board and the rim that keeps the pieces contained on the board and 5mm material for the pieces themselves. You’ll be making two copies of the puzzle. (The puzzle isn’t mirror symmetrical and both sides of the pieces need to be scored, so making two seems like to way to go.)
-
Start with the 3mm material. Load the svg into the GFUI, cut red and orange steps. Ignore the green an aqua. This will give you two boards and two rims. Glue the rims to the boards with CA glue.
-
Switch to the 5mm material for the pieces. Score the aqua (the shells) and cut the green and orange lines. Ignore the red step.
-
Note that the there is a small arrow scored just outside each of the puzzles. It points to where the distinctive, mustache-shaped piece needs to be to have the scoring line up when you do the second side.
-
Without moving the stock material pinned to the bed (you do pin material to the bed, right?), carefully remove one of the sets of puzzle pieces one by one. As you remove them, flip them over and keep them together so that you end up with an assembled, flipped-over puzzle. You can use the other puzzle as an assembly guide.
-
Turning to the remaining set of cut pieces, start by removing the mustache-shaped piece. Flip it over and place it in the hole left by the puzzle you removed. Make sure to line it up with the arrow. Remove the the other pieces one by one, flipping each one over as you remove it. Reassemble them as you go in the hole from which the first set was cut.
-
Move the first set of pieces into the hole vacated by the second set, making sure to orient it so that the arrow points to the mustache-shaped piece. You should end up with both holes filled with assembled pieces with their scored sides down and the arrows pointing at the mustache-shaped pieces.
-
Set the aqua lines to score. Ignore the other colors.