i have searched through the forum about making mylar stencils and really haven’t been able to grasp how to do it. i read something about silk screen, but that’s not what I’m looking for. just plan mylar stencils. there are no setting on the software for that anywhere. i also read somewhere that people use plywood. what do they mean by that? am i supposed to tape the mylar to that?
is there a tutorial for mylar and Glowforge?
what are the setting for the most recent software on apple computers?
Welcome @roscka. You could use the same techniques that folks use for cutting paper, using an engrave to vaporize the material or just use the cut since you don’t need the surface to be pristine.
Yes, you would need some type of flat substrate or base to fix the mylar too. Folks often use rare earth magnets, but sometimes that interferes with the electronics in the head and can cause errors.
Folks also use a cutting mat, like a Seklema mat.
You could also use a piece of cardboard for a base and get some low tack spray adhesive. Spray it only on the cardboard and not on the mylar. It should release well after cutting. I use Loctite multi purpose spray adhesive and just to a light coat.
Glowforge settings are computing platform agnostic, so they are the same for whatever material. Here is one post about settings.
I understand that you are new and there is probably so much to comprehend. Keep searching and reading.
I forgot to say, Welcome. As marmak3261 has stated, there are various ways to make stencils, but since you specifically want to use mylar, you should pay special attention to the “Mylar stencil cutout” post in Beyond the Manual that he links to above.
As for your question regarding Apple computers, the Glowforge doesn’t care what computer you use. You must design your stencil in a vector graphics program such as Illustrator or Inkscape using your computer or ipad. The settings for cutting or engraving are entered into the Glowforge interface not in your computer design software.
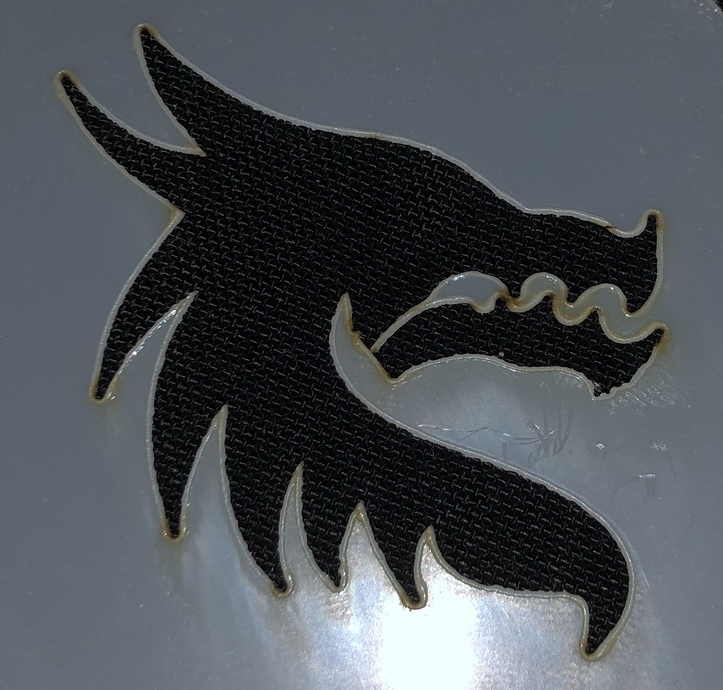
this looks horrible
i tried all of the setting above and this is what i got. burn marks and melting
material is 7.5 mil mylar
speed=500
precision power=55 #of passes=1
focus hight in inch=0.01
placed on plywood with spray mount
If your mylar was placed on plywood, the focus height would not be .01. I suggest you use the set focus tool. Also, the settings I have seen suggest full speed and power of 50 or 55.
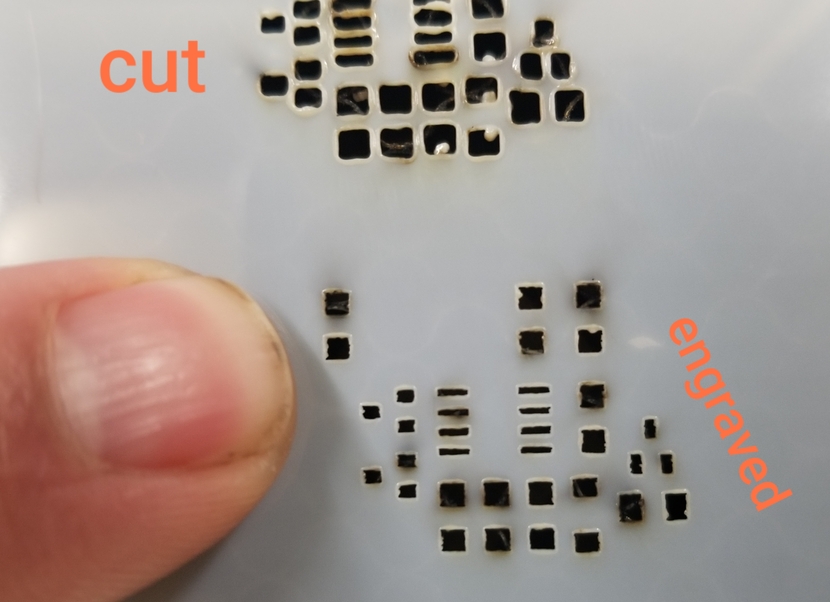
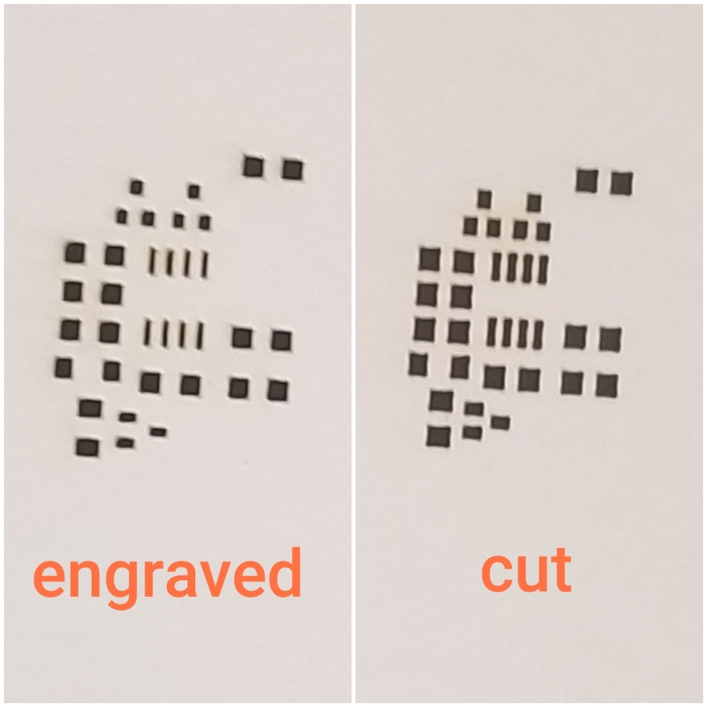
use engraving, not cutting. yes, it takes longer, but the quality is way higher. I’m making solder stencils with Mylar. I went thru lots of testing. engraving is far better.