Have a glow forge on order with expected ship in a week. Preparing for my first project and wanted to see if any of you have a suggested workflow.
Making a Halloween costume. Sort of a broken mirror man (covered head to tow in acrylic mirror cut to be shards) Pain in the you know what to cut with a blade (and my cameo barely put a dent) so viola excuse to get a glowforge
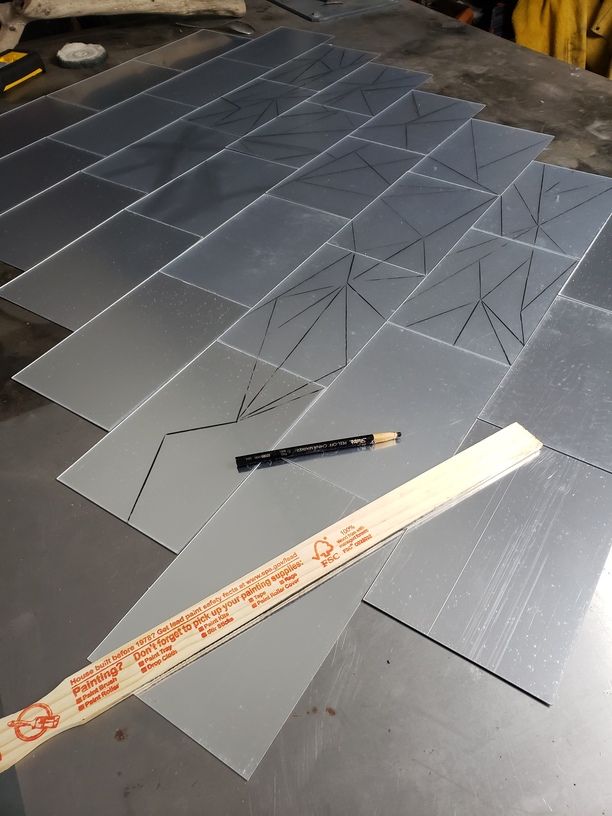
I have already laid out the design via grease pencil thinking I would be cutting via blade. Have access to 6x9 acrylic mirror sheets 1mm. What’s the best way to get to cut what I have laid out for the GF?
I know there is a camera to cut feature, but that seems from my reading to make cut lines both inside and outside the line. I am looking to just cut once through the line so as not to have a big gap. Don’t really want to redo the design in inkscape or whatever, especially since each piece lines up with the next so that seems onerous to lay out 30+ 6x9 aligning designs (though I have yet to use program so maybe there is an easy way)
Any help with the most efficient way to get from my design to cut from the glowforge masters here?
I think what I would do is create a single vector line in your vector drawing program of choice. Place your mirrored acrylic with the lines down under the camera, upload the line.svg file and move the line around to superimpose it over your cut lines marked in grease pencil. You can rotate and lengthen the line as needed to fit the requirement, and even copy/paste to make more cut lines if needed.
Oh, and what she ^ said about cutting upside down and masked.
You could align it from this photo with appropriate photoshop skills and importing into inkscape. Take the image and square it up with perspective tools and them import into inkscape for final vectorization.
Of course if it were me I would probably get a stepladder and take a top down photo from as far away as I could, it’ll save you a bunch of photo manipulation. Then import into inkscape, make a grid of acrylic sized rectangles, scale your image and draw over it on the tile outlines.
Done properly I suspect this would take no more than 10-15 mins once you have the pic in hand.
Trivial. Use my method but flip the photo before you start tracing. Gimp and Inkscape are all you need. Heck gimp is optional. Flip the imported image in Inkscape.
I think @cynd11 was suggesting using the gf ui for this. While that may work, I think using a photo in proper editing software will be much simpler and more precise.
I think I get what you are saying. Question once I have a giant photo that encompasses all the say 30 tiles, and I trace it out into one SVG in inkscape, how would I then get the GF to cut only the single tile I am now ready to cut?
I mean you’d make your tile rectangles to the correct scale, then draw your lines in it, group those. Then you can arrange them as you see fit and cut one or two at a time
(In fact make your interior cut lines black and exterior rectangle blue and you’ll be happy later, you’ll be able to set the cut order.)
That being said if you are cutting edge to edge you will have a plus and a minus. Plus: you can skip cutting the rectangle. Minus: you’re probably on the hook for jigging to get your alignment right. All depends on your precision needs.
You can cut three at a time in the machine, it won’t cut to the edges of the full 12x20 bed but 18x9 is perfect.
Lay out 3 at a time, slightly spaced (use a pencil), and take pics. Import to inkscape, trace each line, then flip the file before you save each file. Use the pencil again when you place them in the machine, so your file should line up perfectly over the three tiles.
Looks like plastic on those tiles, you’ll want to remove that before cutting.