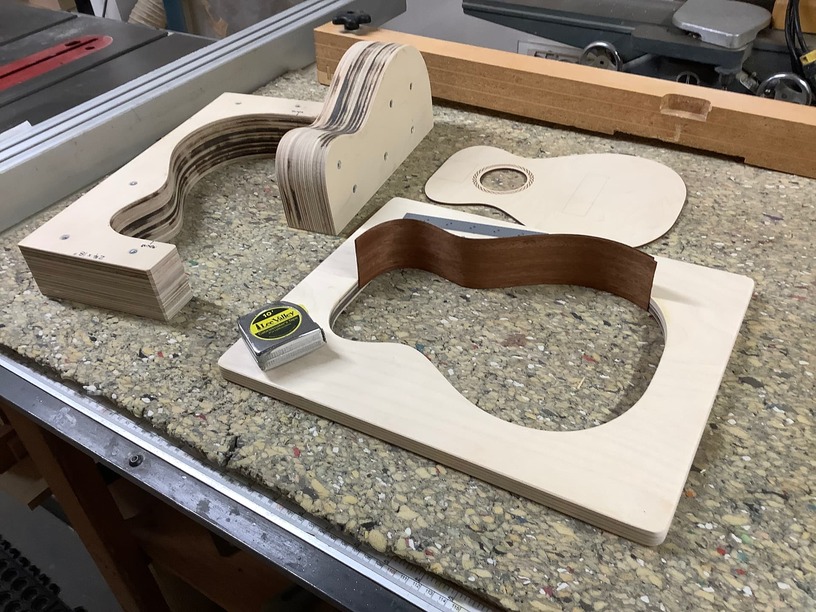
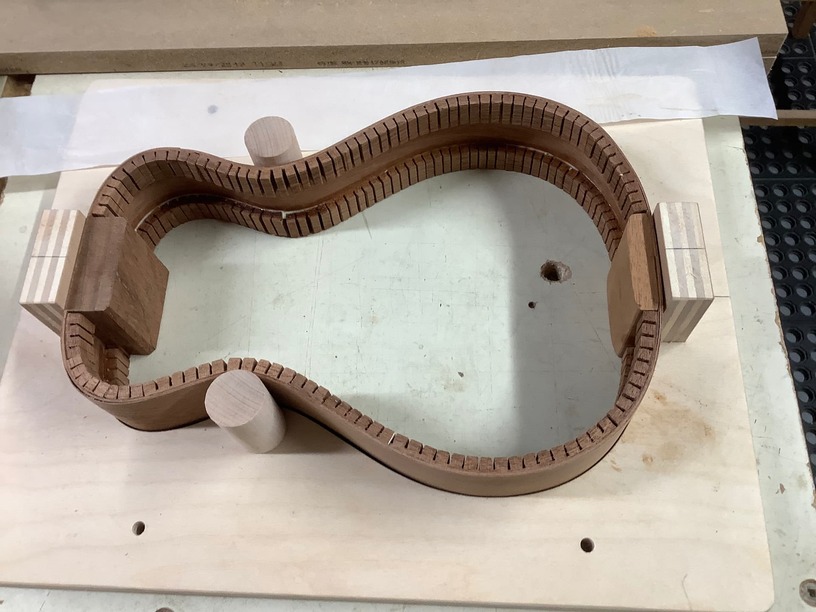
I have made a study of Ukulele construction. I made my first one with the help of a glowforge template. It sounds great and I enjoy playing it but I wanted to explore the world of bentwood instrument shapes. I took the plan for the instrument back and put a box around it to make a mold. The mold has many layers since the forge can only burn certain thicknesses. I used nice plywood and some plywood subfloor material. This was glued up and reinforced with screws. I have tested a double layer Mahogany side with success. The next step is to repeat the process with appropriate width and length. The second mold pictured is the form foe glue-up also made with the glowforge as a 5 layer guide. I will add a head and tail block attached to the mold to make glue-up better
Happy Cake Day. Thank you for sharing your experience as you build another ukulele.
It’s always fun to see these bigger projects!
Happy cake day!!
Happy Cake Day!I would love to try this. Thank you for sharing
Sorry I missed your cake day. Happy belated cake day.
None the less, perhaps it’s the early hour. But it took me a while to understand that concert was in the title of your post. My brain read concrete for some reason and I was trying to figure out how that would make a good body ![]()
Cool use of your ![]() well done!
well done!
I love making tools to make other things!
Happy cake day! Someday I hope to make a ukulele. ![]()
This is incredible.
Do you wet the veneer to shape it inside the mold?
This is awesome! Happy Cake Day!!
On my first trial I just coated the veneer with PVA glue and parchment paper on the inside and outside and clamped. The piece is still holding its shape quite nicely. I think that 100% glue bond between layers is essential.
Have you considered steaming the pieces and then quick slapping them in the form? I saw a demo at rockler, and this is ideal for that.
I am using 2 layers of veneer and I think that this method will work. If I was using one layer I would use a steam box or a water immersion technique.
Garnet Dobsky
That’s so cool!
did you cut all the layers on your glowforge?
If so I’d have been firing up my router and using the GF produced first layer as a pattern. mostly because I like to use more toys when I get a chance. LOL
very slick. looking forward to seeing the results.
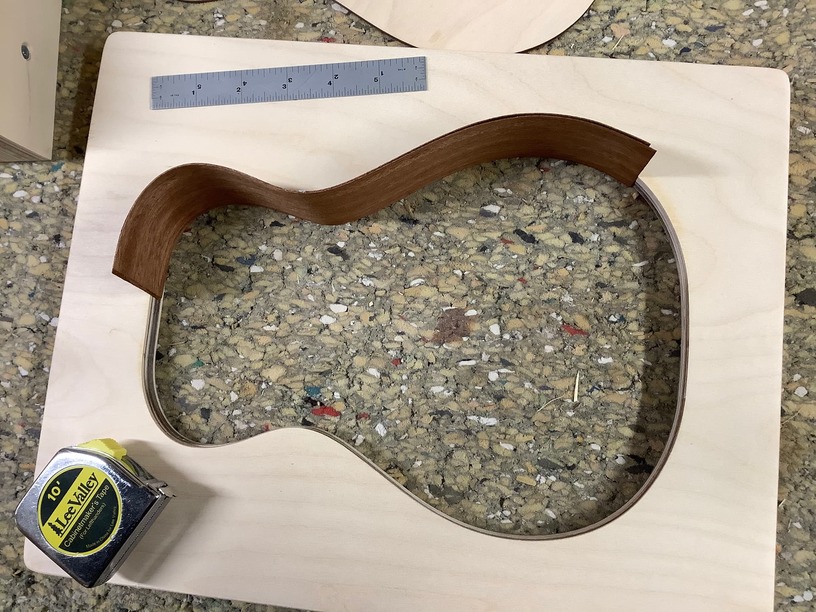
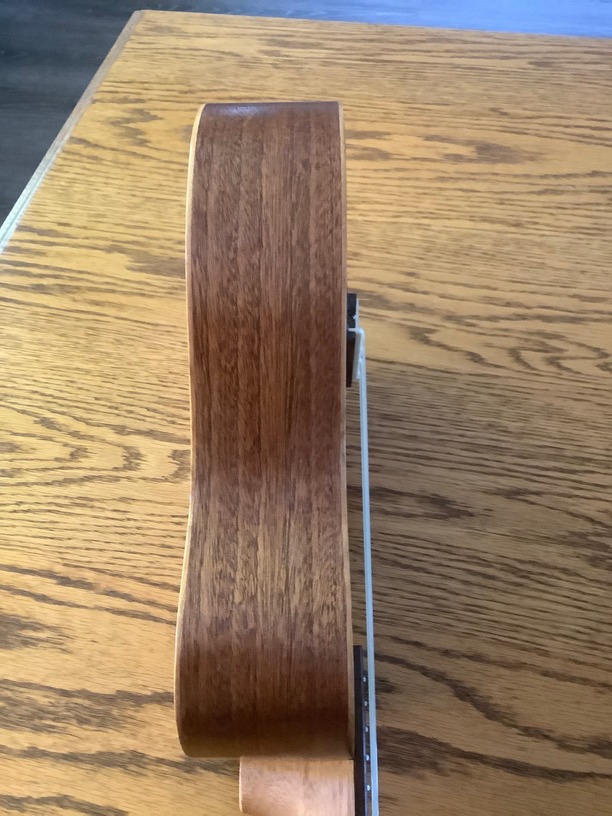
I did cut all layers on the forge. The next time I would cut a couple of dowel holes in the form and use it for glue up. I just finished three layers of mahogany for the sides and it is holding its form quite well. I will glue the tail block and head block on next.
looking forward to seeing the final product!
Very cool! I have never heard of molds used like this. My son is an avid uke player- I bought him a tenor as I felt it went better with his baritone.
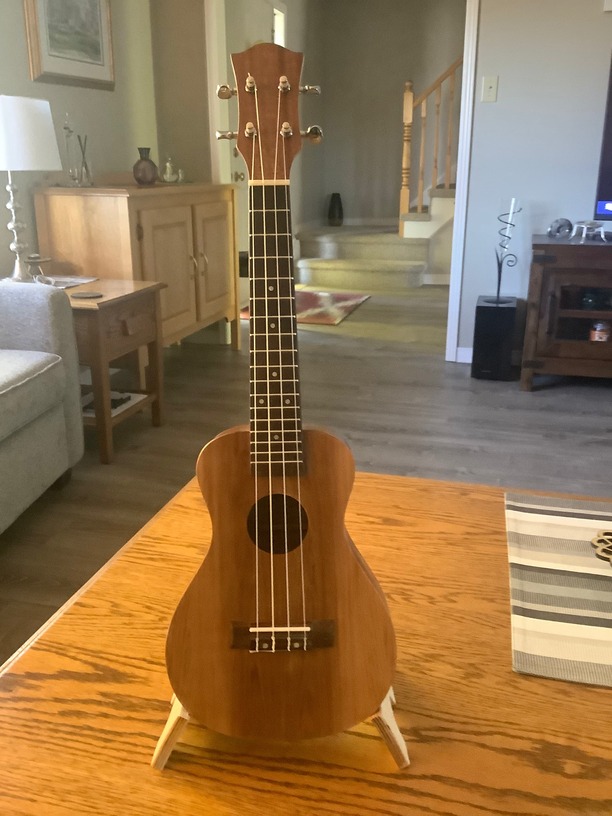
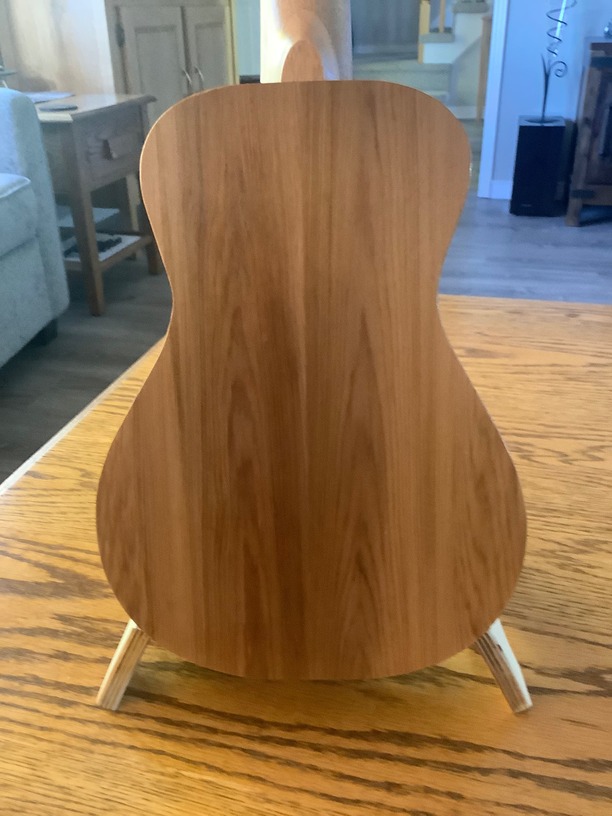
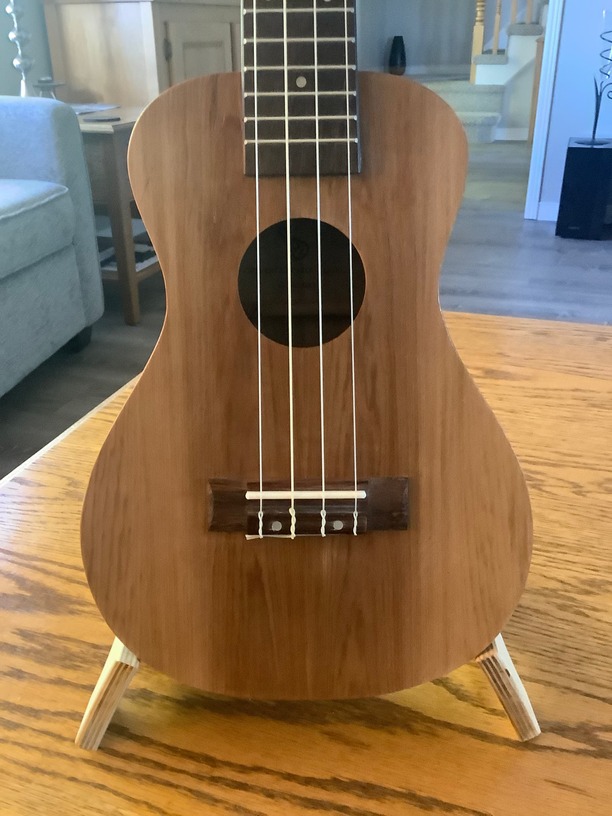
Many people have asked for a peek at the finished product. This Ukulele was not made on the glowforge. Rather it was made with molds and forms that were made with my glowforge. It is very much lighter than my first ukulele which was made with laser cut pieces. The Western Red Cedar top and back turned out very nice considering these boards were salvaged from a set of exterior steps that were replaced with new pressure treated lumber. It sounds amazing. I can feel the vibrations of the ukulele as I play. The sides were made from three layers of mahogany veneer glued up in the mold and all interior support pieces were made from mahogany and red cedar top waste pieces.
So now you need to post a video of yourself playing it so we can enjoy the sound too!
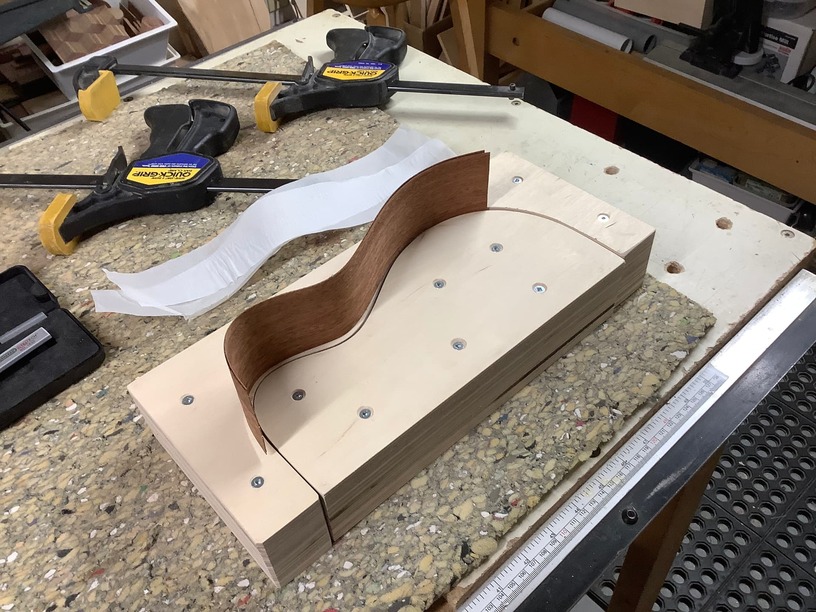
I have changed to using three layers of the Mahogany Veneer. TightBond 3 waterproof glue. Side pieces are over width to allow for sand ing to final width. Have had great results thus far.