Practical Project: Lighted Polishing Station

My husband needed a better way to polish jewelry with his Foredom tool besides using a cut-off 2 liter soda bottle. The issue is that the bits thrown off by the spinning tool get in the air and in his lungs. You can buy commercial enclosures for this but they can be bulky and expensive. We sat down with his list of requirements and came up with a 10" x 10" box with a removable acrylic lid, rubber curtains to contain particles, and lights inside. I just finished it and am pretty proud of how it turned out:

The battery box screwed to the side powers the LED strips along the top edge:

And here it is in action:

I pre-cut circles on one side so we can later add either a shop vac (1.5" access) or dust collector (3" access). Meanwhile they are just taped closed.

The cool thing is it’s all self contained and doesn’t require access to power; he can just set it on the floor (the only clear space in that room!) and out of his way when not using.

51 Likes

Genius! Love the built in lighting and the rubber strips! :grinning:
(And that would sure beat goggles and a mask.)

3 Likes

Okay, color me impressed.

2 Likes

Maybe relevant:

If you decide to upgrade to total particle containment, toilet flanges and cleaning gloves are what you need to make a glovebox on the cheap.

(This is my glovebox used for abrasive glass etching.)

19 Likes

What a great :glowforge: solution! The rubber curtains are a fantastic!

2 Likes

That link takes me to a picture of a cat sitting on a cable box. Is that what you meant to link?

1 Like

Wow! Excellent work!

1 Like

Whoa, I guess the imgur link expired? I’ll fix it.

I like your glove box! If you would like to do a tutorial I’d love to see it.

I’ve misplaced most of the pictures and part numbers but I will let you know what I can.

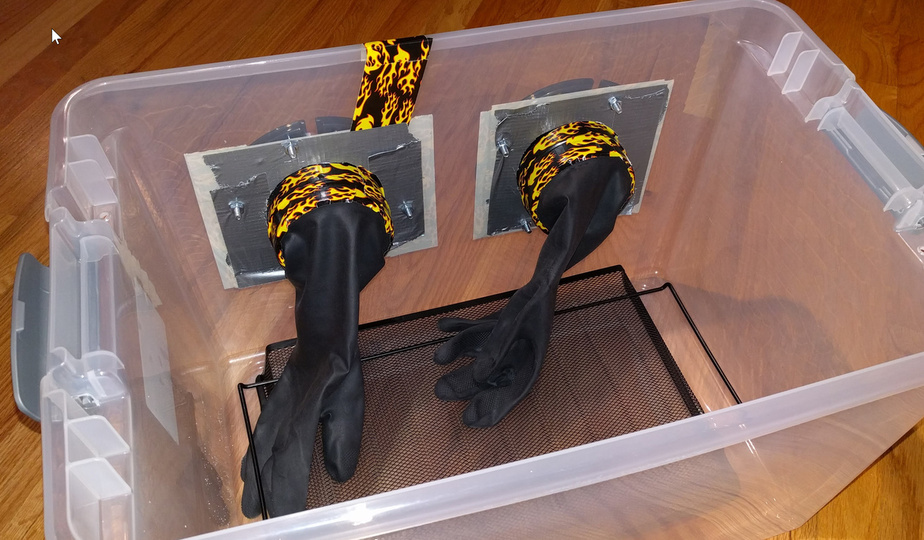
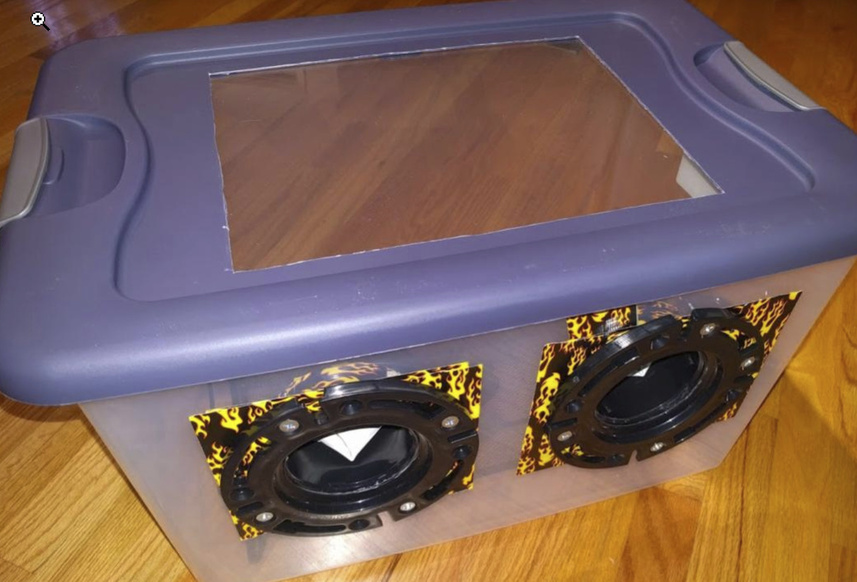
Mainly you need a big plastic tote box, or some other container which is big enough for your hands, tools, and work item. You then cut holes for two 4" PVC “toilet flanges,” which provides an inner lip. Mark the holes and drill for the matching nuts and bolts, which you figured out while you were at the hardware store. The exact dimensions don’t really matter as long as it holds together. You can see my bolts are too long, but it doesn’t hurt anything.

Stretch the cuff of your rubber cleaning gloves over the lip. I secured mine with duct tape–for abrasive etching, I don’t want ANYTHING escaping!

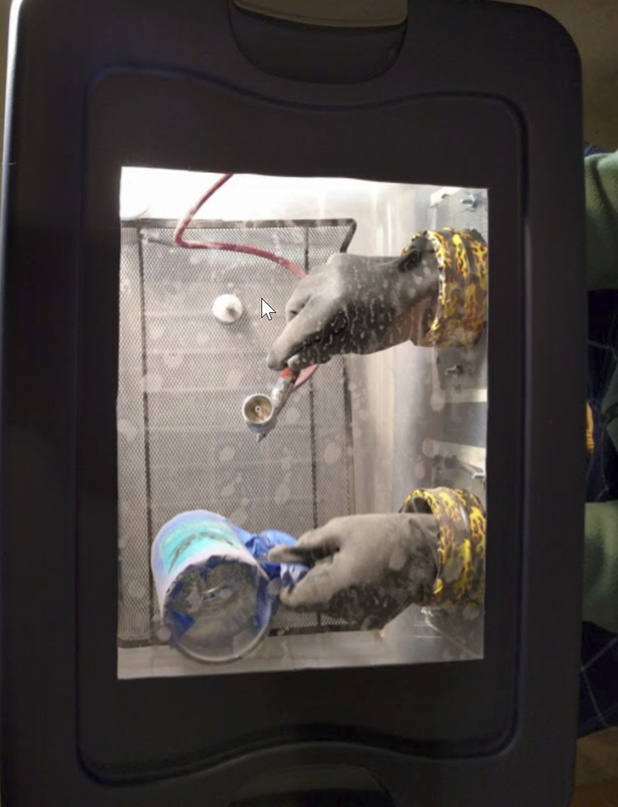
Because I am using abrasive and the bottom of the box will quickly get covered, I needed a raised platform which I could set the work piece upon, but which would also let the abrasive dust fall through. I found a cheap wire mesh tray at an office supply store.

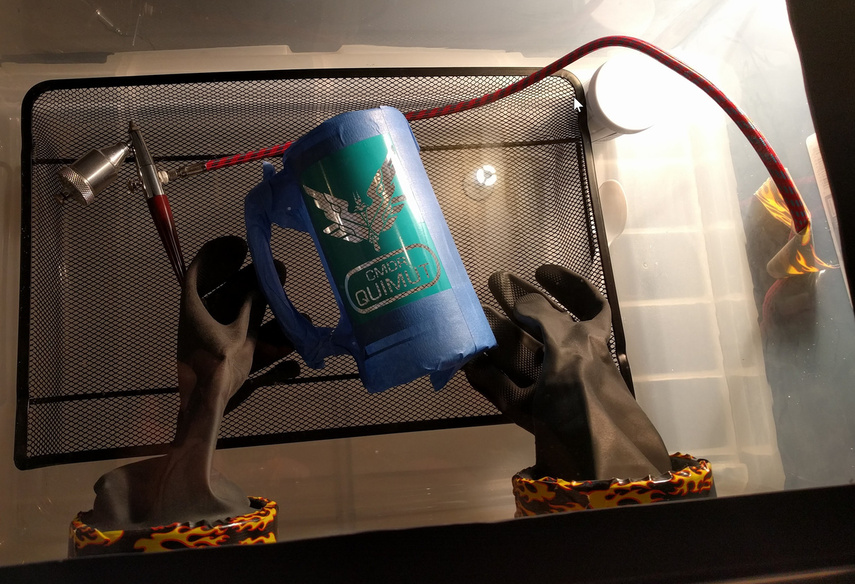
I don’t have good pictures of the lid construction, but I just got a piece of acrylic or lexan at the hardware store for a window. I cut a hole about 1" smaller than the material and used silicone goop to glue it down.

Here’s a different image of the interior before it got filthy.

The project was very easy EXCEPT the milky plastic crate is easy to crack when you cut it. That is why there is a lot of extra duct tape in use! I used a Dremel tool and a utility knife to cut out the 4" holes, and if I pressed too hard with the knife the plastic would flex and it might crack. It would have been easy if I had a hole saw and backed the plastic with sacrificial wood, but… I didn’t have the right things on hand, so I just did it sloppy.

No lighting, as you can see I just aim a shop light through the side. Works OK.

If I wanted to make something fancy and sturdy, I’d make or buy a wooden box, but for my occasional use the plastic is holding up OK. I’d like one of these but I spent about $30, not $200. If I had to use it all day, though…
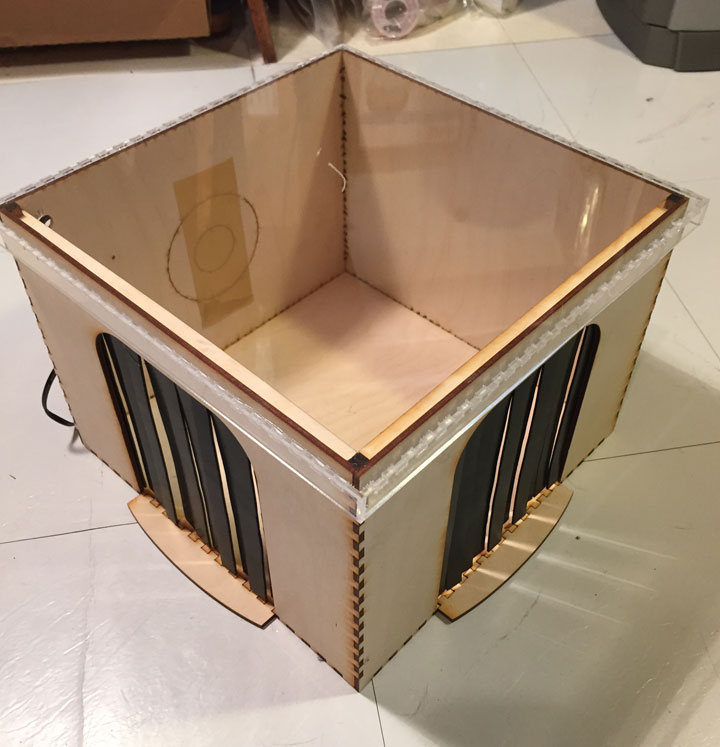
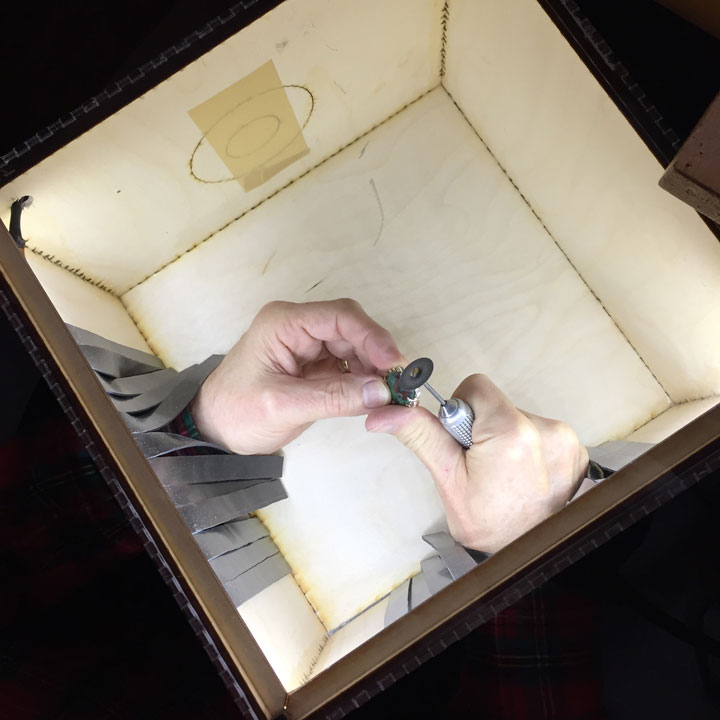
11 Likes

Thank you! I might build one someday.

Nice job! I made mine out of a PetsMart acrylic fishtank they were throwing out. What air eraser are you using? One of these days I’ll have to use the Lasermask to try a detailed sandblast - since you have to apply mask- then laser-then sandblast, the :glowforge: won’t do glasses or any round objects, but can do flat (plates, frame glass, etc) How di that beer mug come out?

1 Like

very cool project, I want to make something similar for sanding too!

1 Like

So cool! This is a great solution!

1 Like

What can be next in this game of one-upsmanship but a full biosafety level 4 containment suit made from laser-cut leather.

8 Likes

I have the Paasche air eraser. I’m using it with an airbrush compressor and it’s fine for small projects and simple masks. (I make the masks with Oracal sign vinyl and my vinyl cutter.)

I also tried some fancy photosensitive resist that lets you etch halftones and other fine details, but the Paasche doesn’t work well with that stuff… you need more blast power. It is a MAJOR gear upgrade.

Looking forward to trying the laserable mask too. If there was a way to do round items in our GFs I would have bought some of it on day 1! Etched mugs are great gifts, wish there was a way to make doing the masks easier with the GF…

I found another imgur link with a pic of the finished mug and more pics of the blast box and mug process.

(Dunno why it chooses this image as the preview, it isn’t first in the album)

Sorry to hijack the OP!

1 Like

Look great!

Add another layer of rubber with the strips overlapping the first set and you will get slightly better containment. It will help to keep the particles from slipping out between the strips when your hands are placed through the curtains.

1 Like

Awesome solution down to the curtains and lighting. Great team project, too!