Wanted to post before bed. Early sleep tonight lol. Until tomorrow…
They’re all big now!
Bioshock: 7x10" - 3hrs
Stranger Things: 6x8" - 2.5hrs
Both on proofgrade maple ply - default dark
Wanted to post before bed. Early sleep tonight lol. Until tomorrow…
They’re all big now!
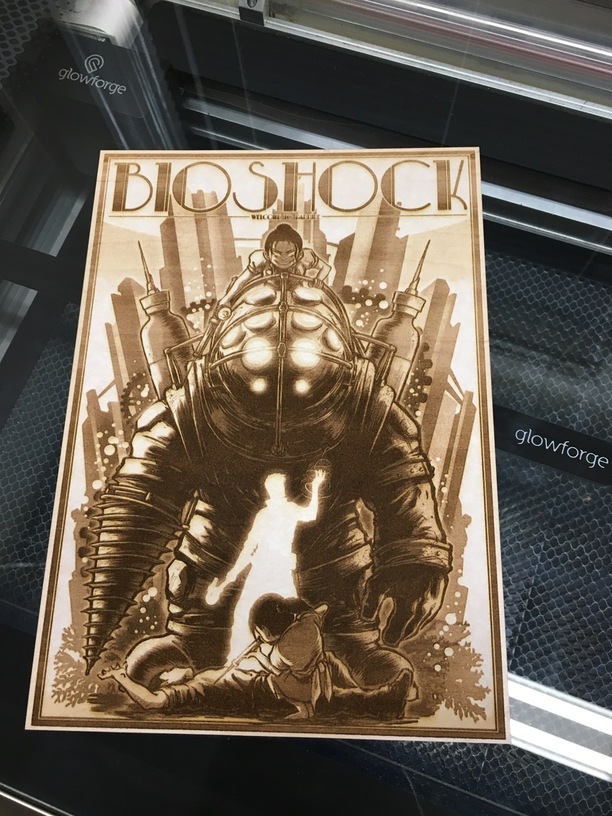
Bioshock: 7x10" - 3hrs
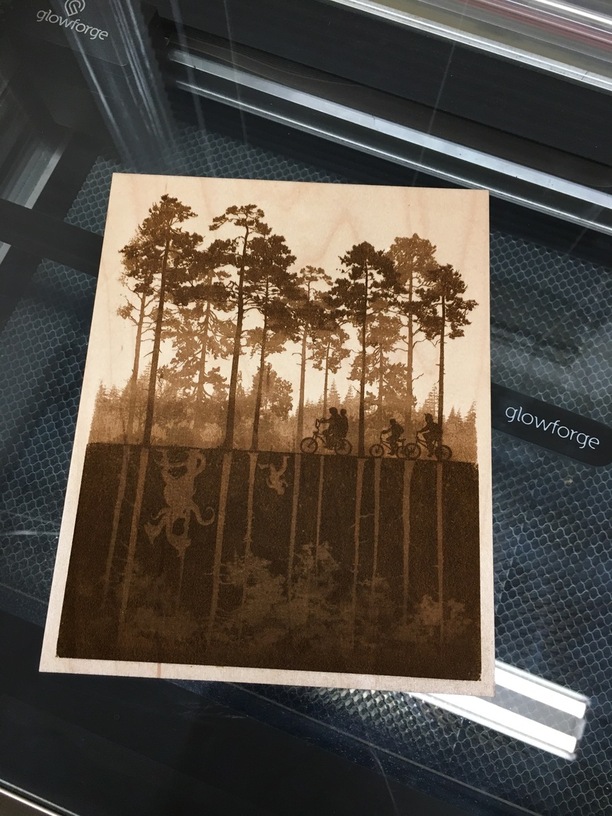
Stranger Things: 6x8" - 2.5hrs
Both on proofgrade maple ply - default dark
That Stranger Things is awesome.
Thank you! I love it! The bioshock is a present, but the stranger things is for me!
Those engraves are absolutely amazing! Exceptional!!
Gorgeous work!
I love how much cleaner the Bioshock one looks full sized. Can’t wait to get my hands on a laser!
Gorgeous!!! Any weeding issues on these (or the little siblings?)
Simply amazing quality!
Just beautiful. I love it how you can’t even see the horizontal marks!
Wow! Any temperature timeouts?
None!
However there was a little tube fatigue at the end (its a unit issue)… It only shows in the darkest print sections though, which is why both of these prints were oriented so that the darkest section prints first. The letters at the top should be black like the rest, but its not a huge deal here. Kinda goes with the art deco style. Overall im super happy with the way these came out and the person thats getting this for their birthday is gonna go crazy. They had a bioshock wedding… so theyre big fans
I am so impressed by the quality of the engrave on wood. Thank you @takitus for your generous sharing of your projects. 
 - Rich
Those are seriously cool. Are they dithered? Or did you have to do much to the original files to get good results? The definition between light and dark is awesome.
The borders look great! Did you have to cut the board afterwards to make the borders equal or was the positioning spot on?
I do them all in one operation. Thats the only way to accomplish it at this point.
I actually wanted to go back and engrave a birthday message on there, but I wasnt going to risk it lol.
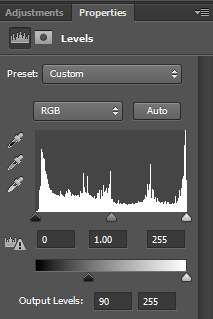
To get it to engrave well I have to set my levels a little differently. I just bump the output level minimum to 100 so that instead of the darkest color being 0,0,0 its now 100,100,100 and it scales up from there. That allows me to get a clean engrave on this particular unit. I dont think this will be necessary in production units though.
(its 90 here, but ive been using 100)
Other than that, I have to bring the image into illustrator, add a new layer, and draw a box around the outside of the image to make a cut line for it. Thats about it. Save as SVG, drop into glowforge, position, print.
Im going to write up a post about the process sometime soon, with a few more steps to include weird shape engraves with outlines.
So amazing! Thanks for sharing! I seriously can not wait to get my hands on the Glowforge!
I love the trees!
WHOA! 
That should be a popular write-up. All of this pre-release engraving work has me a lot more interested in the application than I thought I’d be.