Each side is made out of 3 layers of 1/8" acrylic ( Medium Clear Acrylic). The center layer has a tab that sticks up. When the sides are bonded together using acrylic solvent, this technique allows one to create a mortise and tenon joint. I learned about this technique in a Youtube video that was posted here (it is one of the Fusion 360 tutorial videos).
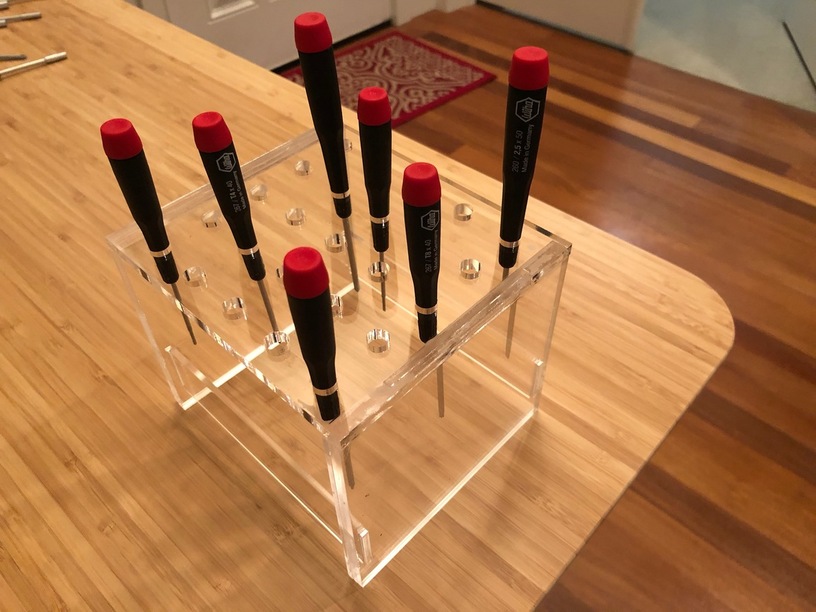
The top is made of 1/4" acrylic ( Thick Clear Acrylic). It has a slot (mortise) in each side to receive the tab (tenon) from a side. The holes are sized to accommodate the Wiha precision screwdrivers. You may want to tweak the hole size(s) for your needs.
In the front and back are a strut with tabs that fit into slots in the sides. These are there to add rigidity.
I assembled the pieces and held it all together with large rubber bands while I used some acrylic solvent to bond everything together. This was my first time using acrylic solvent, so I ruined the pretty looks a bit. However, it appears to be quite strong and completely functional.
The attached zip file has my Illustrator source, SVG, PDF, and PNG files. If you try and use the SVG in Inkscape, be sure to compensate for the 1.333 ratio mismatch that happens when you import Illustrator created SVG files into Inkscape. Both PDF and SVG should work fine, without scaling issues, in the GFUI.
It works because the body if the Wiha fits down in the hole and the 1/4" acrylic is thick enough to keep it aligned vertically. For a more generic design that will work with a larger spectrum of screwdrivers, you might want to add a second horizontal piece of acrylic, below the top one.
Also, it might be interesting to experiment with 3D engraving to see if you could use it to chamfer the holes.
The rubber bands are a good idea. I have used masking tape to hold an assembly together for fusing. On a right angle I set the pieces slightly obtuse and tape them. The movement to pull them into a right angle tightens the tape and ensures a sung fit.
I found using a syringe gave me more control over applying the solvent than a squeeze bottle. I carefully watch the capillary action flood the joint to prevent over filling it and having it bleed out and follow the tape (or rubber bands).
The other thing is a saw cut is 90 degrees, a laser cut is not - so a saw cut edge gives better contact along a cross section of the material. Also a saw cut has the texture of the ridges of the saw teeth, they ‘stand off’ the surface giving the solvent a better path to flood the joint. The solvent melts that texture and gives a strong solid joint.
Very good organization for your tools there, and I agree the clear gives nice visibility. Thanks for sharing that!
Thanks for outlining your process and findings. This is a great way to store your screwdrivers. Now you just have to remember to put them back in the holder when you’re done.
Much of the value of this forum for me is being embarrassed by other people’s amazing work into getting off my couch and actually doing something.
I keep mine (same ones) in their original plastic envelope thing. But they’re in a cabinet with a lot of other similar things, piled in layers. My plan is to build some sort of multi-level spice rack arrangement.