Any idea why my printable area seems to be offset from the machine? Seems to be about 2 inches down and to the right from what would be center on the cutting surface.
How thick is the item you have on the bed, and did you use the set focus tool?
In addition to @dklgood’s questions, have you run the Calibration Tool?
In order you need to run the calibration so the machine knows how to correct for the camera fisheye effect. Then on every print where you don’t put material thickness settings in, you’ll want to do a “set focus” dropping the indicator where you’re looking to place the design. Then move the design where you want it to go.
Okay… I will try that… It also just conveniently didn’t print the last section at all. I haven’t used this in a while and this is not giving me a lot of hope after ruining the first thing I tried to print.
If you haven’t used your Glowforge in a while, you may not know about the set focus tool. Using the camera for artwork placement is pretty accurate for many of us, but only if the focus is correct. Maybe read this from Glowforge: https://support.glowforge.com/hc/en-us/articles/360033633714-Alignment
Yeah, it ran the set focus when I initially turned it on and it calibrated. I think you were right about the thickness. That still doesn’t account for why it stopped printing before it was finished or cut of the last vector object even though it printed the text which was in the same vector. SHM.
I just rant the bed refresh and the set focus and I am going to try and add the missing piece. I guess we will find out how close this is to being true to the camera image.
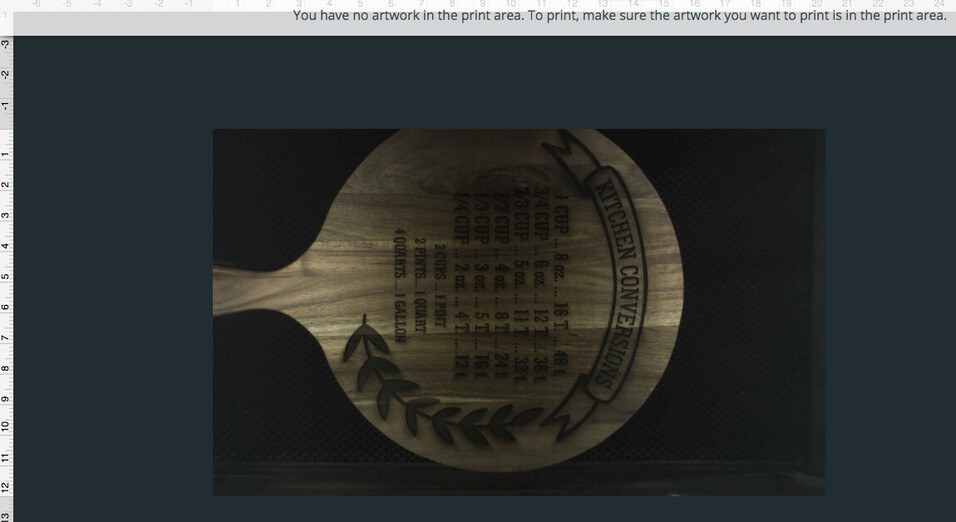
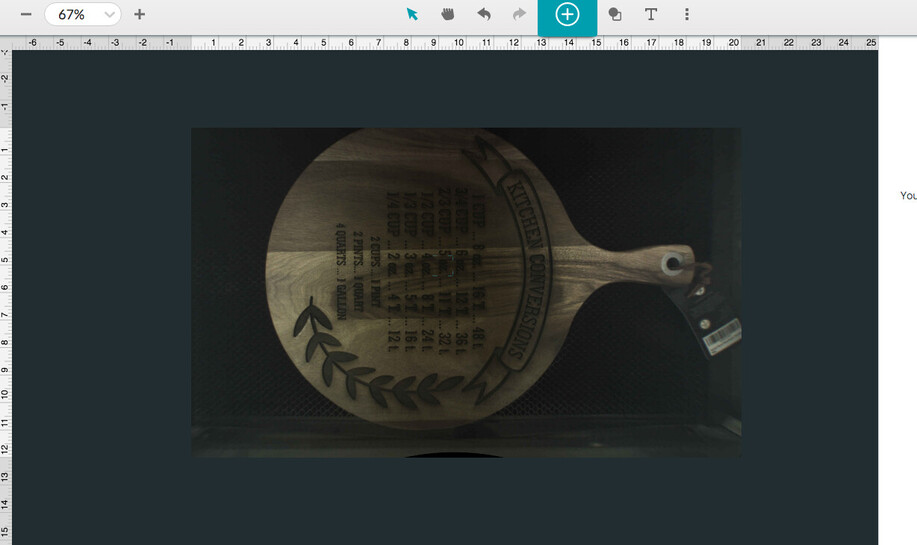
…and judging from where it just started… it isn’t very close at all. Not awesome. I guess this one will be a cutting board for the rental property rather than a gift… lol.
If you haven’t run the calibration tool, all bets are off in terms of alignment. That’s different than the calibration sequence it goes through (to find its position) when you turn it on. It will print out a sheet of GF logos in a defined pattern that the software can then use to adjust the camera so the set focus command will work.
1 Like
I have run the calibration tool before. How often do I need to do that?
Maybe you could sand/plane it down, add a layer of veneer to each side (must be both) trim/sand veneer edges to the body and re-engrave. Makes it look like a “”feature” instead of a boo-boo.
1 Like
Arghhhh…
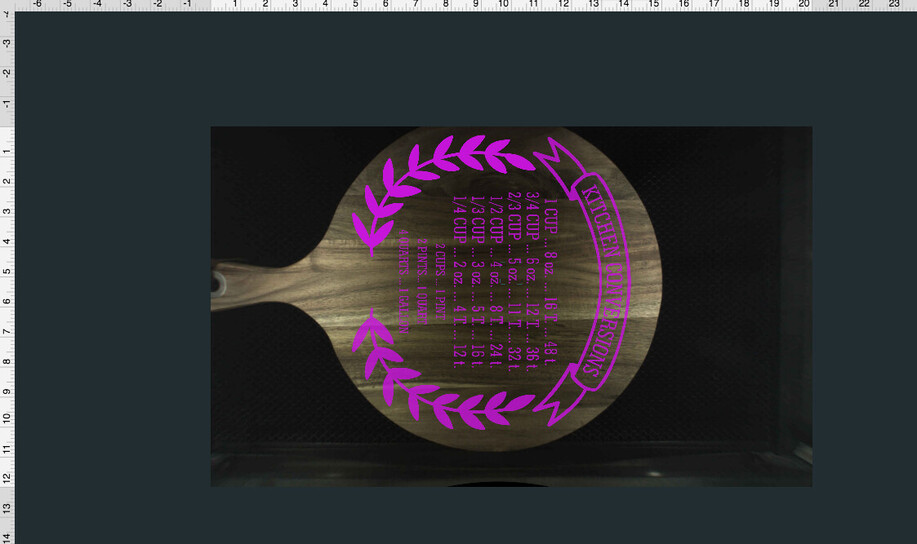
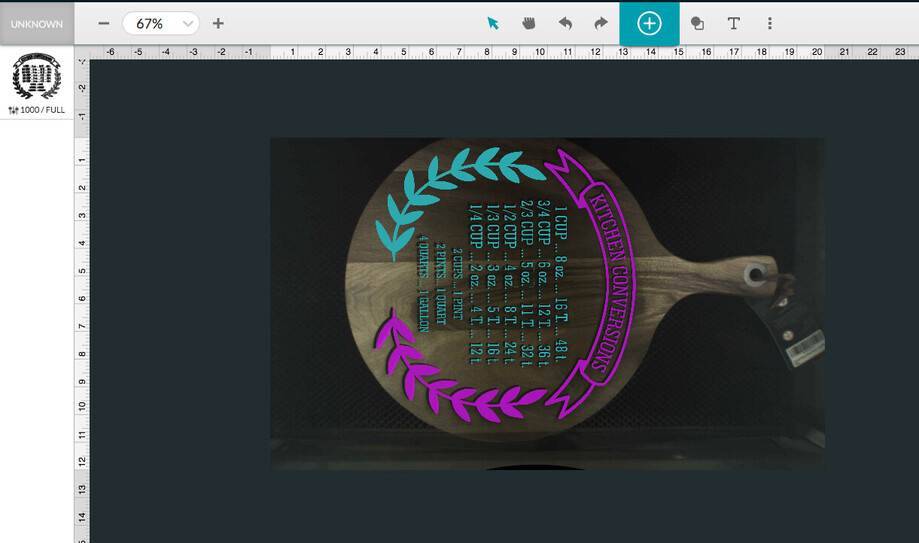
I erased, and reimported the image. Lined everything up again and it skipped that part of the design again, despite showing it during my print. Is there a way to know that it is going to skip it? Is there some way to know why it is leaving this section out?
It shows in the actual print count down but then never engraves it. Aggravating for sure. It isn’t alignment issue, it is just refusing to engrave a whole section of the design.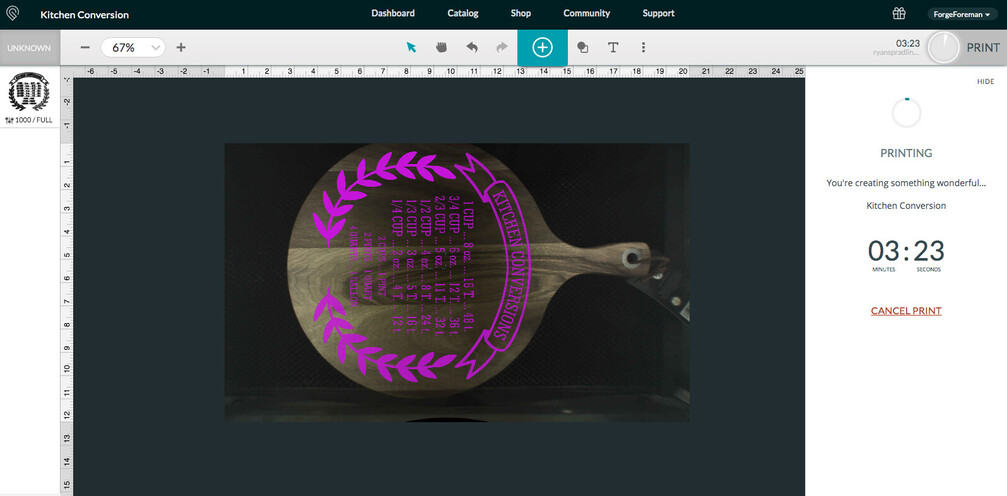
Do you have all the parts set to engrave or could that one part be set to ignore? I got nothin’.
Generally you may want to recalibrate anytime you move the machine, the case has some flex in it.
For your missing artwork - double check in your design program that you don’t have two copies of the missing laurel leaves on top of each other. Overlapping vectors cancel each other out in the GF.
4 Likes
Is there any chance that the part not engraving is duplicated. Would you share the file for someone to check and see if the problem can be repeated?
2 Likes
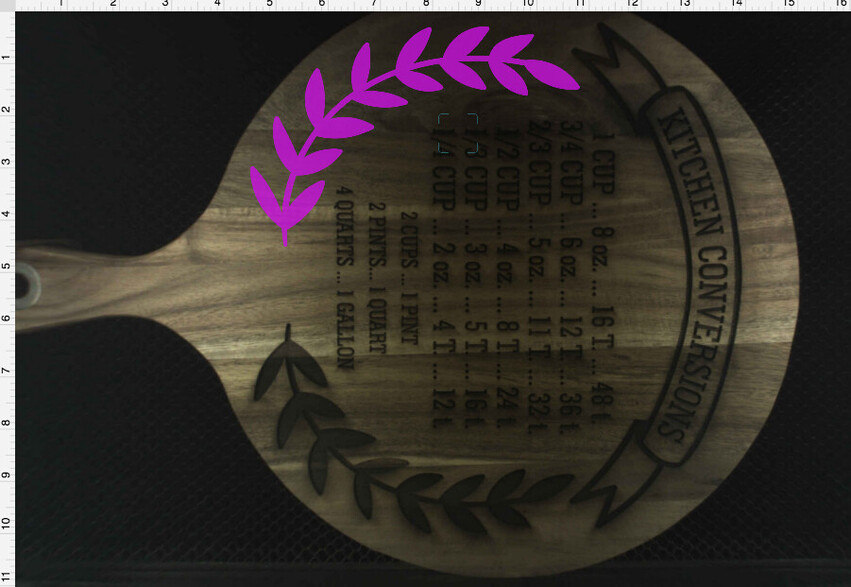
If when everything is set up and called out, and you have everything unselected, then those parts that will engrave will be colored red or pink and what will not engrave will be gray.
The reason for this is if even a tiny bit of that part is “over-the-line” the entire part will not engrave. Before it would not light up at all, even if selected, but as dark gray against black it was hard to see. So the changed it so everything lights up when selected but when not selected only the parts that will be processed are colored.
I think if you moved both sets of leaves just a bit toward the center until both were lit up as a color when not selected, then it would do the whole thing. You could also take the messed up one and using the leaves just print an outline at max speed and minimum power to see where it will land and take a ruler to it to see exactly how far it is off.
Then using the precision tool in the lower left corner, record the numbers, and then move the design the measured distance in the opposite direction. Then you could replace the good blank exactly where the old one was and the cut will be where it needs to be even if it looks off on the screen.
2 Likes
Just read this today, about having 2 vectors stacked canceling an engrave, maybe this is your problem? I’ve never read about this issues anywhere before, maybe this thread can help?
Engraving A Mirror - Beyond the Manual - Glowforge Owners Forum
1 Like
I thought they changed that for a fix?