Having been spoiled by the remarkable output quality and ease of weeding on the draftboard and acrylic, I tried engraving and cutting some of the Medium leather that came in my sample kit.
The adhesive is way too strong.
I tried everything I could thing of to weed: Fingernail, x-acto, gorilla tape, heat (both with gorilla tape and by hand), soaking in water. Nothing really worked, and the combination of heat and gorilla tape actually made the masking paper fail, with half of the paper coming off with the tape, and half of it staying on the adhesive on the leather.
It seems like the heat from the laser just welds the mask to the leather.
My workaround was to peel off the mask and then lay it back down, only pressing very gently. You do need to make sure there aren’t any bubbles, as I got burn marks under one bubble I left behind, but if it’s laid down smoothly, it engraves beautifully, and gorilla tape works perfectly to weed even fine detail.
Good to know, I’d hate to waste a whole piece of PG leather to a masking issue. Thanks for the heads up!!
My very limited experience with  leather was not very good. Masking was definitely a major part of that. (The other part is my lack of leather understanding.)
My experience with the leather masking: For some things Gorilla tape does work. What has worked the best for me is getting it started and peeling what I could. This usually left an edge I could rub my thumb across. By pulling my thumb across it away from the clean area, I could peel the rest of the masking and the adhesive. It is a slower process than most weeding, but it does all come off.
I do agree that the masking on the leather appears WAY too strong, but it can be removed.
If you are trying photo engraves, you really don’t want to remove the masking. The results are qay too dark.
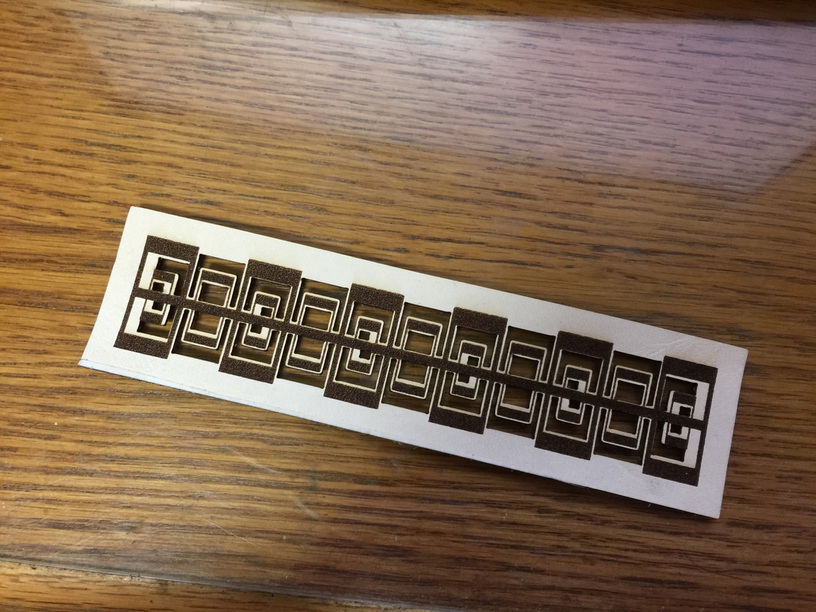
This was all line art, but the remaining masking was way too small to get at. (areas inside 18pt type, etc)
I have a general sense that the engrave and score settings are too much for the material, but I haven’t done any test strips yet.
Line art, I would probably peel the masking first, though it is still strongly adhesive.
I like the stickiness of the adhesive on the masking. I’ve just got a slightly different way of dealing with it when I work on leather. (Which I’ve been readdressing recently.)
If I’m engraving it, I peel off a section of the mask where the engraving is going to go and engrave without masking.
I save the cutting of the leather for last… and I put the mask back on before I cut it.
This addresses all the issues, no goo in the engrave, the engraving doesn’t stain much, but the cutting does…this keeps your nice clean leather from getting stained during the cut. And the extra stickiness of the masking makes it easy to re-use, so it doesn’t come up on you.
Obviously you want to anchor the leather down on the tray with either tape or magnets to keep it from moving while you are putting the mask back on - but the results are excellent:
You can see a faint discoloration from the engrave in the shadow on the photo, but it’s not apparent at all in real life.
So anyway that works pretty well. ![]()
I do want to mention to Support that I get a much better Engraving result on leather (of any kind) by using only about 1% to 2% power with maximum speed and no masking. There’s less charring and smearing. It tattoos the smooth skin of the leather extremely well without cutting so deeply into it, where the texture changes. (Might be just this PRU, but the defaults are burning halfway through the leather on this one, even with the masking on.)
I think for my next leather attempt I’ll remove the factory mask and simply apply plain old masking tape. It works on everything else I’ve ever used and would likely be a lot less sticky on the leather. Dunno.
I can’t imagine engraving with stock settings without masking at stock power, but Engrave and Score are both cutting deeply through the leather, as you mentioned. I did get scorch marks around the engrave where I’d left a bubble in the mask.
Also, this is the first time I’ve seen engraving through the Proofgrade sticker make a difference, and it’s quite noticeable.
Time to run some power/speed tests. 
I ran quite a few…for engraving, the amount of power had absolutely no effect other than char…about 1% or 2% works incredibly well if that masking is removed. (Oh, I think I forgot to mention that up top  ). All of that extra power is needed to burn through the masking and adhesive and it’s messy.
High speeds and low power without mask give a great result. If you want it black instead of brown, just run a second pass at the same settings.
Those are really clever! (And they turned out perfectly…doesn’t look like any of the masking got smeary.)
I made a real mess of the first shot at something I’m working on - that might be this PRU though - we’ve got a little bit less control than the Production units in some cases.
I’d keep those. 
I will share some photo engraves later on with default settings. I think you will find some of them improved over the PRU.
Thanks!
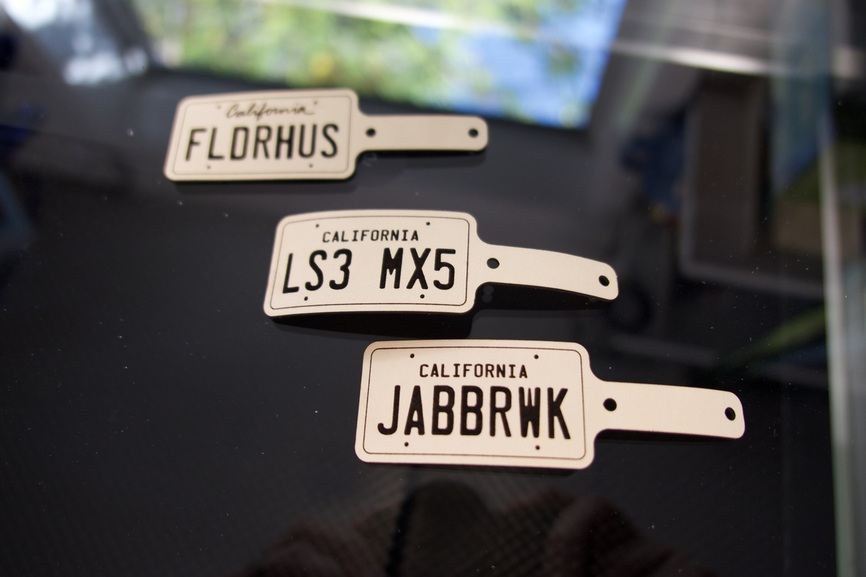
This was the third attempt. Default settings, but with the peeled-and-restuck masking. I didn’t keep the one with the scorching where the bubble was. Gorilla tape weeded these perfectly.
A few leather engraves from photos. For all of these, ![]() leather was used with proofgrade settings.
leather was used with proofgrade settings.
Masked: Source image lightened too much, masking stopped too much detail.

Masked: Unmodified from original, much smaller engrave.
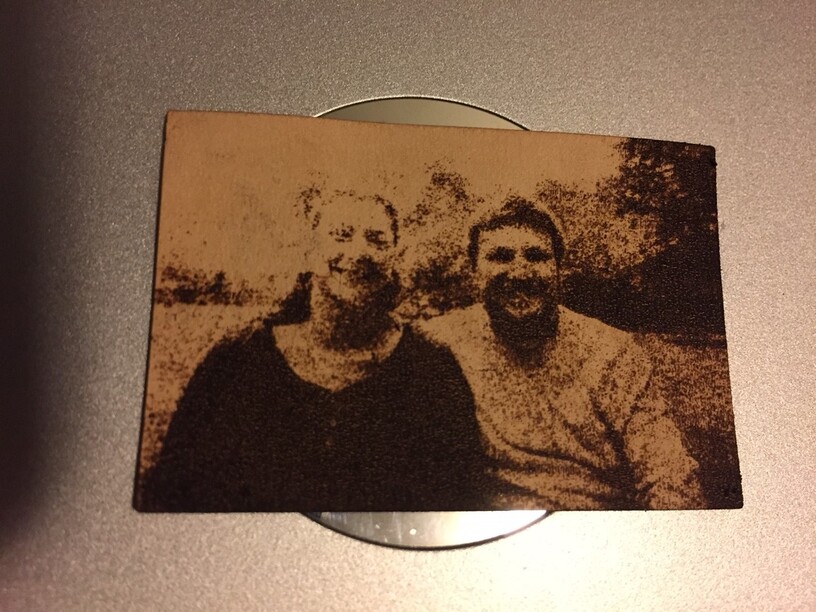
Unmasked: Identical source and settings to second.
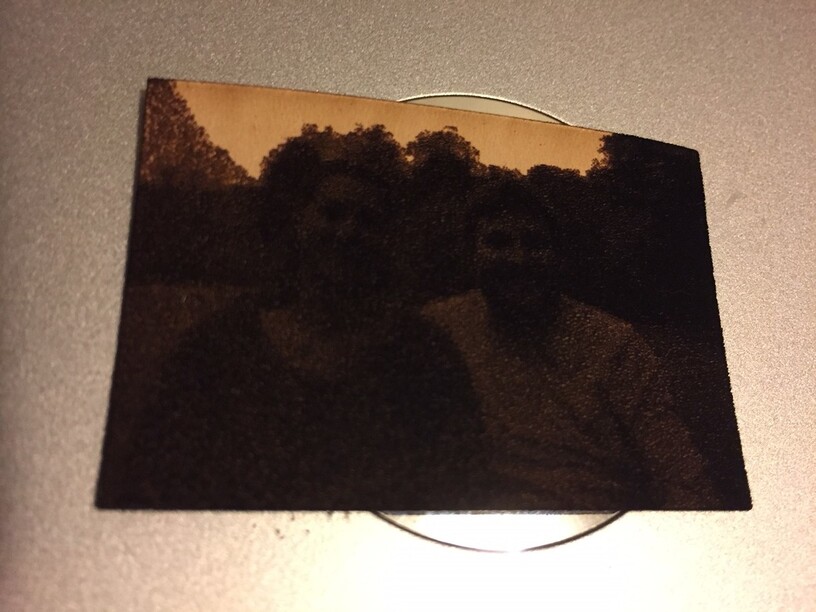
Note: I’ve tried cleaning the 3rd, and nothing I’ve attempted has lightened that at all so far.
I don’t think you can use the default settings if you remove the mask - those are way too powerful. I’m using 1%-2% at highest speed on leather with the masking off.
Also, if that was a vary power engrave - that would just burn deeper, and I don’t think that would work so well on leather. My guess is…one of the dithering options would be the best bet for engraving leather. (But haven’t tried one, so not certain sure.)
Ugh. There’s a ton of soot in the engrave, so these smudge super easy. 
Time to try turning the engrave power way down.
Don’t think that was varying power. I think it was ‘convert to dots’, which is default, at least for leather.
I might do a small test on leather with masking removed, doing only 1-2% and see what it results.