This is the project I’ve been working on… or at least been trying to work on for the past month now. Haven’t had as much free time as I would’ve like to spend on this.
This is only version 1.1… but its just about done. I need to rework the supporting wood for the electronics and some other small tweaks, but other than that, its pretty good.
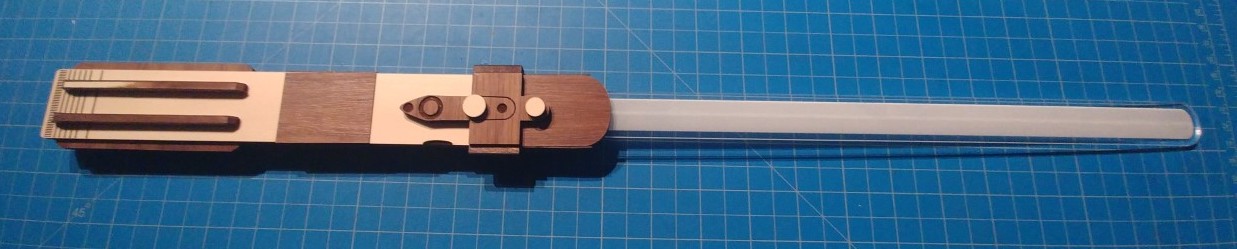
This is based on Darth Vader’s lightsaber. It’s made from basswood (med hardwood, because that’s what I had), walnut (thick plywood), walnut (thin veneer), acrylic (med clear, though I will make it with red transparent in the final version, I bought already but the sheet is a bit bigger than the GF bed).
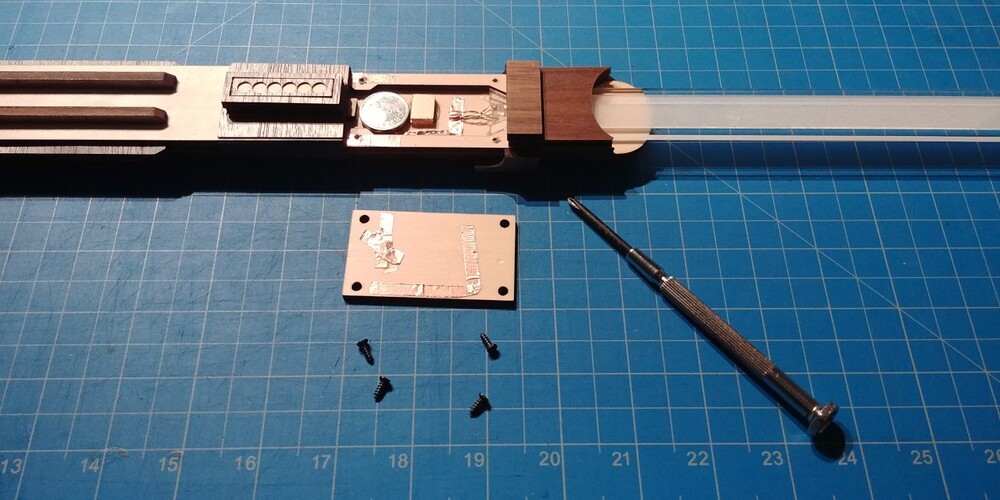
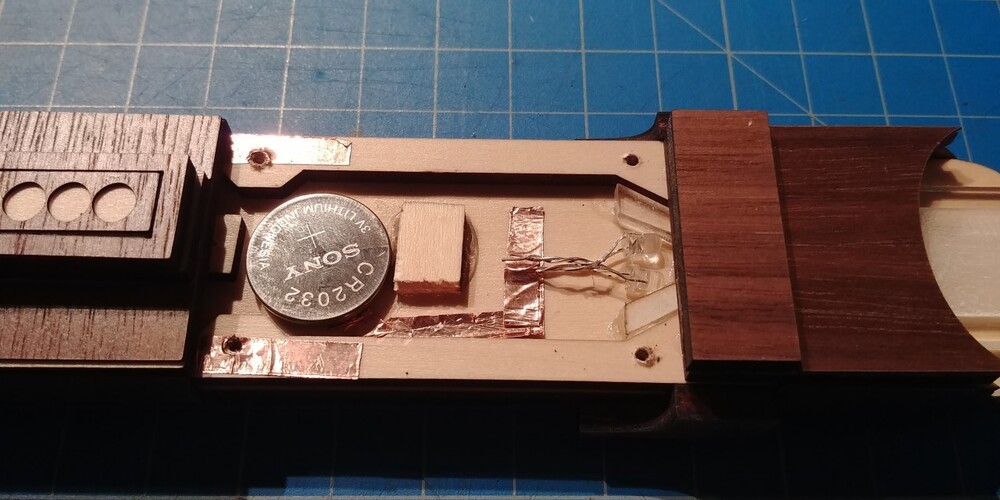
Electronics are 2 3mm red LEDs, 1 CR2032 coin battery, 1 momentary push button (which is under the circle veneer, where the lightsaber on/off switch would be located), and instead of wire, I used copper tape. All electronics fit within the 1/8th high plywood layer. Made part of the back panel able to be unscrewed as to replace the battery.
Copper tape on panel lid completes the circuit connecting the battery positive side to the push button and the other end of the push button to the LED, which you can see connects by it coming in contact with the panel tape.
Then the other end of the LED is already touching the copper tape on the bottom which leads to the battery’s negative side. The veneer cut circles on the left is where the push button is located. Its just within the 2nd layer of those plywoods. The top layer has been cut on 3 sides and the forth has a score, allowing it to be pressed like a button on one side. The button’s terminals come in contact with more copper tape, which you can see along the side rails. The panel’s copper tape will contact those upon closure.
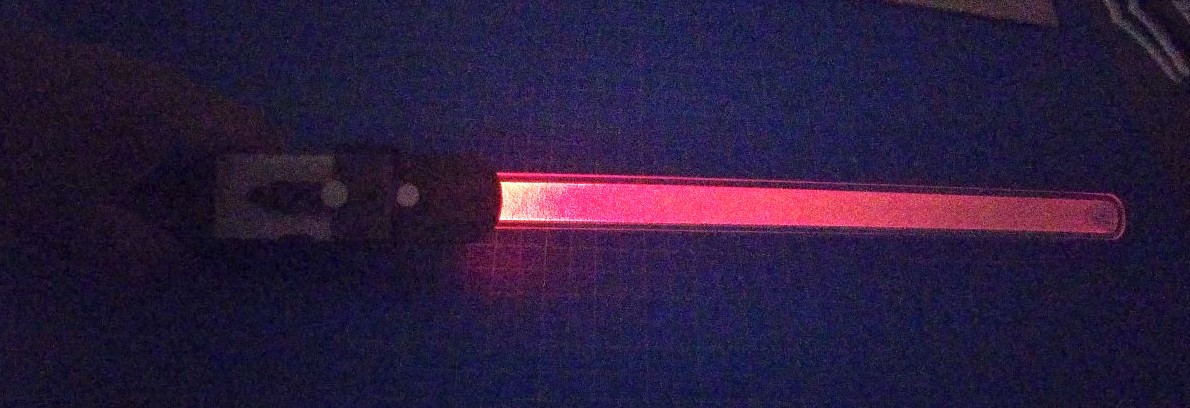
Yeah… without that engraving it barely lights up. I would’ve liked to find a way to have more LEDs in the blade, but that would require it having at least 2 layers of acrylic. I wanted to keep this at the 3 layers of plywood that it is currently, which means only 1 layer of acrylic in the middle.
I wanted to sell them as a kit, or just the SVG file
I wanted to remake the design to work with 4 layers of plywood instead of 3 because…
The blade doesn’t light up as good as I would like it to and with 4 layers of plywood, I could make the blade 2 layers of acrylic, which would make the light focused in the center and not lose half of it.
2 layers of acrylic will also make the blade more sturdy.
Use wires instead of the copper tape would make it work more consistently… right now its based on 3 contact connections with the copper tape, which doesn’t seem to work so great.
And finally, I could use a battery holder instead of just having the battery sit on the copper tape.

 I just need to hide this post from my boys for a while (too little time
  )
)