Proofgrade veneer compass rose inlay: from design to finished piece

Not cheating at all. At this point I’d do the whole thing with veneer if I had four different colors of veneer the same thickness. I’m remedying that situation.

11 Likes

You can print on two different materials if you assign speed and power settings manually. It will only autodetect one material at a time for now.

9 Likes

I have an idea that might work for projects like this.

These are the problems as I understand them.

  1. the recess in the Oak board is uneven after cutting out with the laser.
  2. The veneer is so thin that it doesn’t sit well on the uneven surface.

There are several options so might not work for this project, but more guidelines for the next one.

  1. Woods such as Oak and Pine have heavy growth rings. This causes hard and soft spots, Dark is hard, light is soft. When you hit the wood with the laser the soft spots cut away more, causing ridges… When carving oak this same problem appears. You can either sand or plane the heck out of it, use a fine grain wood such as walnut or like somebody else suggested use a leveling type of glue.
  2. Thin veneers like to be glued to a smooth substrate, other wise all the imperfections in the base get transferred through the veneer and you have to sand them out. SInce the veneer is thin, you don’t want to sand anymore than necessary.
  3. With an inlay project like this, I am suggesting you look at it like laying tile. Glue your veneer to 1/8" hardboard, or start with 1/8" proofgrade instead of veneer. Cut these pieces out to size. This make for solid pieces and the base imperfections won’t show through.
  4. Take a 2 part epoxy and mix it up. Add wood dust, (the color of the base material) to the mix to thicken up the epoxy. This is called a gap filler and it helps with the imperfections in the base cutout. Make it not quite as thick as peanut butter but a bit more than honey.
  5. Smear this concoction in the cutout as carefully as you can.
  6. install the cutout pieces. Because of the thicker glue you can push the pieces down into the glue to get the top flush like you want. This is similar to how tile is laid.
  7. Remember, you will never get it perfect just do your best, wipe away excess glue.
  8. let dry and sand everything flush.
28 Likes

I’m bookmarking these awesome suggestions!

3 Likes

Got some more Proofgrade with some Cherry veneer and that will allow me to fill in the gaps with alternate wood. Thanks you for summarizing the problems and pointing out solutions. I will give this a go.

2 Likes

I received some more Proofgrade plywood. That along with the veneers allowed me to finish this long-messed with project. The plywood engraved very evenly so I could do an inlay. This is 1/8" maple plywood. It took an hour and 52 minutes to engrave the 7 inch circle. I did it at 675 LPI.

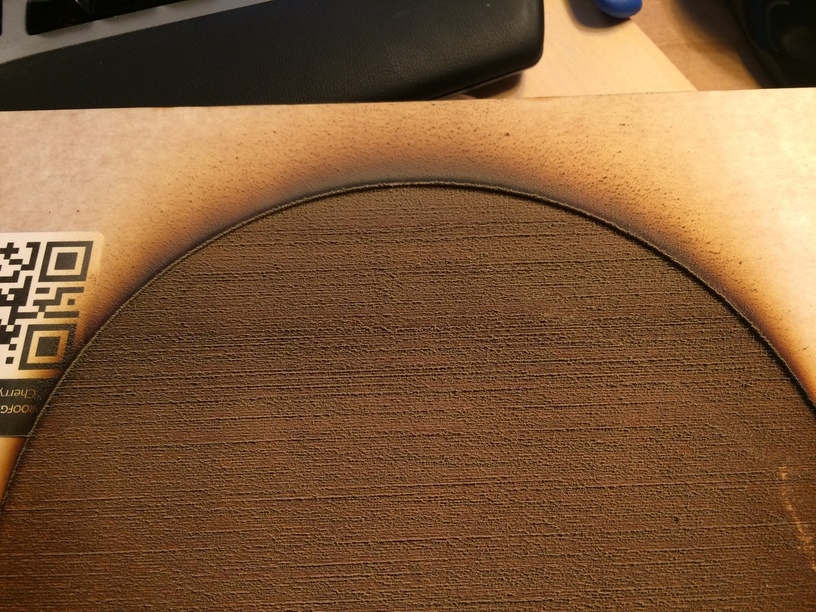
I used a toothbrush, a hat pin and an exacto knife to clean up the substrate. I especially had to clean around the perimeter where the exhaust deposited its residue. Even though there was a thick layer of goop, the masking performed perfectly.

I ended up cutting out the inset pieces in the cherry veneer so I could finish the inlay. Much simpler than leaving the gussets proud and fitting in.

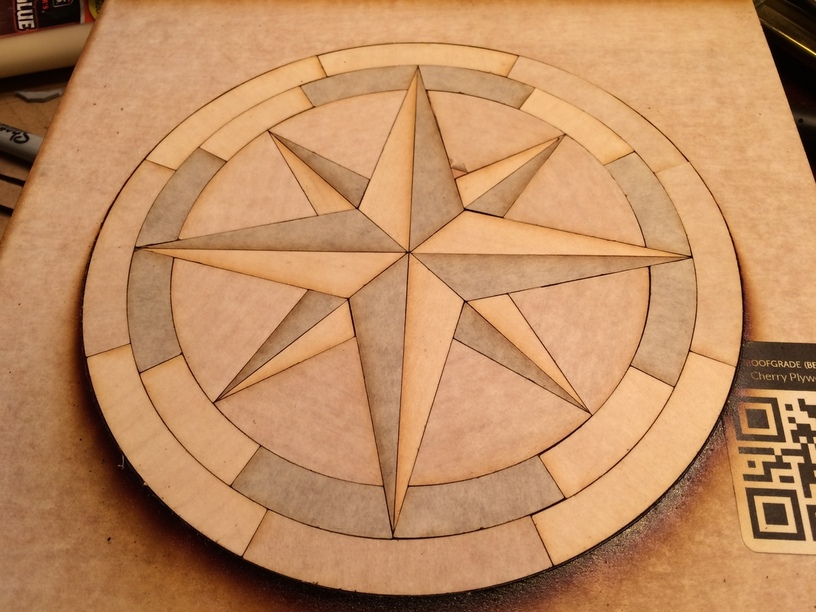
Protip. Mark the back or front of your veneer with some markers of a specific color. Sometimes it’s hard to tell cherry from maple with the masking on. I had to re position one of the outer ring sections.

One suggestion for Glowforge. It would be great to have one more type of veneer of a different color. I know I could stain it but with the masking and everything. This has to do with the four color map theorem. To do a compass rose with the sections correctly colored to highlight the directions you would need four. I made do with three and it looks ok.

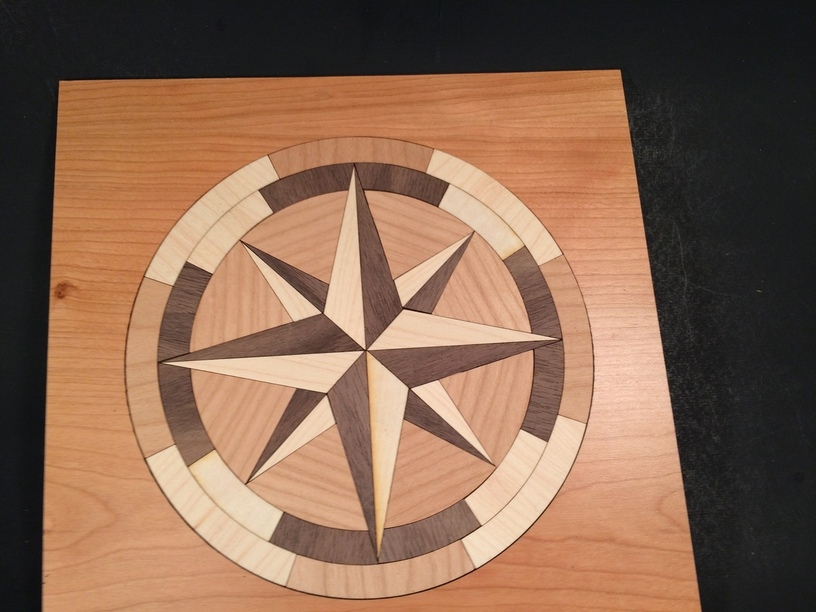
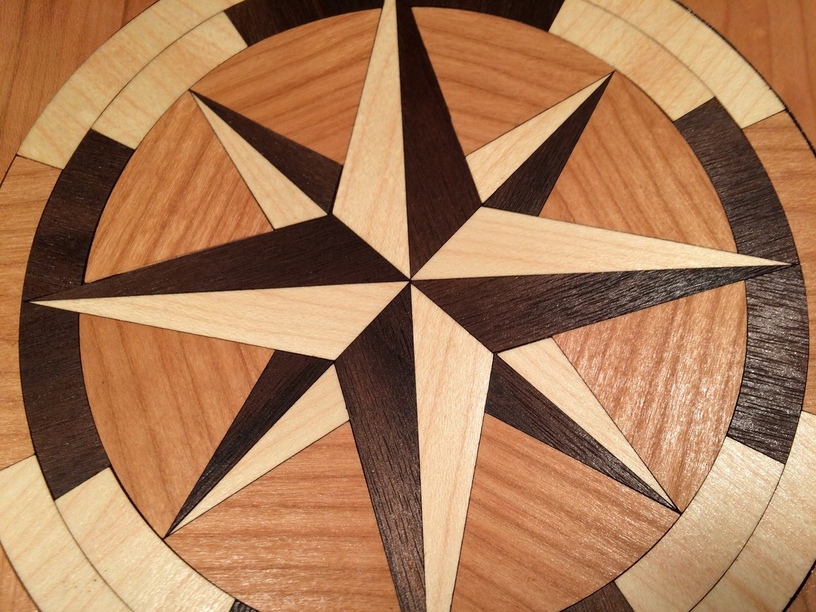
Missed the masking on a few of the pieces. Here it is without any finish on the veneer.

Here it is with a light coat of spray finish.

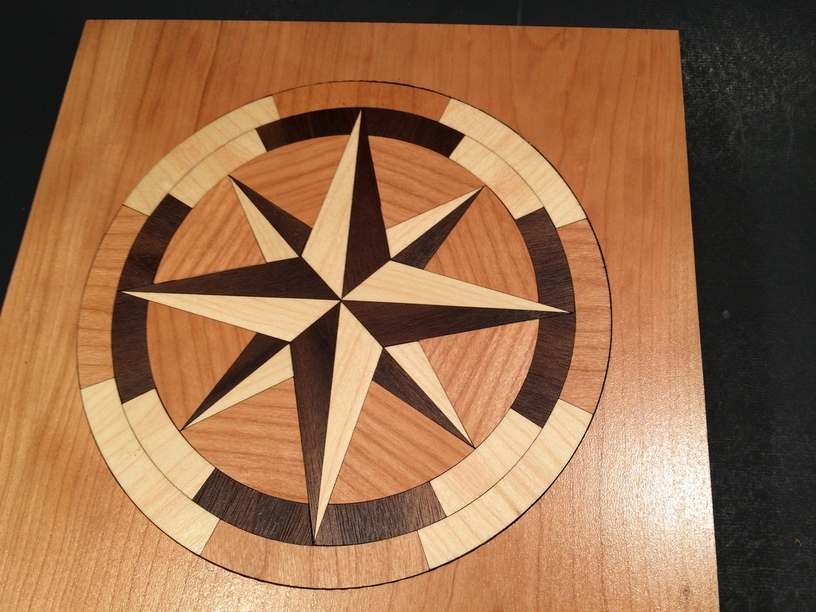
You will note the gaps here and there. As careful as I was to do the math on the original design, I don’t think I quite had it correct. This is the first time I did an inlay so getting all the pieces snug from the very start was a challenge. I didn’t press the veneer in tight until I got all the pieces in. I had to take a few up and shift them to get them all in. I also had to trim with a blade the final two gusset pieces. The eight pieces that are triangular with the round edge are made up of two separate designs. One edge is longer than the other by a 1/2 mm. I copied and pasted one too many times and made six of one and two of another.

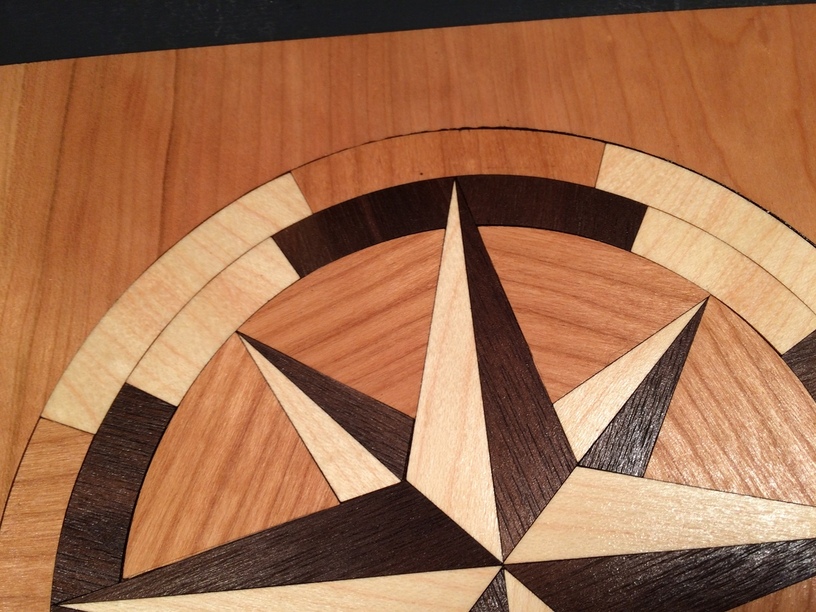
A little closeup so you can see the gaps here and there. This is a pretty challenging piece in the end to get it all to fit in.

So have at it. Any questions? Comments? Observations? Suggestions? They are all welcome.

I made the top a square of 9" since I had a piece of Proofgrade with that much real estate available. Thinking of making a box eventually.

77 Likes

Beautiful job MacGuyver !!:grin: No questions (yet) but lots of praise !!!

5 Likes

Wow! That is really excellent! Beautiful work! :clap:

4 Likes

Oh, FRACK, that’s beautiful! Jeez!

(NOTE: I didn’t say “frack” in my head when I saw this. I said something… else.)

6 Likes

Most impressive! For a novice tackling a very detailed inlay I don’t know how much better you could have pulled that off.
Definitely something to be proud of and incorporate in a future design :+1:

3 Likes

That’s amazing. I hadn’t really thought too much about doing inlays before this post, but this is putting it at the top of my to-do list.

6 Likes

Did you notice any issues with circles being oblong? Could that be part of the cause of some gaps?

But more importantly, that looks amazing! This helps build my confidence in even me being able to do inlays (especially since you were very thorough in your design and build-up…if I achieve inlays with twice as large gaps I’d be happy)!

Nice work!

3 Likes

ok, workflow question. From following this thread I think that you had cut each of these pieces individually for this compass rose.

Would you recommend cutting out only individual pieces as the way to go about it, or would you cut the same design out of the three (or eventually four) veneers you had access to and just switch out the pieces?

Being a part of a band that sings sea shanties, I have always gravitated towards a compass rose design. One of my projects that I want to do is to inlay a compass rose onto the side of a Cajon. On the other side I was hoping to inlay our Band’s logo.

3 Likes

It’s gorgeous! So nice to see it finished and fitting together so well. I think it looks great with the three colors.

1 Like

Oh SQUEEEEEEEEE! That is BEAUTIFUL! :hedgie::hedgie::squeeee::squeeee::squeeee:
(And now I want to do inlay soooooo badly!)

Great job Marion, it was worth the wait!

4 Likes

You could do it either way. In the end there are only ten different shapes. Left and right large dart, left and right small dart. Left gusset and right gusset, right inner ring, left inner ring. Center spacer inner ring. And one piece to make up outer ring segments. I didn’t make these using angles and trig. I built it up from straight lines and did boolean operations to cut out the shapes. I can just say that I’m glad I’m done.

3 Likes

The style of compass rose I want to do has a design at the center of the rose. I’m hoping that might help with the overall alignment of the piece for me. while it would be awesome to have 4 copies of the compass rose in different veneers, I’m concerned that the kerf would end up making gaps everywhere. Small gaps to be sure, and I could probably coat the top with a layer of epoxy to hold it all together and fill in the cracks, but there is nothing like a tight fitting inlay to show off the makers skills. Yours looks mostly seamless with a few slight gaps. You make it look like you’ve been doing inlays for a few years instead of one of your first attempts :slight_smile:

4 Likes

I think the gaps are from the positioning and the initial design not being perfect versus the Glowforge’s problems. I should have taken a picture of the pieces stacked up on each other. They all appeared to be perfect copies of the design. I imported only the one design and did copy and paste in the Glowforge UI to make the other copies.

6 Likes

Very pretty piece.

4 Likes

That looks fantastic. Colors are great and the layout looks perfect to me. I can’t wait to try some similar patterns because you make it look so easy. Thank you for sharing. :smiley:

5 Likes