I just did my first print (metric keychain) and everything went fine except the top of the keychain and smaller holes didn’t quite get cut all the way through. It looks exactly like the pics in this thread (closed):
What material were you using?
This often occurs because the material is not perfectly flat on the honeycomb bed. Many of us use the hold-down pins (below) or magnets to make sure the material is not lifting up anywhere.
if you are not using proofgrade material, there is also the chance that you have entered the material height incorrectly, or that there is a hidden obstruction in the material (like a knot or an inclusion in plywood… see here: Inspecting thin plywood for voids and glue)
I used the material the setup page suggested, eg the medium proofgrade draftboard.
Ok, and did the glowforge recognize the QR code on the draftboard, and auto-populate your settings? If so than that should rule out measuring/material-height or knots/inclusions being the issue.
Is the sheet of draftboard resting totally flat against the bed? if any of it is lifting up at all … like even a tiny little bit… it can cause failed cuts. I use the hold-down pins on almost everything.
Being your first print, i doubt it is a cleaning issue, although it is remarkably easy to put a big thumb-print on the side-cover of the head when installing it. A quick zeiss wipe will solve that.
Otherwise… if your material has been stored in a particularly humid spot, its possible it has absorbed a bit of moisture, and that you would need to adjust your cut settings manually.
2 Likes
Glowforge recognized the material. Am now wondering about adjusting the settings–what happens if one accidentally adjusts them too high? Does it hurt the bed?
you can’t hurt the bed with the laser. If you set it too slow with too much power you may cause charring and discoloration at the cut lines, excessive flashback underneath, or actual flames in the worst case. Never run the glowforge unattended, and have a damp rag standing by.
The proofgrade settings are supposed to just work. When they don’t, I adjust one slider at a time to get it where I want it to be. Using med draftboard on my Pro, I see that changing the cut setting from Proofgrade to Manual shows me a speed of 183 and Full Power. In the situation you are describing, I might try dropping that speed to 180, or maybe 175, and trying again. In a situation with cuts that were closer together, or on a more fragile material, I might try lowering the power, raising the speed, and doing multiple passes.
2 Likes
Seems an appropriate place to post this one minute video on material flatness.
Flat means different things to different people. For a correct focus and successful cut thru with the Glowforge no variation in focus height is supported. Dead flat is important.
Also might note that material can bow in the center, edges or in random spots. Check everywhere.
5 Likes
Thanks for reaching out. I’m sorry to hear your print didn’t come out perfectly.
I extracted the logs to investigate the problem. As @jbv and @rpegg suggested, it’s likely the Draftboard wasn’t completely flat in the bed. Could you try following the instructions in our cut-through troubleshooter to check your material and some other possible causes?
Once you’ve inspected and cleaned, please print the Gift of Good Measure again on the piece of Proofgrade Draftboard we included with your materials shipment for troubleshooting.
Thanks in advance!
1 Like
Flatness was clearly the issue. I tried printing one of those pegs and using it to hold down the material but don’t dare push it into the crumb tray too hard because it seems like it would bend it?
Now looking at magnets to hold down the material. Any suggestions on width and height? So they are strong enough to hold down material but won’t get stuck/hit against/jump into the laser head (I assume this is theoretically possible depending on what the parts of the head are made of).
the crumb tray is steel (unlike the one on my universal at work, which is aluminum). you’ll have to work pretty hard to dent or bend the crumb tray honeycomb. the wooden holddowns should be fine.
for magnets, as long as they’re not really tall (and i use magnets that are probably 1/8" or ever so slightly taller), they won’t hit the head. my favorites are the ones i pulled out of old dead hard drives.
1 Like
Push it in, just make sure you have the correct orientation. (Or the pin will break off - you won’t damage the tray. If that happens, print another one. push the broken one through.)
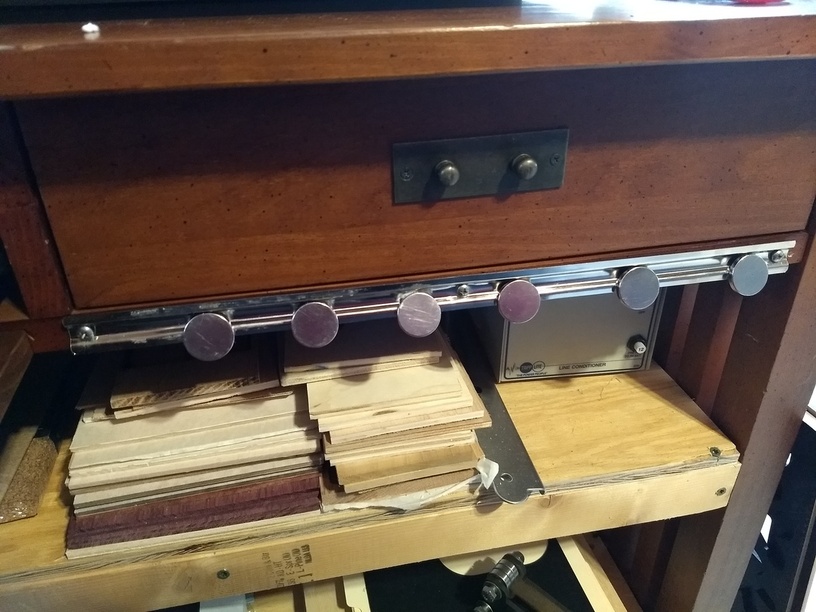
These are the magnets I use in the video. 1" diameter x 4mm thick. Just the right strength for medium and thick Proofgrade material. Far too strong for paper or veneer. You can find thinner magnets of the same diameter but I would stay away from them because they shatter too easily. Five to six magnets are the most you would need for any warp in a full sheet of material.
https://www.sciplus.com/1-inch-disk-magnet-46712-p
The magnets are very strong. I have a metal bar screwed to my workbench where I place the magnets. Keeps two magnets from sliding across the table and severely pinching my fingers.
3 Likes
I’m glad to hear you’ve solved it!
Regarding the magnets, we don’t recommend putting anything in your Glowforge unless it’s laser-compatible. We recommend using small scraps of Proofgrade material if you need to weight down the edges of your material.
I’m going to close this topic. Please post a new one if you have any other questions.