So I’m on a job currently remodeling timeshares and the old bathroom shelving fixtures happen to be glass. Since they are all going to the trash I’ve been collecting them By the end of this job (roughly 350 units) I’ll have enough glass to play with all types of ideas. I had planned on doing a test tonight with this engrave of going back across it with another defocus to see if it fractures the glass differently, but I didn’t pin it down and moved it by accident. Oh well there’s plenty more to try later!
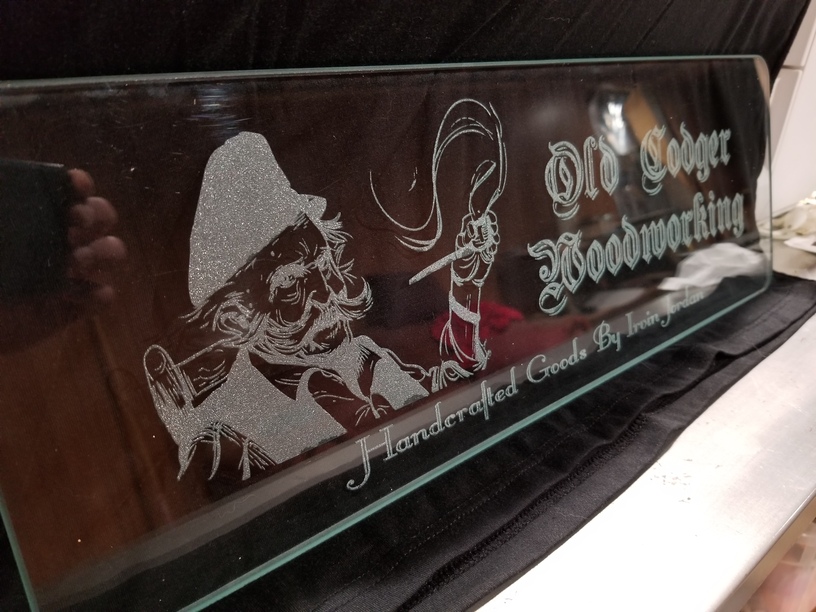
So without further ado, here is the latest project as a gag gift for the contractor removing the shelves and giving me the glass.
The material is .25" thick glass 6"x18" presumably also tempered glass since it’s vanity shelving.
Settings (Pro Unit): 1000 speed, 100 pews, 340 LPI single pass. Material height set to. 25 but I changed the focus for engraving to .4 so it would defocus and in theory blast the glass a little easier.
I also whipped up a baby shampoo and water mix and sprayed the glass down, however it all disappeared halfway through the engrave.
If it was tempered glass it would likely turn to shards in your sand blaster, and surely do so in a Glowforge. Such a level of shattering would not do so good in a bathroom either. Most I have seen were Safety glass that was two layers with a plastic center that would make a mess heated up by a laser, If it is safety glass you can see the layers on the edge as any grinding or polishing would remove more plastic than glass,
We have seen the effect on some folks Glowforges that you could hit the top hard with a rubber hammer, but a serious scratch and they shatter.
Standoffs are easy to come by for them on Amazon or distributors too so it’s great. Some have minor surface scratches from normal wear and tear so I’m going to try some buffing compounds to see if I can repair. If not at least I can get 1 out of 5 basically. I’m ecstatic.
Well I’ll get to retry the multiple passed with different defcocused settings…spelled his name wrong I tried to do it secretively and didn’t ask if there was a weird spelling before hand…there was.
He still loved it and said he wouldn’t trade it for a correct one haha.
So last night I had the chance to redo this project (correct name spelling), and tried two things. First I added a bead of plumbers caulk to the edges to act as a retaining wall for the baby soap and water mix, and I also tried a second engraving pass which yielded an unexpected result.
The retaining wall acted as anticipated however I still dried out before the engraving finished. Either the fan was strong enough to evaporate all the water, or it pushed enough over the edges. It wasn’t a complete bust for a cooling/lubricating method and is worth revisiting on my next glass engraving. For those wondering, plumbers caulk is siliconized caulked so it was easy to peel off without leaving anything behind. I also made sure the laser didn’t get near it in case any ill effects (gases, fumes, fires, etc) wouldn’t happen.
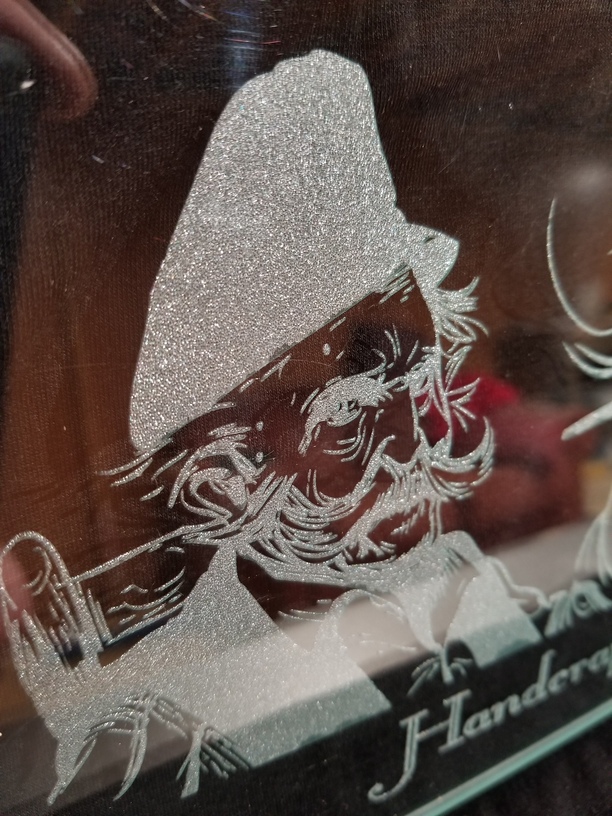
For the second engraving I still used the baby shampoo and water mix, but I first smeared a thing layer of shampoo and rubbed it into the engraved sections, then added the mix. The second pass like I said yielded a nice result and caused an interesting reaction to the previous engraving. The engraving started to create sheets of fractured glass, almost like slivers of ice. It was neat to see, but I’m not sure if it had something to due with the baby shampoo or not. The only downside was anywhere it created the slivers, it wasn’t as “frosted” which caused me to do manual removal with a metal flat edge to make everything uniform. Once I scrapped all the lose glass dust out I was left with a nice etched look that was smoother looking and tighter than the first attempt. Also I could actually feel depth to the engraving and if I dragged my nail across it, I would get hung up on the edges.
It was late and I couldn’t get a good lighting photo for this one so I don’t have a final look, but there wasn’t an easily noticed difference in photos.
Rabbit skin glue will grab the glass hard if clean and shrink creating a famous texture called "glue-chip"as it pulls bits of glass as something has to give. there is an issue with sharp edges and it is clear and bumpy rather than frosted but it seems that you might have accomplished something similar.
Now that I read about it, and the process, I think you are correct that it’s a very similar look.
Funny part is that type of glass is what I requested for the door of the entertainment shelf of the built in cabinets I had made for our house. Never knew that’s what it was called or how it was made. I just knew about it from using it in at class for a few projects and knew it would be great for not blocking signal but “covering” the equipment.
@rbtdanforth found out from testing yesterday that these shelves are indeed tempered. I was hoping they would be heat strengthened rather than tempered so I could cut them with a cutoff diamond wheel or drill standoff holes. There are no tempered markings, burning you do the polarized test you can barely see the strain marks. I relied on none of those tests, rather did a controlled safety smash with a hammer and again with an emergency glass punch. Each time it exploded in cubes rather than shards. Also the score line from my glass cutter produced shavings rather than a clean cut.
I learned quite a bit from one artist’s page regarding tempered glass and its properties. Also a learned a “fact” about sandblasting and etching with tempered you can remove up to 10% of it’s surface before it explodes. The process for tempered glass is actually amazing to learn especially the process for de-tempering.

 I tried to do it secretively and didn’t ask if there was a weird spelling before hand…there was.


 after reading a lot of stuff.