I know there are a few Rhino users here so figure I would post my “work around” for exporting directly to the GFUI.
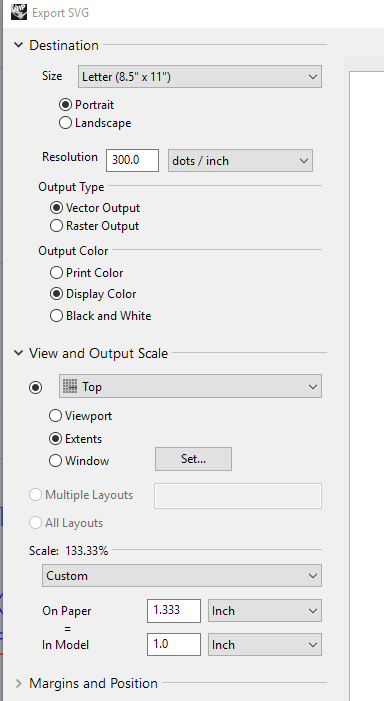
So first off you need to be using Rhino WIP, this allows you to save as SVG. in the save as dialog I set to vector, output color to display color and need to scale it to 1.33%
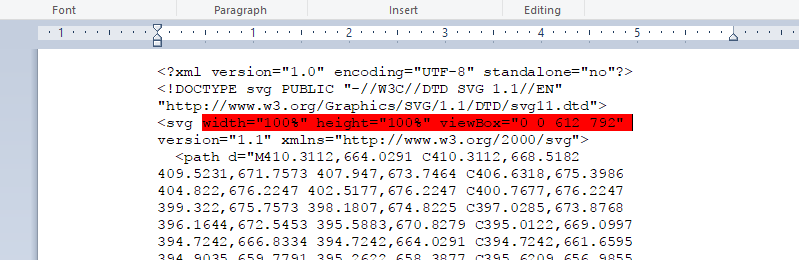
Next you need to open SVG file in a text editor and remove the part here that is highlighted in red
So this works for now, but seeing as both programs are in beta who knows for how long.
I tried getting the Rhino 6 WIP to save an SVG without that section of code (or put in more appropriate information), but also wasn’t able to.
I do hope they get it working better, all the settings are there, is seems they just need to actually transcribe them into the SVG code.
I would also suggest bumping up the Resolution to something higher, say 1000 DPI. Maybe more. It hasn’t had much of any impact on the size of the few files I’ve compared, but it has made a couple of them look significantly better.
In the meantime, exporting from rhino in dxf and importing into Inkscape (free) and saving as .svg is pretty quick and painless after doing it a couple times. Still, yeah, better if it’s direct.
was this ever solved? I am trying to do just this and having problems. id like to just export the geometry as .svg but the background always comes along as a second object getting in the way ,even when set to transparent, and I don’t think it ca be deleted from the gfui.
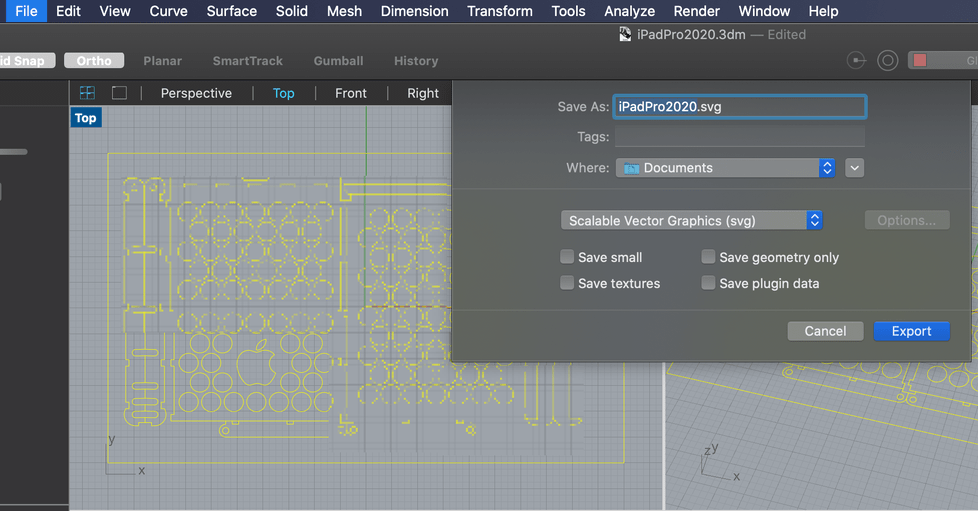
Presuming you’ve started from a Small Objects - Inches template in Rhino, lay down all desired curves on one of the View panes. I usually keep mine compartmentalized in its own layer. If there are separate cut / engrave / score groupings, best to corral them in their own layers with a distinct color. One final layer should include a rectangle sized 20" x 12" to represent the Glowforge Bed Boundaries. Highlight ALL of these curves and select File > Export Selected
In the resulting dialog, select Scalable Vector Graphics (svg) from the pulldown, give it a name, give it a location and hit the Export button to continue to the next dialog.
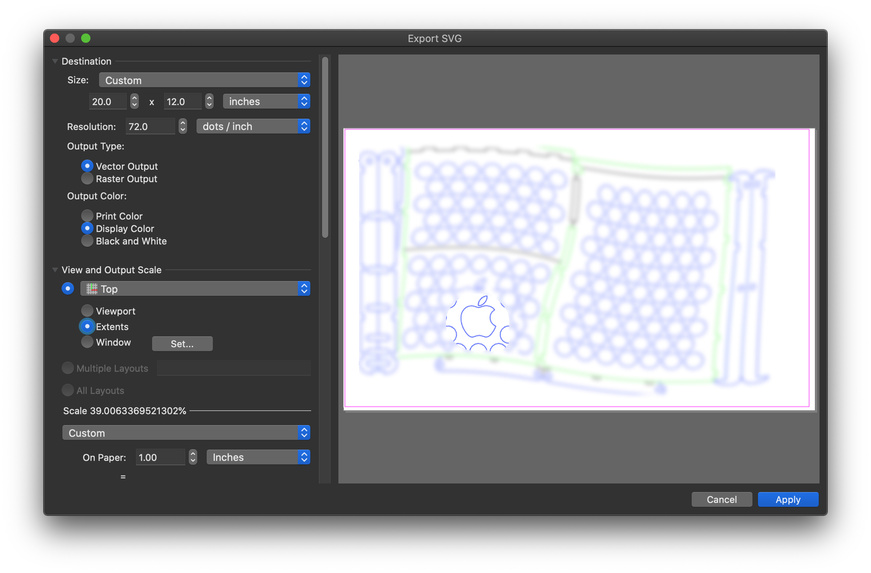
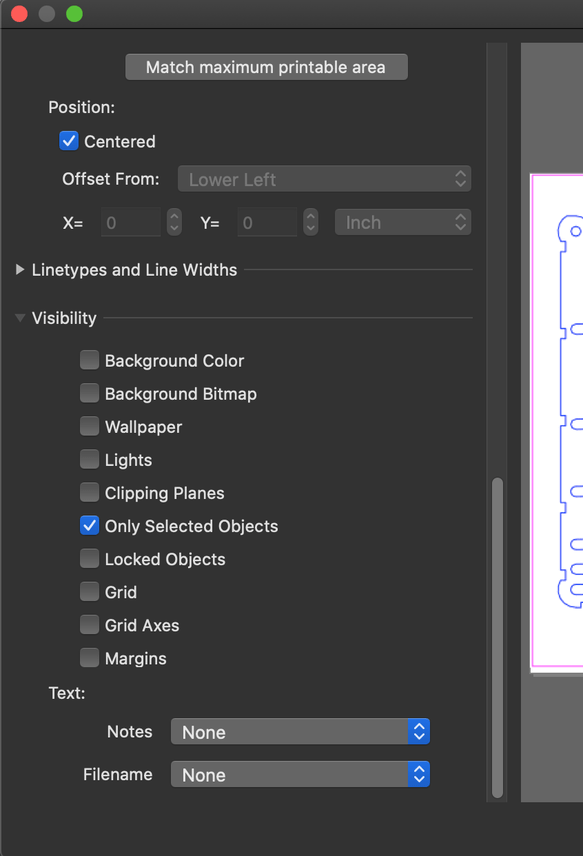
In the Export settings, enter 20 and 12 inches in the Size fields. Resolution doesn’t matter since this will be a Vector Output. Tapping Display Color will follow those colors pulled from each contributing layer. View field should have Extents selected.
If gridlines still appear on the preview screen, scroll down further in the settings dialog and double-check that Selected Objects is the sole item under Visibility.
From here, I’ll usually bring it into Affinity Designer to verify the SVG’s size/proportion are correct and tack-on additional artwork, but it should be possible to bypass this and go straight into Glowforge UI.
With the SVG loaded into GFUI, take advantage of the new measuring feature. Highlight all the curves and make sure the measure tool reports the selection as being 20 inches wide, 12 inches high. If not, make sure the proportion link is activated and punch in the respective numbers. That Glowforge Bed Boundary rectangle has now fulfilled its job and can be set to IGNORE in Glowforge UI.
Rhino v6 and above for OS X Mac and Windows PC should have an improved SVG Export module over v5. There was chatter on McNeel that the beta Rhino 7 Work-in-Progress has further improvement to the PDF or SVG modules. It’s neither pretty or intuitive as-is, but this is the process that works for me under Mac Rhino v6.