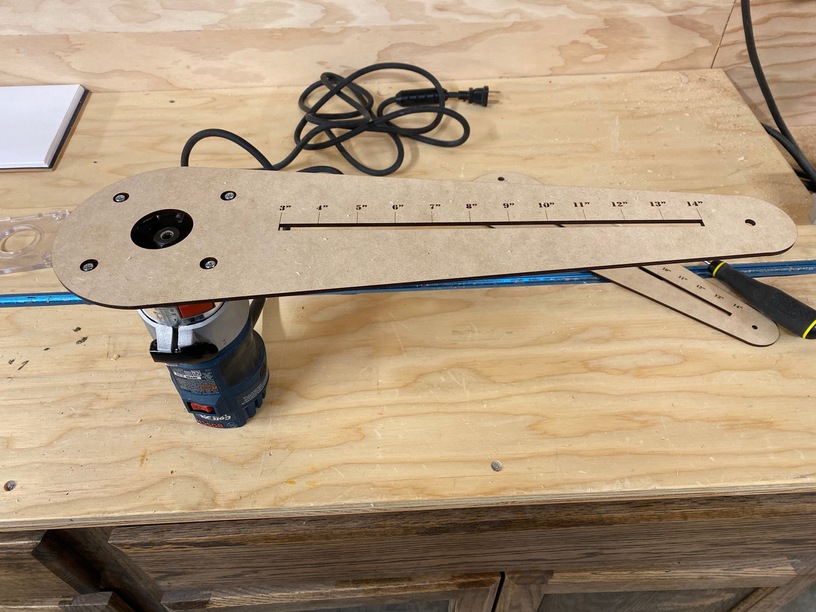
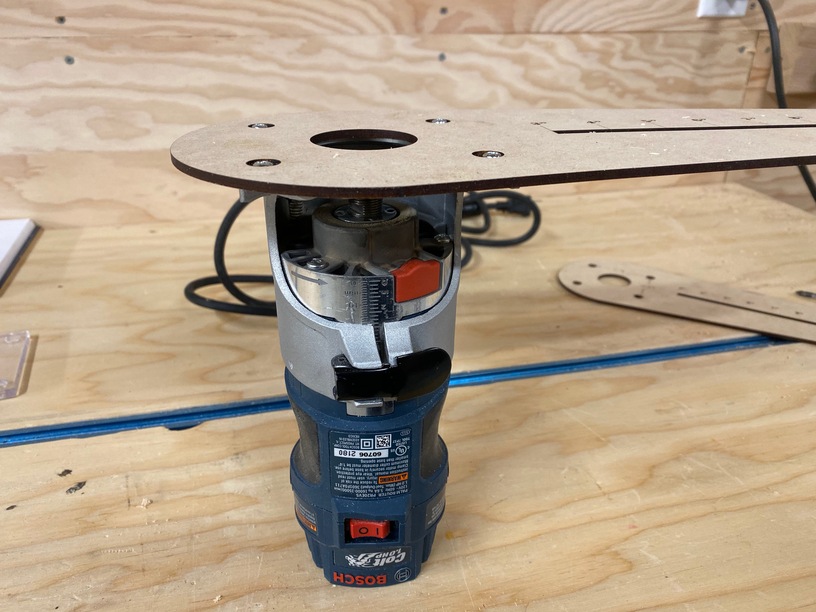
My wife is making a bunch of signs, and we wanted an easy way to cut circles out of wood that are perfect. I have a Bosch 1HP router, so I just created this template that I could mount to the base. I don’t yet have a design on the pin I will use to secure the pivot point. You could easily do a pin through your workpiece, but I want to make something that just makes a dent, and not a hole. I will figure that out. I thought the design might be useful for others.
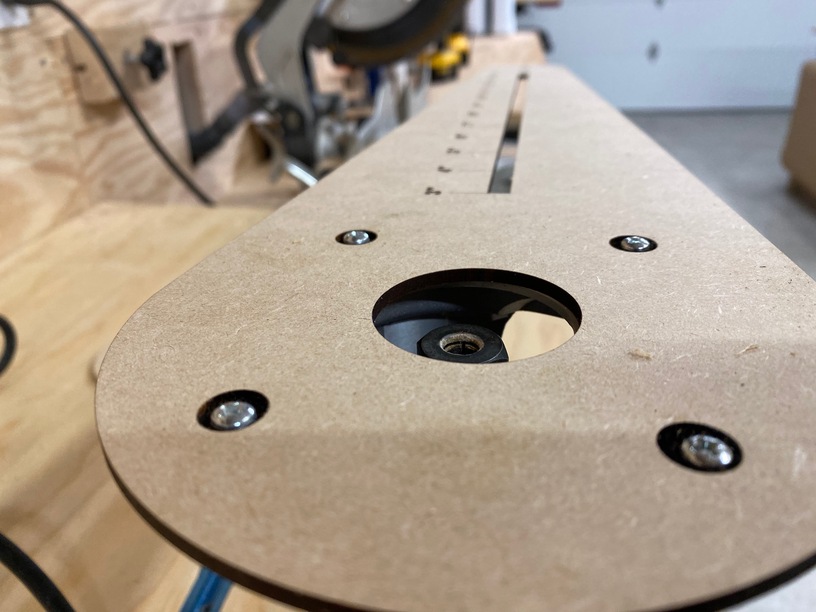
One other neat thing I learned, I could slow the laser down and create a recess for the screws, and then come back and cut out the screw holes smaller, so the heads sit down in the part. Worked like a champ.
Funny, I needed a circle cutting jig last weekend for a wood bending form. Looked at the examples online and said I can make that on the GF. Ended up making the form on my CNC and held off on the circle cutting jig for this coming weekend. Turned out to be a good decision. Thanks.
Again thanks for the file. A couple notes. Each router manufacturer has a unique bolt pattern for attaching the jig. No big deal to change the bolt pattern. I rounded the slot at both ends and extended it to the end pivot point. Unless you had a very specific circle radius in mind the end cutout point isn’t used. When I downloaded the file the inch markers were way off on my computer. I suspect there is a difference between what your design program uses and my instance of Inkscape. But that doesn’t matter. The distance markers are not useful unless you use a specific diameter bit and have adjusted for that. If you use a 1/8 bit or a 1/4 bit the inside circle diameters will be different.
Here is a drawing of what I mean by extending the slot.
It seems like if you made this with recessed screw holes… then making a pivot point that looks identical to the one that is mentioned out of a bolt and acrylic wouldn’t be hard. you’ve done the hard work! Great job
You are absolutely awesome for this. I just went out and bought a router for my wife’s exact same situation and was about to sit down to design a jig myself. Just thought to myself that I should check the forum first. Again, you’re awesome and thanks for posting this!
I know this is an older post. I have been eye balling circle jigs forever and I think this is the one I want to go with. I have a couple questions I hope you don’t mind answering. How thick can the router cut out the circles? Can it cut 3/4" pine? If so, with what type of bit? Do you use a plunge router or a palm router? If this is a palm router, how do you start the cut? Thank you in advance.
Hello - I did purchase a countersink bit but wondering if engraving the green circle will give it the same effect - to allow your screw to countersink. cut small red and engrave the green?
Love this design…thank you - wondering if you would share how you recessed the bigger hole to create a countersink effect? I bought a bit but thought it could be done on the laser. would engrave the outter circle give us that effect? Thank you
This was from last year so working from memory. The original file was not mine. The green circles were for a countersink and need to be engraved at an appropriate power to get deep enough but not all the way through. Test and retest on scrap.
This is correct. I was doing an engrave and multiple passes. I think I ended up on 3 passes on an acrylic version for the full power engrave. Testing on scrap is indeed your friend.
I need some help with this one. Everything I have tried did not work. I am using Inkscape and the svg from the zip file above.
This is the error I get.


 you’ve done the hard work! Great job