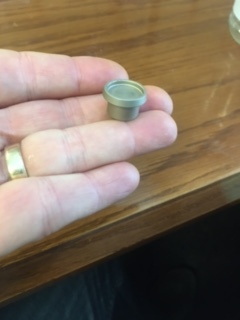
My friend gave me this end cap that he would like to have a logo scored onto. I just bought my GF and unsure how to go about doing it. I believe it is an aluminum piece. But wondering if the raised edge around the top will effect how the camera reads it? I assume I measure from the bottom to top of the cap to put in thickness. Any idea on what settings I should use? Any helpful tips are appreciated
1 Like
The Glowforge cannot score or cut any metal.
Check out #11 here:
2 Likes
It can only be engraved if it is anodized or painted metal. The measurement is bottom of item to surface you expect to engrave not the outer lip. If the item is over .5 inches then you have to remove the honeycomb tray and raise it up to within .5 inches of the laser.
Hope this helps.
1 Like
It should be totally achievable if that’s a coloured anodization. If it’s clear it’ll score through the anodizing, but it’ll be an invisible image :-/ Can you find out what it actually is? There are some materials you can use to mark metals (both commercial and might-already-be-in-your-kitchen) but it all depends on what you’re working with.
1 Like
It’s aluminum under the gray coating. I’ve been doing some searches and someone indicated a setting of 1000, full, LPI 270. Does that sound about right? The logo is very simple with just some wavy lines, so unsure if I should try to just score it or engrave?
Totally reasonable - it’s likely the logo is going to end up being all but invisible - grey on grey, but depending on the design it may look cool ![]()
on another note: to make it easy to get them centered
measure the diameter of the bottom
in your design tool draw as many of the circles as you want
draw a box around all of it (use a different color)
place the logo in the circles (use a different color)
open the file in GF
set box and circles to cut, ignore the logo
cut the circles and the box from a piece of cardboard
you now have a jig to put the caps in
NOW to set the jig correctly every time
tape printer paper to the crumb tray
score the box (full speed and 4 power)
now place the cardboard template, (set the template correctly - top and bottom) with the caps in place, exactly on the scored box
now ignore the box and the circles and engrave the logos
as long as you don’t move the paper, you can replace the caps and go again
if you need to come back to this at a later date, (another order  ) just start with fresh paper and score it, then go!
1 Like
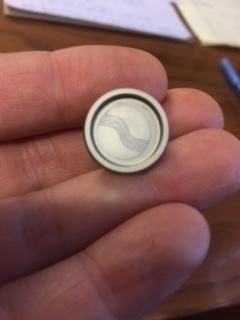
Thanks everyone. It came out OK. Due to the cap being gray, the logo did not show up all that well with the aluminum showing through, so I took a sharpie and rubbing alcohol and darkened the lines a little. I didn’t get it perfectly centered, but this was a trial cap, so lessons were learned. I appreciate this community so much. Again, thanks.
8 Likes
You could paint it with acrylic paint and then laser the paint away?
4 Likes
I like that idea. Thank you. Only problem is that it’s a cap off of a fishing reel and unsure if the paint would peel away over time. The owner has given me another cap to do (black this time) and that should “pop” with the aluminum coming through.
4 Likes
It’ll be a bit of a pain, but if you cut out circles of masking paper that fit into the cap you can run your design with a power of 1 and it’ll only mark the masking, then when it’s right you can run it at full power and it’ll blow right through the masking (of if you’ve got the cap fully secured you can reach in and pull the masking off - if you do that don’t refocus anything, just close and hit Print)
2 Likes
That’s a great idea! Thank you for the tip.
1 Like
power of 1 and at what speed?
1 Like
500 should work. If you can’t see it, try 2-4 power - but try 1 first ![]() Lightest possible touch!
Lightest possible touch!
2 Likes
Thank you!
Something rarely, if ever, read on Facebook forums.
2 Likes