Hello all, I am trying to figure out how to set the base of a box to be scored and then cut. That way the sides of the box will be flush against the base bottom. I have been trying to figure it out in inkscape as well as if there is a way to do it simply on the glowforge app. Any help would be appreciated.
Thanks in advance!
I’m not sure I understand (not enough coffee in my system). You want to score the base, then cut out the same shape?
You can duplicate the base, and assign it a different color stroke. When you bring it into the interface, the different colors will allow you to assign different functions. So you will assign one of them a stroke, make sure that’s first, then assign the next base item as a cut. In the interface you can run it twice, first as a score, then as a cut.
If I’m misunderstanding the question though, please let me know.
3 Likes
Not quite sure what you’re asking – do you have a photo or drawing of what you are trying to achieve?
2 Likes
If you take the bottom of a simple box, scoring around the outside edges at 3mm will let the sides of the box sit flush against the smaller raised square which is left after the outside scoring is finished. I am assuming the scoring would be enough to create a groove which the sides would settle nicely into. Just like the Pencil box from the glow forge release
Sorry, drinking more caffeine now. Do you meaning scoring or engraving? I only use scoring to mark where I’m going to glue something. The groove it makes is pretty thin. If you want to make a groove, are you asking how to engrave 3mm around the edge of the base?
I guess a picture would help. Going to go look at the catalog. one sec
The pencil box Glowforge design is the perfect example. The very bottom of the box which sits on the table, has a square 3mm band all around the outside edge which allows the sides to fit flush up against it, leaving a smaller square slightly raised on the inside.
Yes exactly, am I able to engrave a 3mm band around the box? if so how does one go about doing that?
And thank you for the response
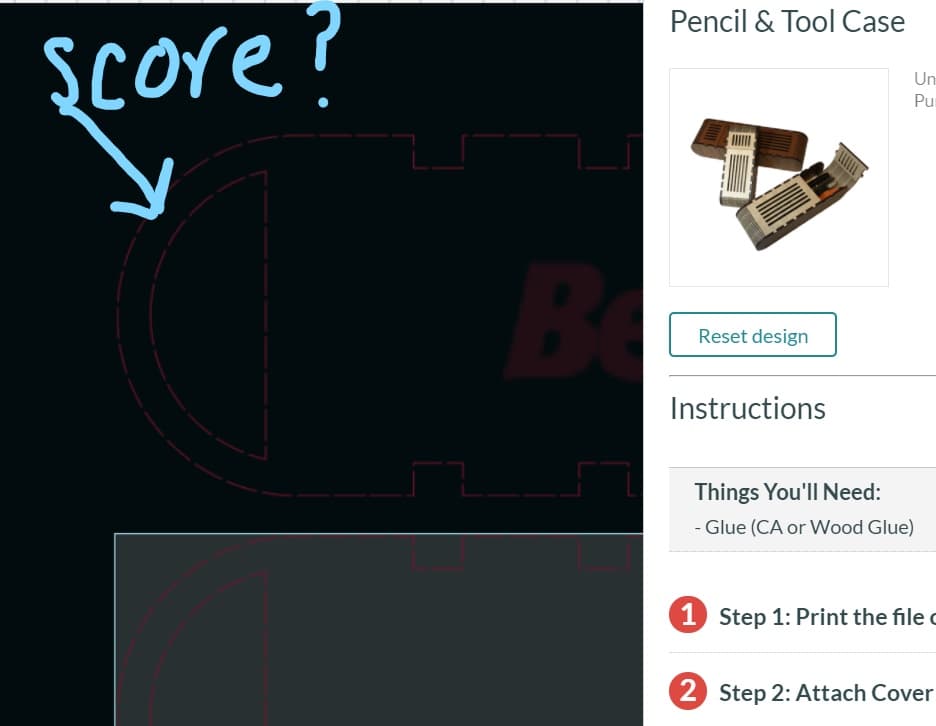
Are you talking about this pencil box and score line?
Let me see if I can answer your question. I feel like an engrave around the box won’t really help things sit flush, because it’s being burnt away and will rub off. If you want something to sit flush, I would make a rectangle/square shape that is 6mm smaller than the width of your base and center it with your base.
That should make it smaller 3mm around the entire thing.
You can either score it to give yourself a glue line. Or, you can duplicate it, leaving one there to score on the base, and then cut the other one out on another piece of materials to glue into that score line. That will give you a much nicer clean edge to line up the sides with.
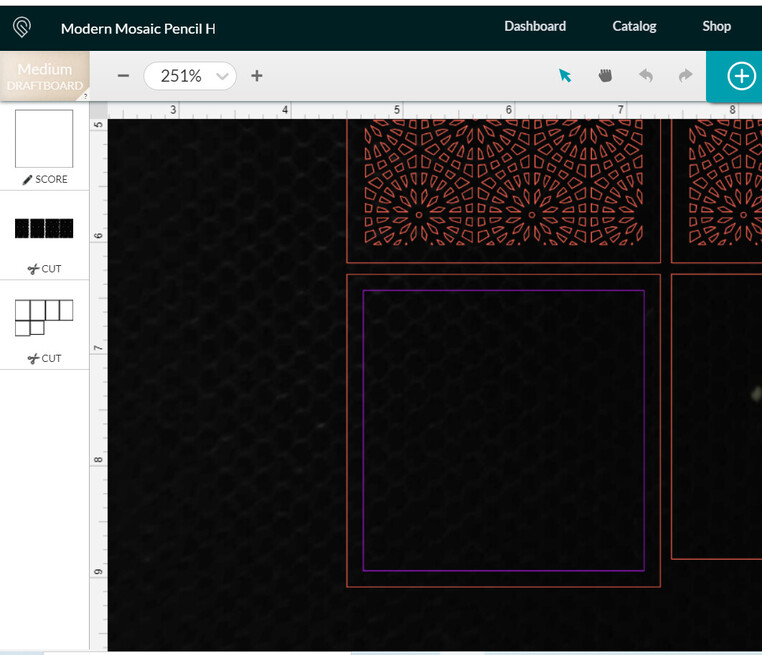
It is called the Modern Mosaic Pencil holder, and it is the singular piece by itself with the dotted line around the solid line.
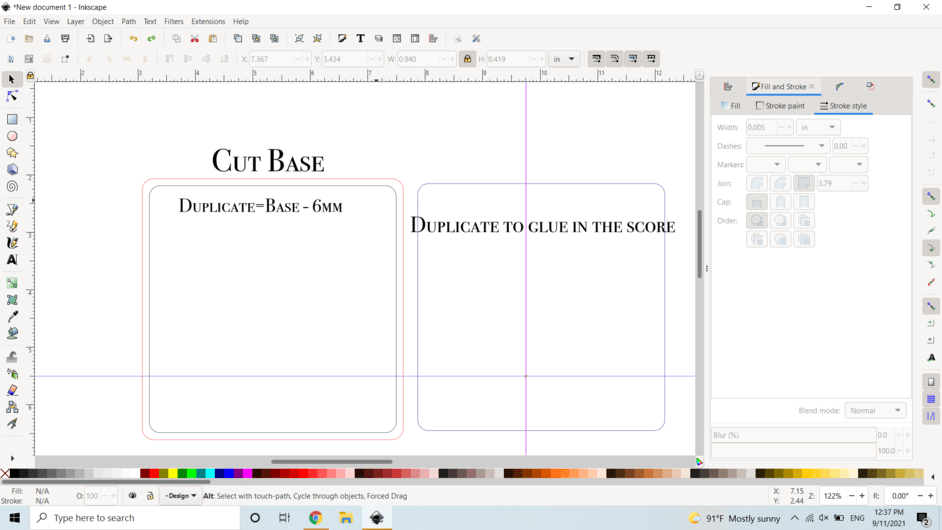
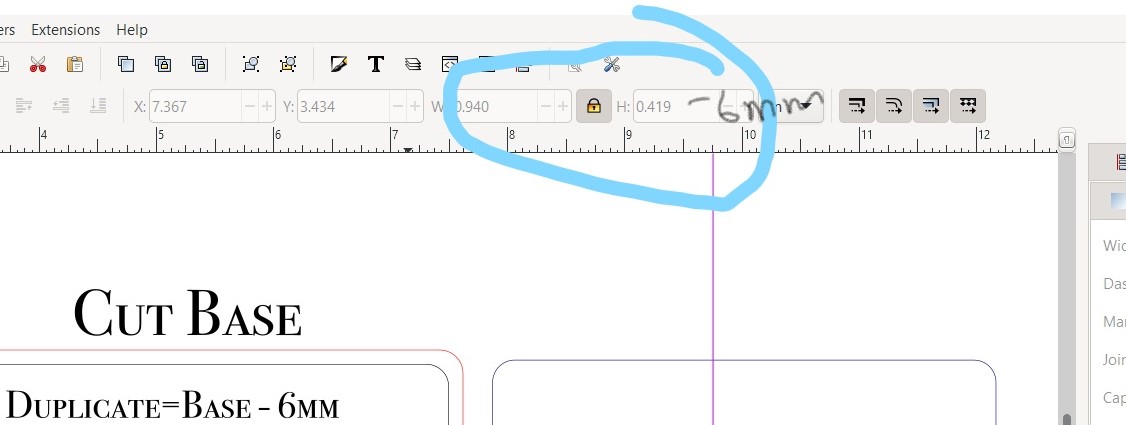
Ok, so just take your base, and create the same shape, but make sure the locked aspect ratio is on, the subtract 6mm from it. In Inkscape, you can just go to the top and in either height or width, type in - 6mm after the current measurement in there.
Ignore my picture where I created a separate cut out.
1 Like
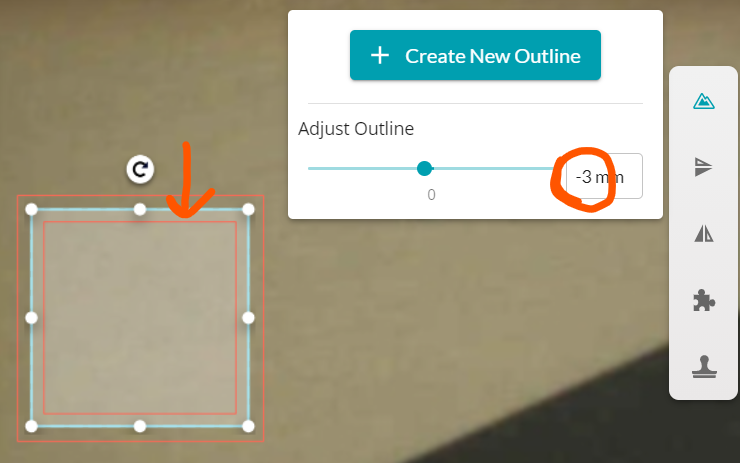
In the UI there is a tool for creating outlines:
Add your part and select it. You’ll see the “Add outline” tool:
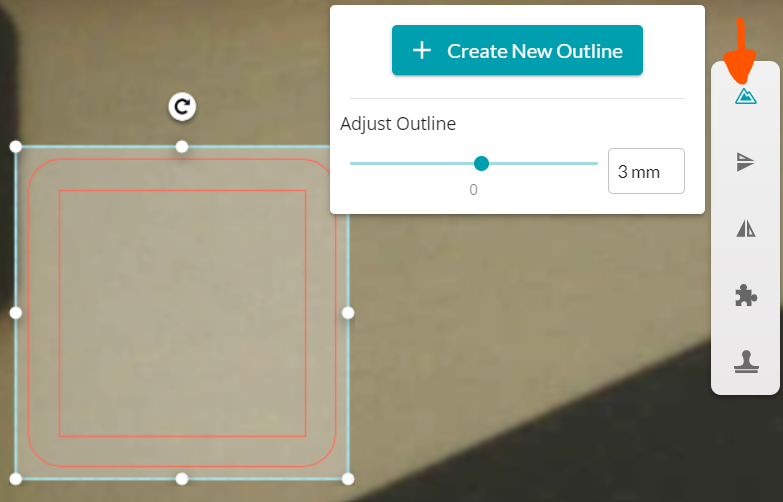
Enter the distance desired around the object – note that + is larger and can result in rounded corners. If you want the outline on the inside, use a negative value as shown here…
In Adobe Illustrator, this can be accomplished by going to Object|Path|Offset Path. Apologies, I’m not an Inkscape user, so don’t recall the exact command of the top of my head.
4 Likes
Oh nice! That looks simple! I haven’t really used the premium features for making smaller outlines yet. I usually take care of everything in Inkscape.
1 Like
Thank you I was trying to avoid using that much extra material. This is a 17 inch x9 inch box
It does a great job with multiple objects with irregular shapes.
2 Likes
Makes sense. You can use @dwardio 's method, I think that will work. But for a rectangle (in Inkscape), I would subtract 6mm (or you can even type in -(1/4) ) into the height and width box. It will bring it in, and then you can just center it on your original base. Just make sure to use a different stroke color so you can just set it to score in the interface.
4 Likes
I just cannot figure out how to make the difference in between the outside cut line and the 3mm less inside line be recognized by the Glowforge to score the entire 3mm band in between like it is in the Mosaic pencil box
In the side menu on the left, any line that is just a stroke will automatically pull up as a cut. You need to click on it and change the line you want to score into a score.
The mosiac pencil holder only has a single score line. Nothing is happening between the cut edge and the line.
3 Likes
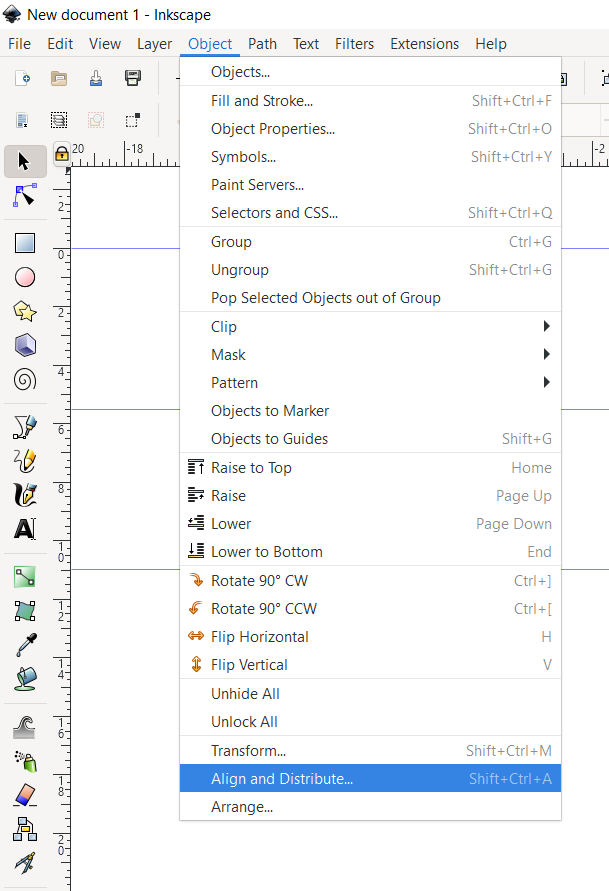
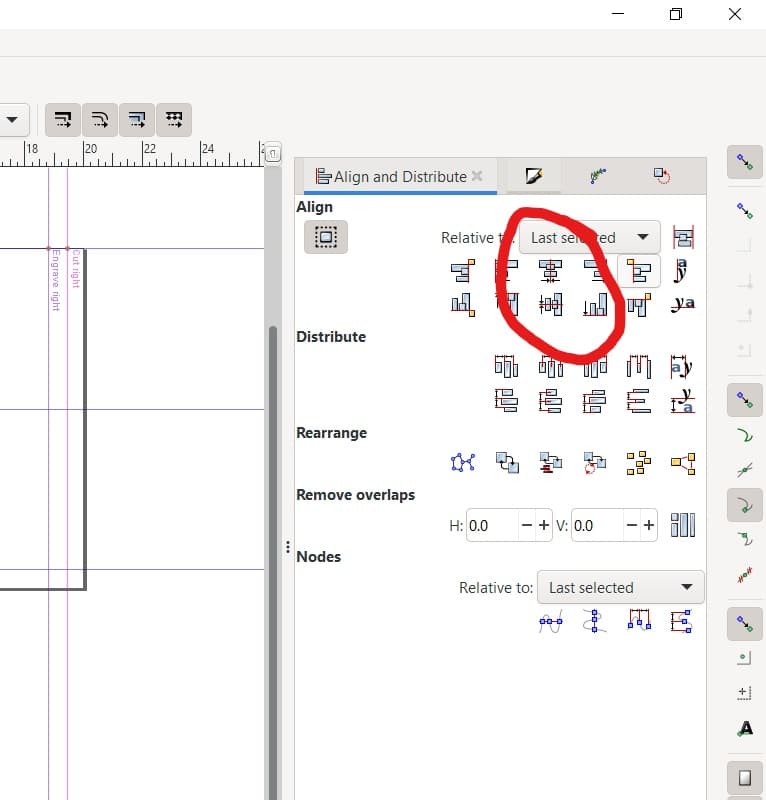
In inkscape draw two rectangles. One of them is the outside dimension and the other is the inside dimension. Align them with the align and distribute tool. Fill them both with different colors but delete the stroke. Place the smaller one on top of the larger one and use path difference. Save and engrave.
2 Likes
Where is the align and distribute tool in inkscape? And Thank you so much.