This project grew a bit from what I originally intended. My Secret Santa giftee is in to Photography so I wanted to make a simple frame that she could display some of her photos in. Then I thought that a single photo is limiting so why not do a tri-fold frame, but then I have to make them square since I didn’t want to force either landscape or portrait.
So after a few days tossing around design ideas, starting on paper, then to Sketchup then ditching that for Fusion 360 I came up with this design.
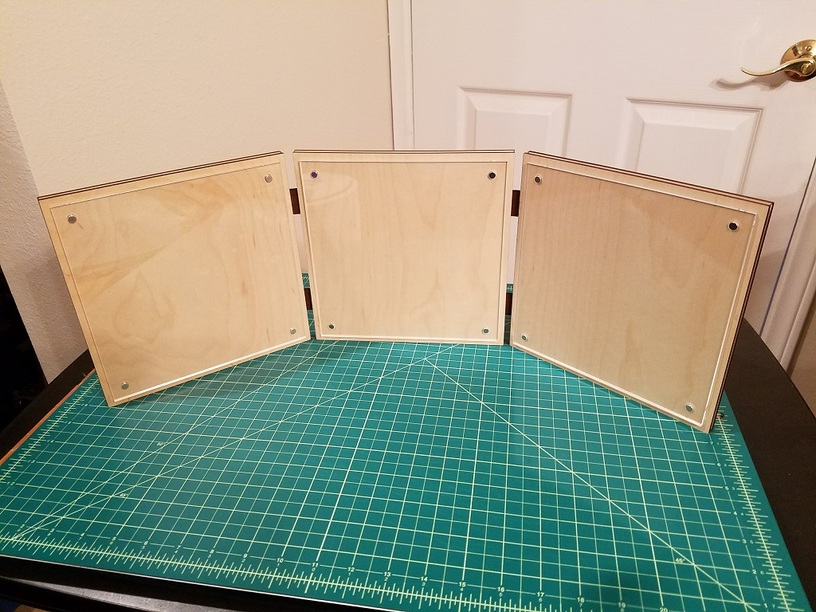
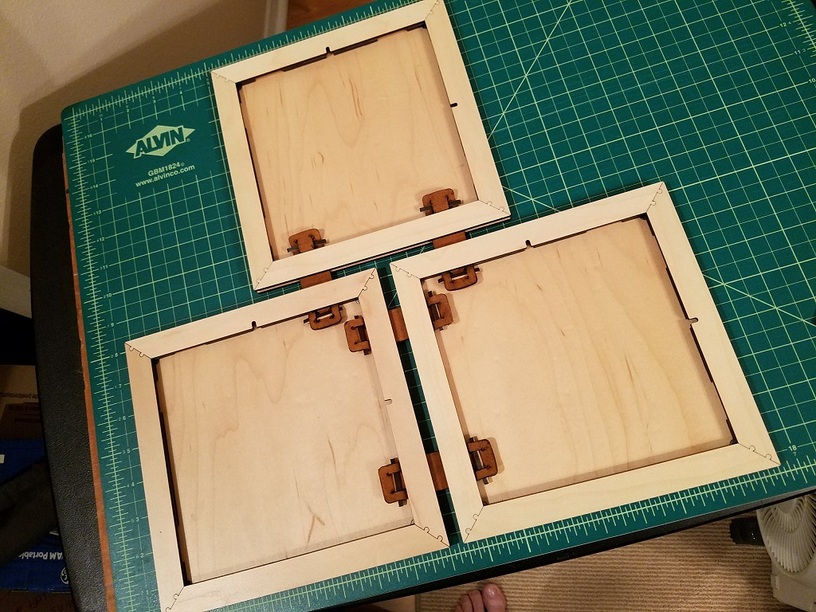
My prototype panel alongside all the components for the other two panels.
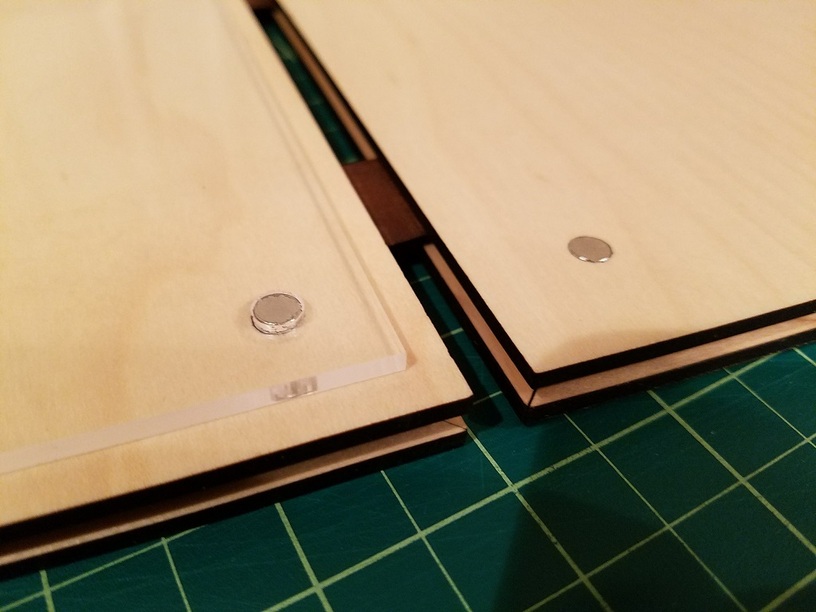
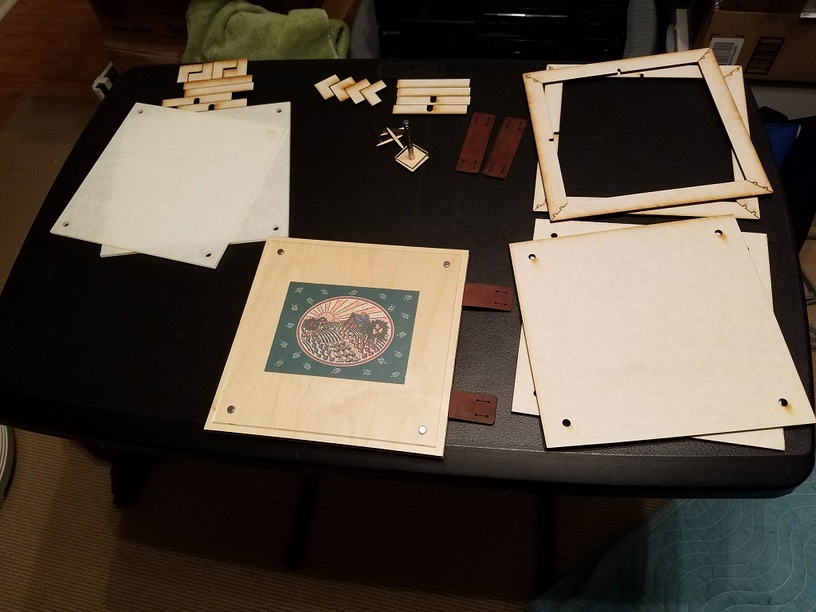
Tip: Leave the masking on until you absolutely have to take it off, keeps everything clean, especially embedding magnets with super-glue into acrylic.
I learned a lot working on this project, 1st time dialing in kerf and offset paths, Fusion 360 was invaluable for that. That feeling when you get the kerf perfect and something snaps in place and you are thinking “Glue?! Who needs Glue?!”
I like the puzzle-piece type joint you used to hold the miter together. I also love that you made it configurable by the recipient. Michelle is going to really like this!
I tend to think things to death, always trying to balance the form vs. function equation. This one definitely went minimalist where every feature has a specific function but there is an art form in that as well I guess. Mainly I didn’t want the frame to detract from what was being displayed in it.
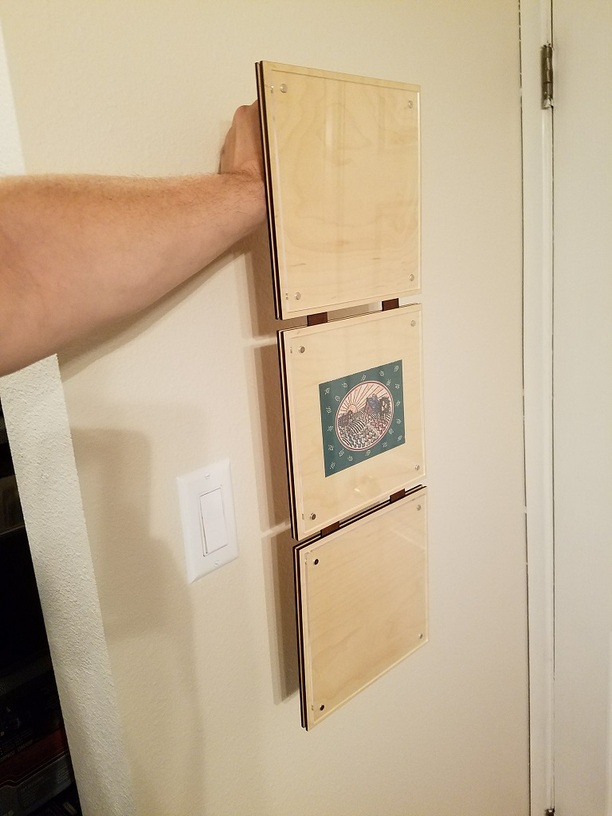
The magnets were also because of function. I wanted her to be able to quickly put in her new favorite photo/s, so this wouldn’t become a static display piece. All you have to do is lay it flat, slide the acrylic off and swap photos.
She really loved it and was showing it off to everyone in the office. I asked her if she could send me a picture once she has it in use. Now everyone wants me to make them something.
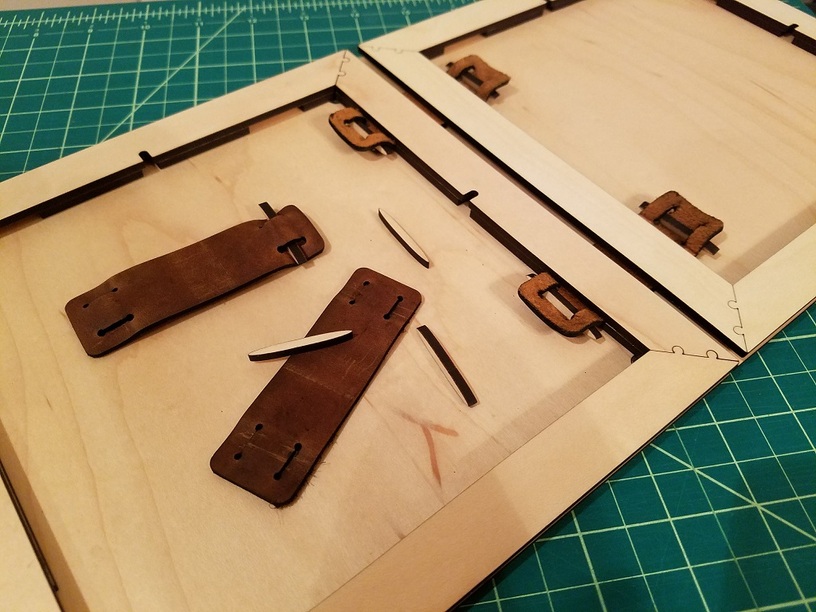
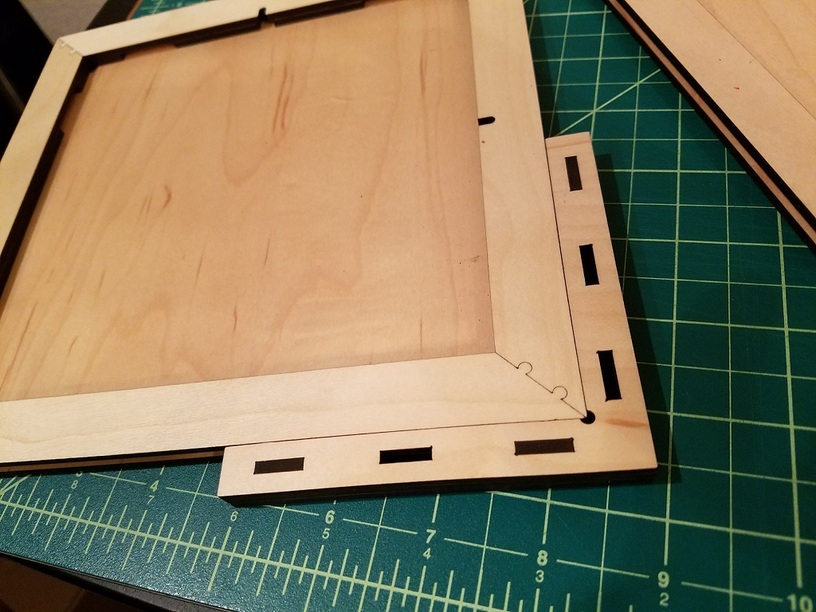
I kinda stole that design from one of the picture frames in the catalog. I was going with a different joint but when I saw that one I liked it better, and it is really secure. When I snap fit it together the whole back felt like one piece. I actually didn’t even glue it, there is glue between the layers and I felt that some would seep into the joint to secure it, so it would probably be adequate for this application.
She was very interested in the process, I did show her the photos. She couldn’t believe at first that it was something someone could just make at home, thinking I went way over budget and bought it from some boutique store. The proofgrade materials are a big factor in that finished look with minimal effort.