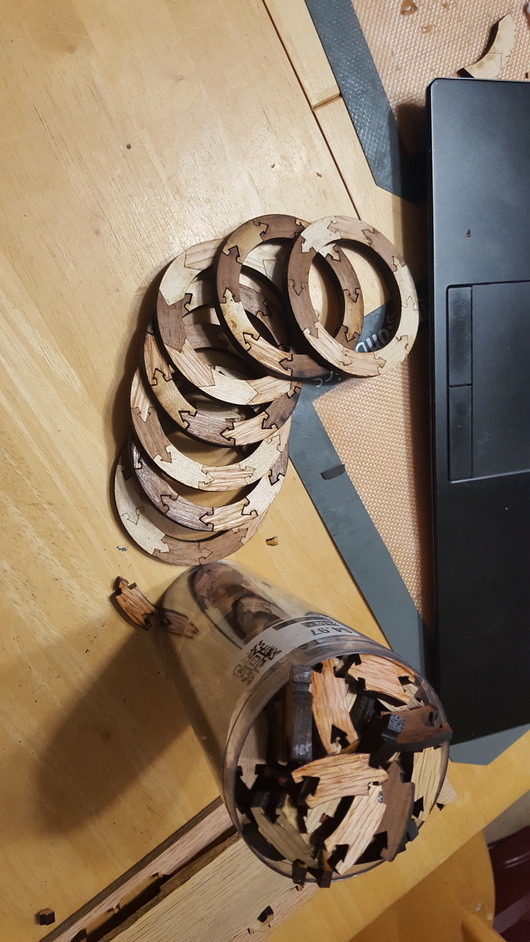
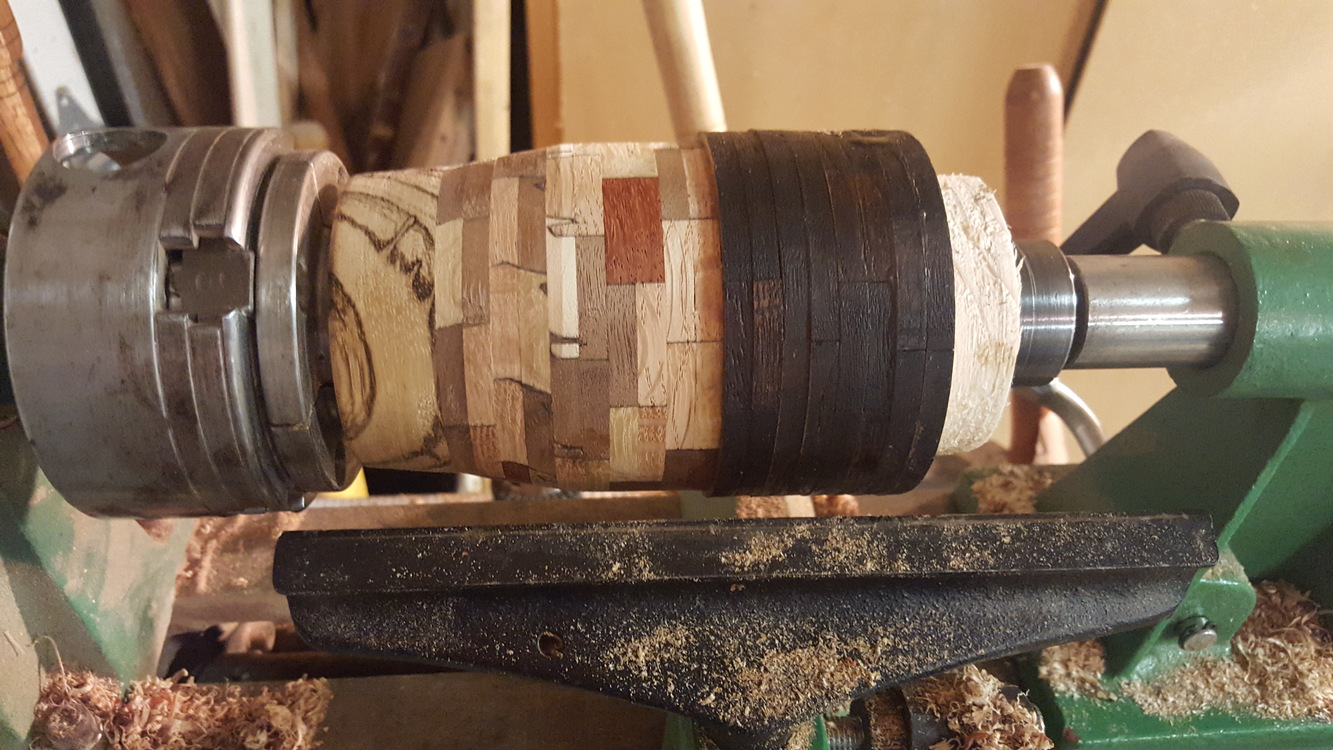
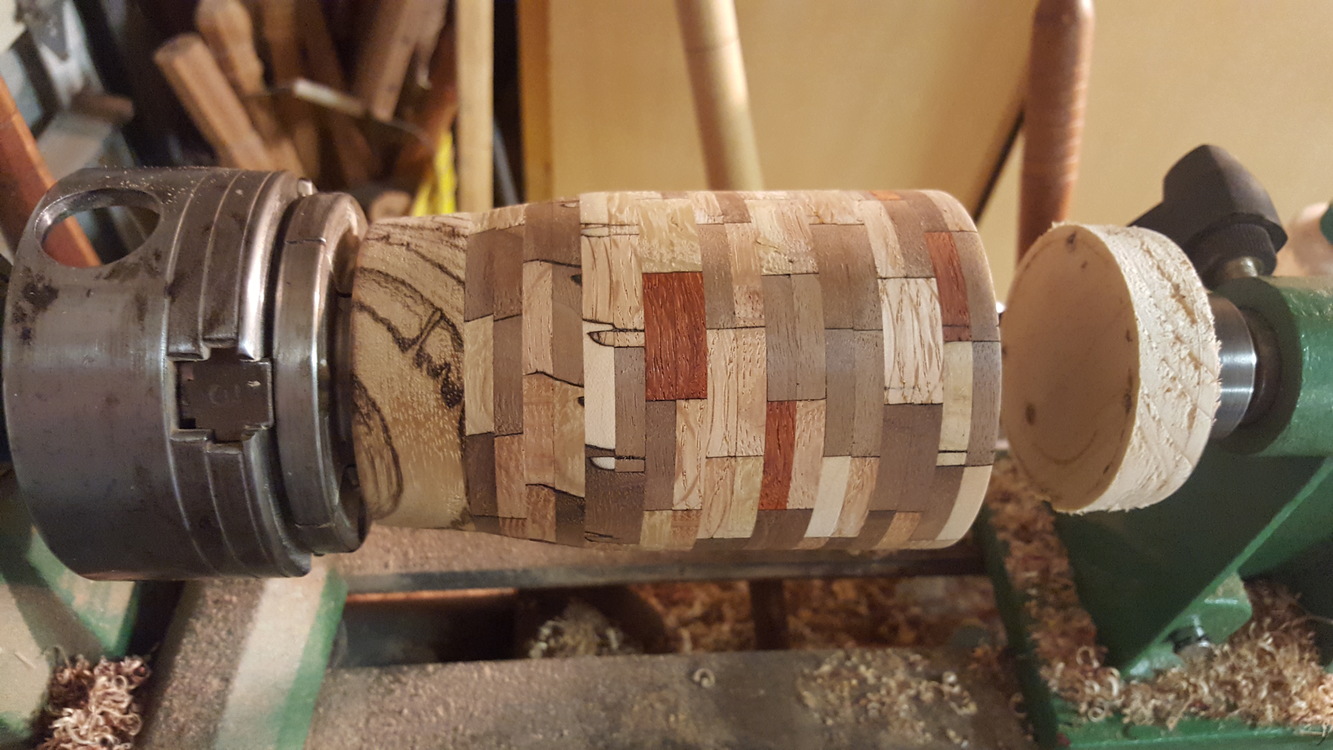
I do a lot of wood work, and I am quickly integrating the Glowforge into my workflow. While I am sure I will still do some of these segments by hand, the work saved by having the Glowforge cut these for me is incredible. My usual process involves a long peice of my wood of choice and a miter saw, cutting each segment at the proper length and angle to get the right ring dimensions, sanding the joining parts, gluing half a ring together, sanding, gluing… its a long process. with these segments they have perfect angles and press fit together, no sanding required. I simply put a bit of wood glue on the arrow head and using a rubber mallet, press fit it to the next segment. The front arrow is slightly larger than the rear to take in account laser kerf. Glue and stack the rings as I turn to my desired thickness and smooth it out.
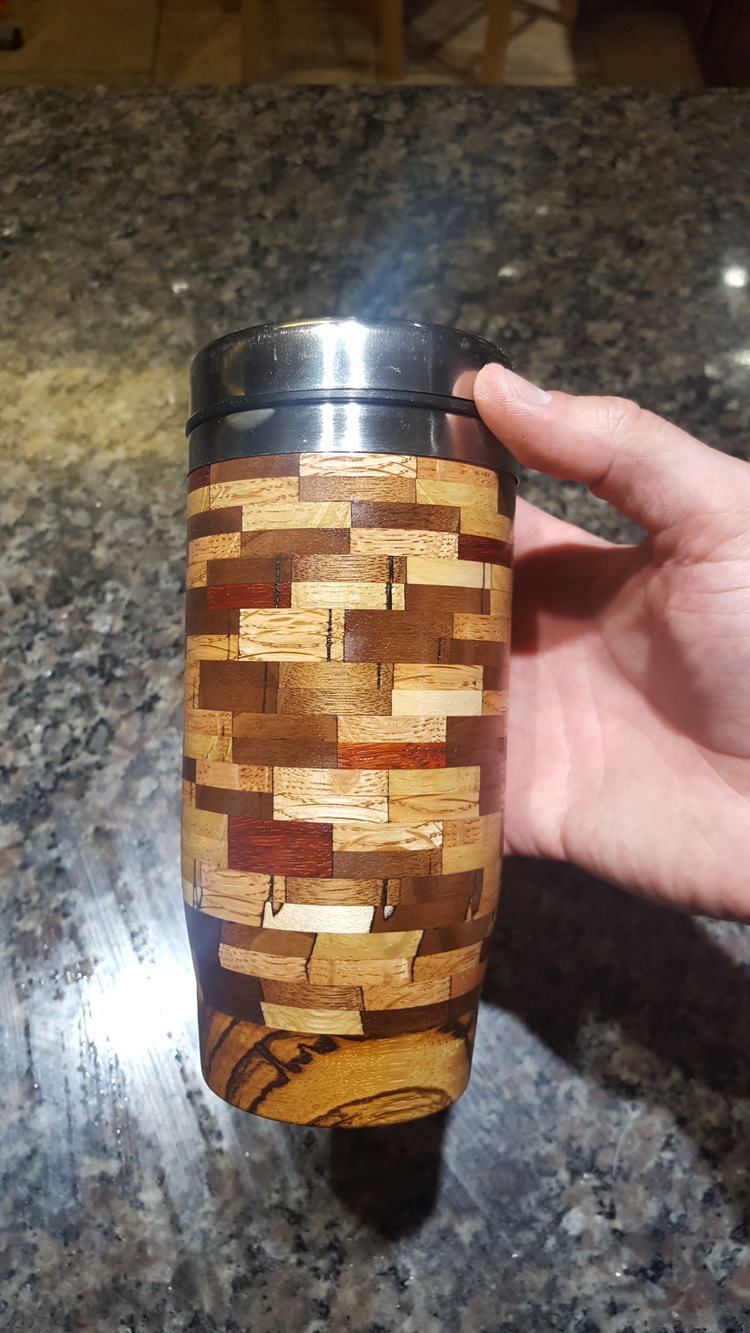
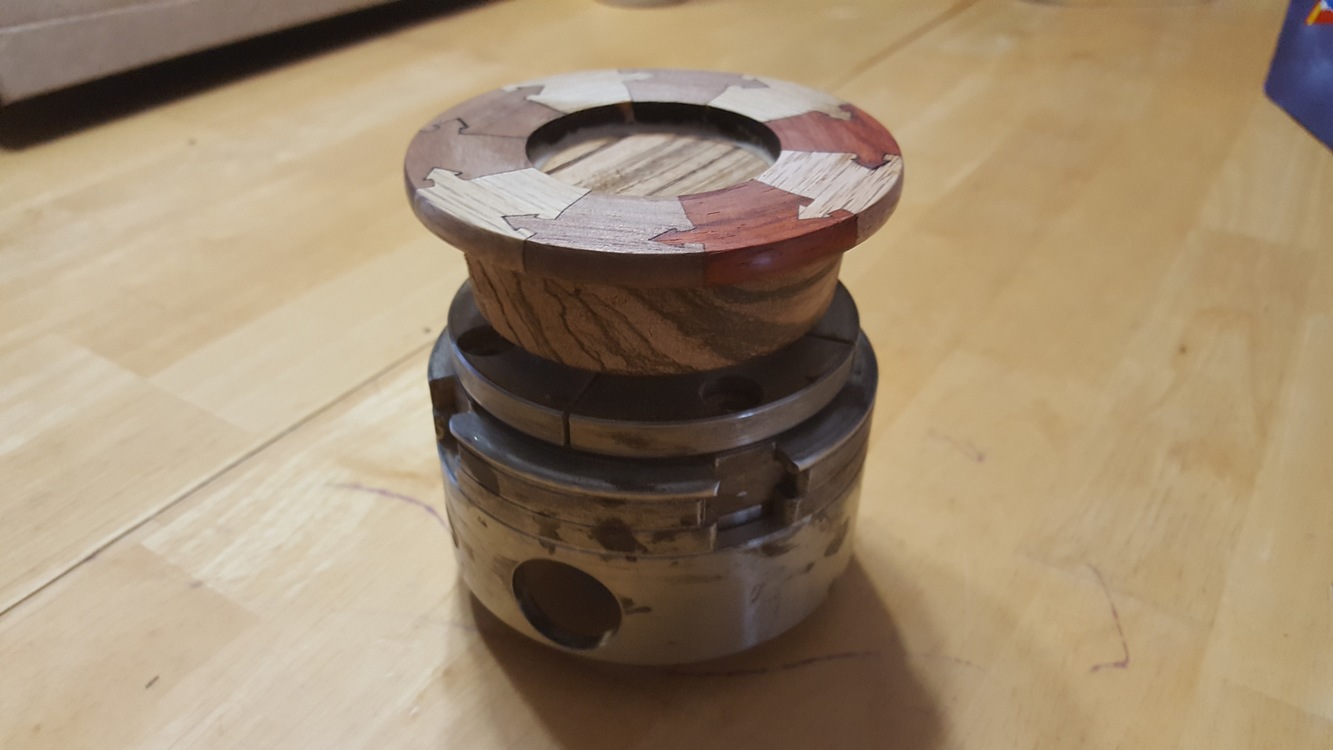
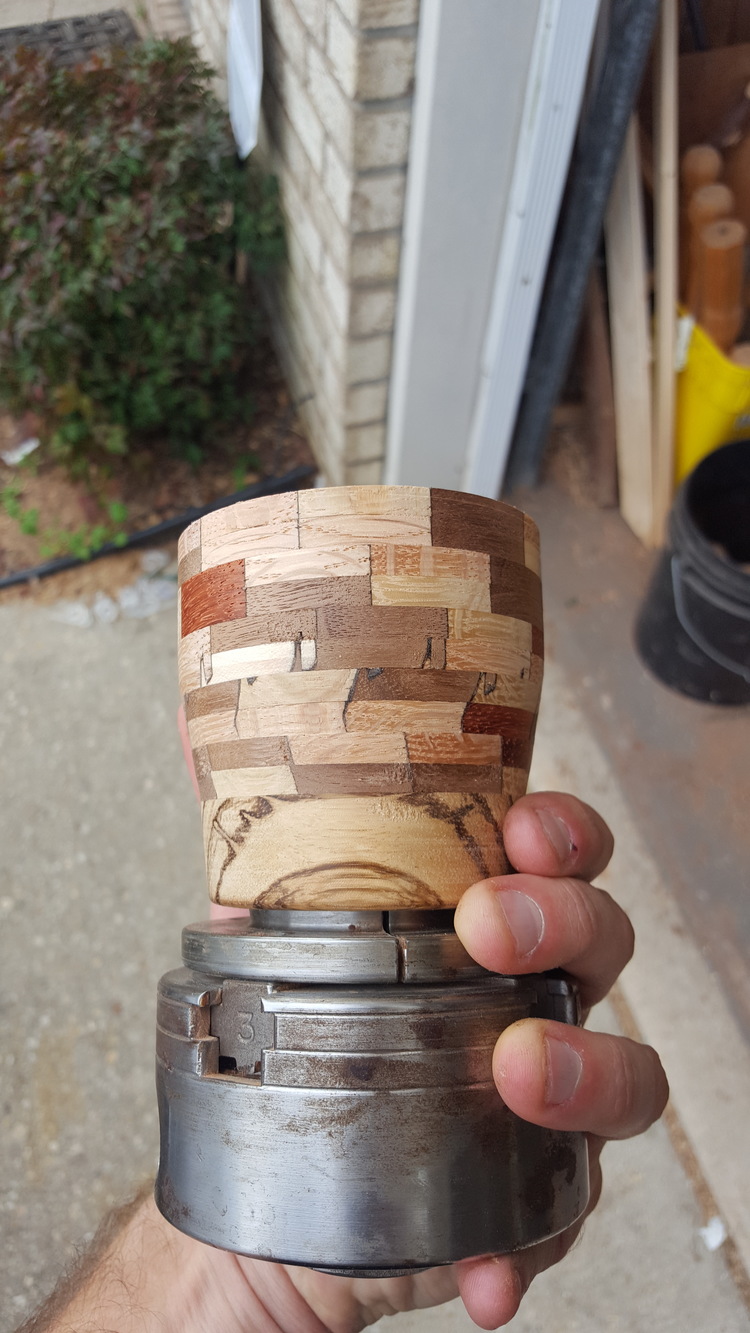
This particular travel tumbler is a random pattern made up of white oak, red oak, poplar, walnut, Padauk, and zebra wood and the segments were randomly put together. While I am actually not a fan of random, a lot of people seem to like this type of design. I prefer structure and repeating patterns and that is what I will probably do for my next design.
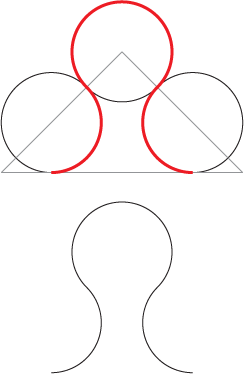
Just one totally unsolicited suggestion. I have noticed in my own stuff that the glowforge doesn’t like sharp corners. That is, for a sharp corner, the laser has to slow to a complete stop, pause, then accelerate off in the new direction. This seems to take time and leave a hotspot. I was using arrow-shaped tabs like yours for a project of my own when I noticed this. So I replaced the corners with the following shape of a puzzle piece tab. It accomplishes the same thing, but has no sharp corners so the laser can smoothly zip around without having to come to a stop. It is simply three circles at 45º to each other, simple to construct and quick to laser.
Another unsolicited suggestion, and me being me, probably totally crazy, but here goes.
If you started with a suitably shaped sloping layer, could you build the blank with a continual spiral climb, so there would be no separate layers ?
Then finish with another sloping layer , igloo like, I believe.
That is kinda how I had my pieces originally… my problem was getting a perfect fit. With the laser kerf, if i do not size the key piece perfectly, going into the keyhole there is a lot of play ( always a gap on the sides of the circle or on the front), but with arrows even if the are not a perfect fit when they press together there is no gap. through my tests, it was a lot easier to account for kerf size when things are straight lines vs curves
These were 2 other designs I tried. The simple triangle was definite the best fit of all my designs, but i did still have to clamp everything together (but the alignment was taken car of) vs just press fitting them together and forgetting about it. the circle design was like iteration 20 and while it was the best fit of my other circle designs, once i went to the arrow head i was able to account for kerf easier and remove all gap.
I was just thinking that if you followed the principle that they use when building igloos, you wouldn’t be making a series of discrete rings, which you then need to clamp together.
So if you had 8 segments in one ring, you would need the first to be feathered down to nothing at one end, rising to 1/8th thickness at its other end. The second is 1/8th rising to 1/4, and so on, so that by the time the circle is complete, the 9th piece is the first to be the full depth, but lays on top of the first one.
Continue till you reach the last ring, this time reversing the slope by cutting off the top surface.
The start and finish might be more easily accomplished by cutting a single piece to the required shape, but I’ve no idea what might be the easiest way to do that.
Unless you turned the first ring, then split it,; wedged it with one end offset by its thickness, and sanded it flat on one face. Take the ‘wedge’ or whatever out, and allow it to spring back to the spiral ramp that you need.
It might also be possible to just wrap your segments in a spiral around a tube, but the slight error in the mating of the faces might not be acceptable, unless to cut the pieces to allow for it.
I think I ought to go to bed.
First - I generally like structure and pattern as well but this random is really nice. My questions are: how thick are these pieces? Did you mask them, did it take forever to get the settings right so they cut through, did you make them symmetrical so you could flip them, did the different densities of the wood play havoc with settings thus varying the kerf- hmmmm that’s it for now.
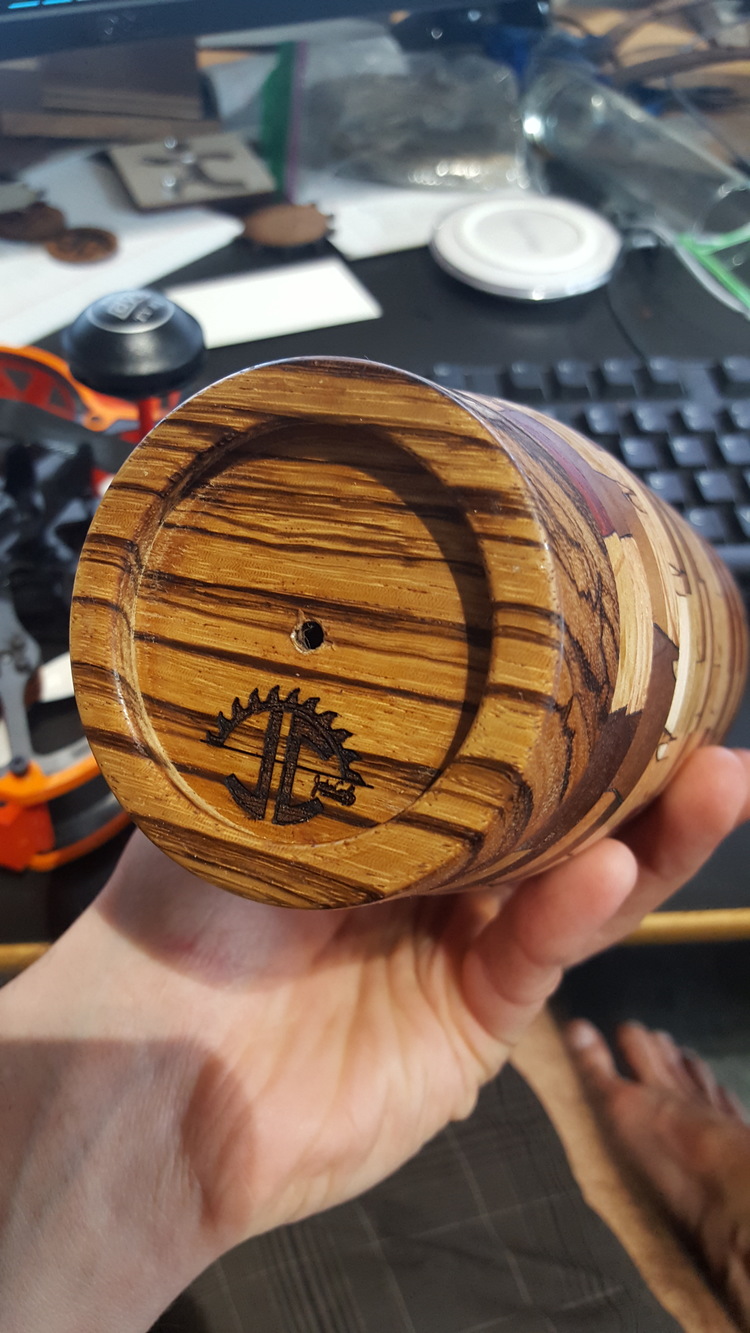
These pieces are .25 inches thick. I planed down all the wood I was going to use at the same time to make sure everything was the same thickness to prevent me from having to sand the rings much after assembly. I did not mask them at all, and it didn’t take long to get the settings right. Luckily for these woods, a speed of 130, power full, and focus at .2 worked for all of them. I am not sure what you mean by them being symmetrical, but I have the patterns in the first post if you want to look at them. And thank you
Can I ask where you source all your wood? My father in law makes christmas ornaments and this process could save him boatloads of time. I’d love to surprise him with some pieces.
I did see where someone had sticks of raw wood that he ran through a table saw and then a planer so they were all the same thickness and went on to make a bowl. However if you had just the planed sticks and cut the shapes in the Glowforge the result would be similar to wrapping the stick in a tight circle to make the piece with any spalting being continuous.