This post will mainly be focused on all the items I use for setting up fabric in the glowforge for engraving. I will go over the items I use to setup with fabric and then give some example setup photos. Keep in mind that this post is in the Tips and Tricks section and therefore, can not include any non proofgrade settings. There is not a single item being printed on in this post that I have not already posted settings for and links to in BOTM.
Whenever I use fabric in the glowforge I do not use my crumb tray and instead, use a magnetic whiteboard and risers. This past post goes over that: My Glowforge Setup
Here is a list of things I use in addition to the whiteboard setup. At the end of the list is some example photos showing how I use the items:
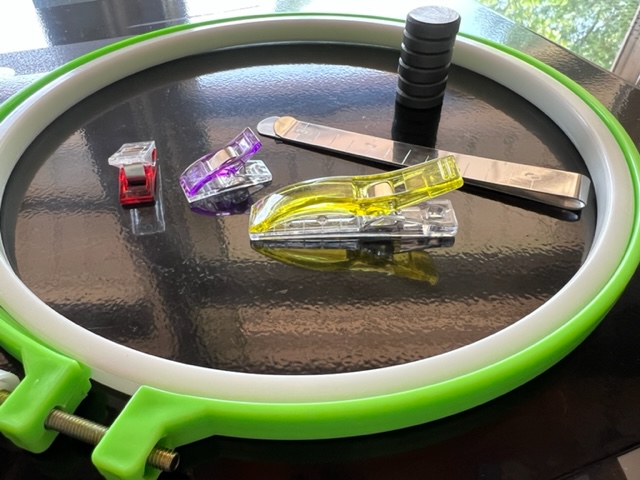
magnetic whiteboard
I have a few of these and love it. Sometimes I engrave designs that expand past the fabric and so I engrave the whiteboard. It is fine. The settings are low when engraving fabric and metal dissipates heat quickly.
These are really useful for securing fabric to itself on the underside of the whiteboard because they are very low profile and low cost. You won’t have any issues with them being too thick to use and causing the whiteboard to sit too high.
These are very useful for making sections of the fabric flat.
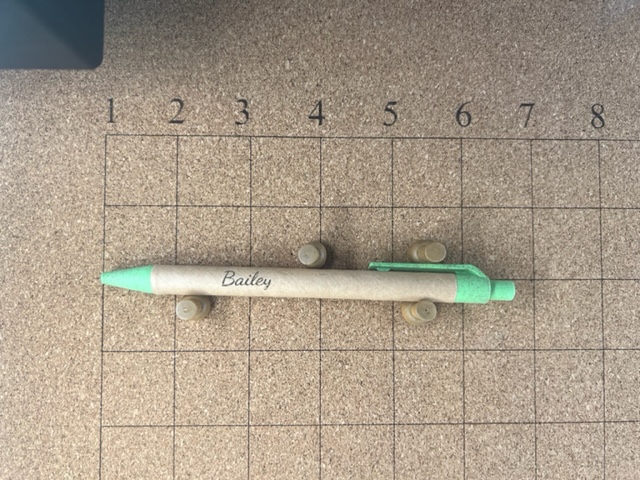
I love these pens for pattern drafting because you can write on the fabric and then it disappears when you iron it. They are also useful for marking a layout for your engraving before you engrave it so you can make sure your designs will fit in the spots you want. I know some use tailor chalk for drafting but I love the pens. The pens do die fast/dry out easily though.
This is helpful for getting more troublesome layers to stick to itself and be flat. Mainly for when doing sleeves. You can put this tape between the two layers of the sleeve so they stick to each other. I do not iron it after because you want to be able to easily remove it. If your fabric is being difficult and you need some extra stickiness from the tape then I have used a hair dryer just to quickly add a little heat and get the tape to be more sticky. Just don’t over do it. Also, keep in mind this post is only focused on engraving fabric.
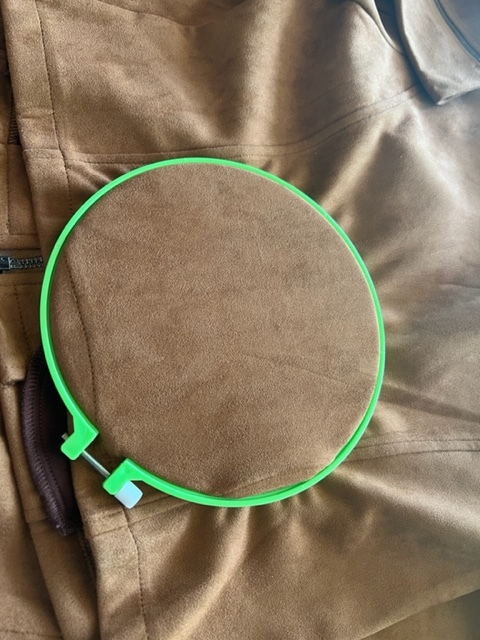
You have seen in posts before that sometimes I use an embroidery hoop to help keep fabric nice and taut. I like the neon ones because they also stand out in the app and are helpful if you are engraving a darker colored fabric against a dark background (i.e. crumb tray or black whiteboard).
Interfacing
I use interfacing at times if I am needing to stabilize the fabric. There are many types of interfacing and stabilizers. Research into whatever you use though.
Magnets
I use ceramic magnets a lot in my setups. If you are going to use magnets then make sure and research into them on the forums. There are plenty of great posts about them that are just a search click away.
Cork board and Pins
Sometimes I pin fabric to a cork board for use in the glowforge but that is only if I am wanting to use a grid type setup.
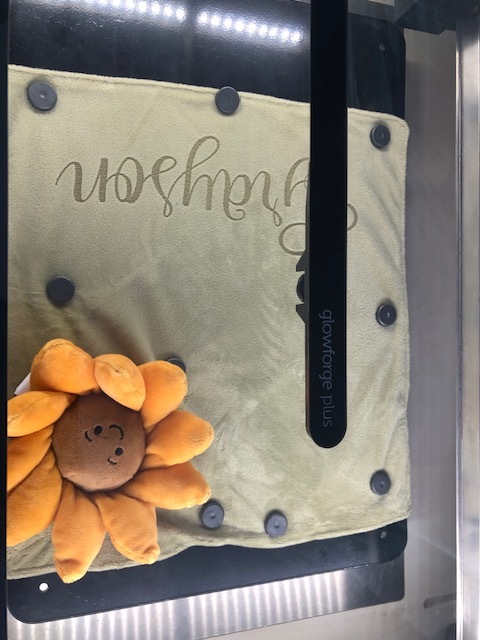
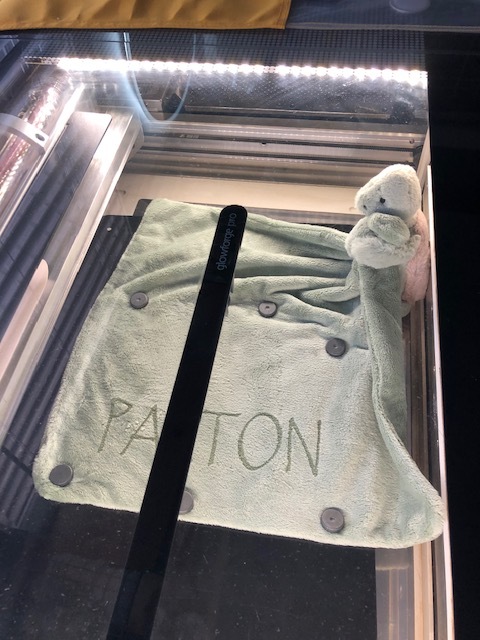
Example photos
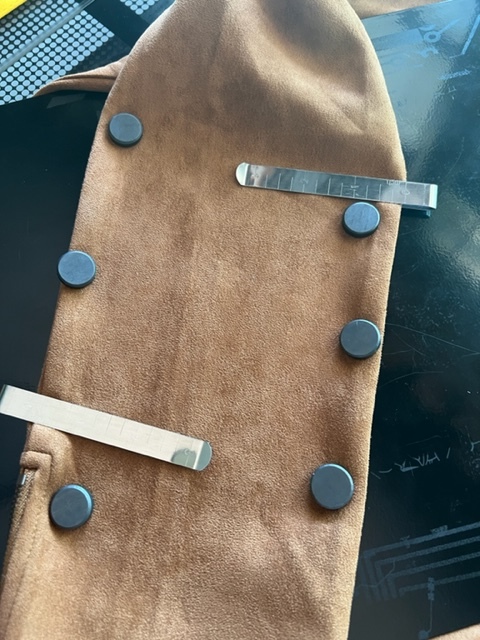
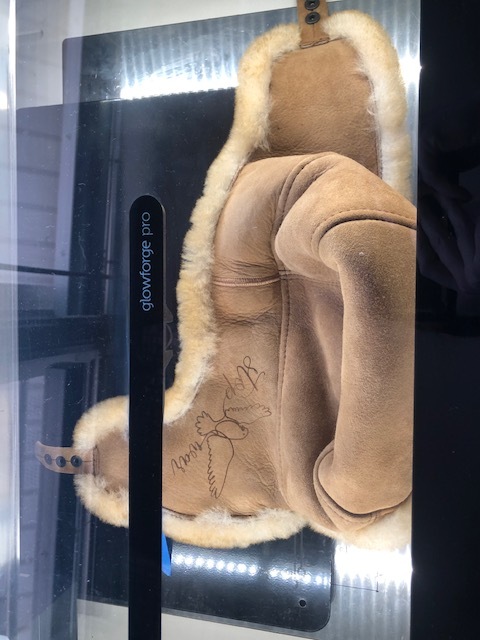
Jacket wrapped around whiteboard
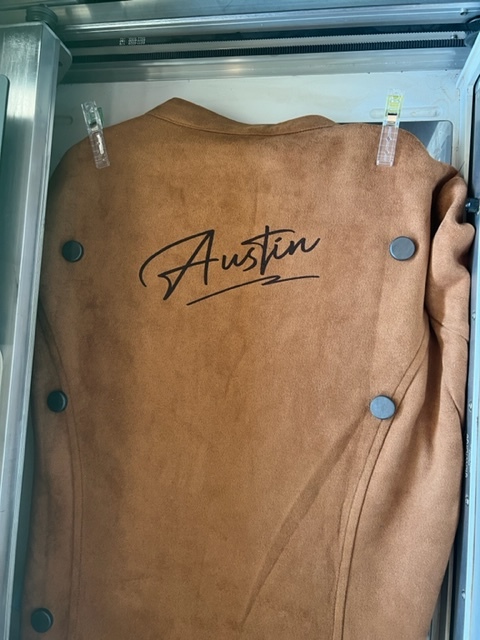
I am going to start off with what often is seen in my photos, which is the top side of the glowforge bed. However, the underside of the whiteboard is where the real focus of setup is. I do not just shove the edging of the fabric under the whiteboard. I actually use the sewing clips to nicely pin the fabric together:

In this photo I have the jacket zipped up with the whiteboard between the front and back layer of the jacket. I then use the jumbo clips at the shoulder to help secure the jacket to the whiteboard. The smaller sewing clips and hemming clips are then used hold the sleeves together.
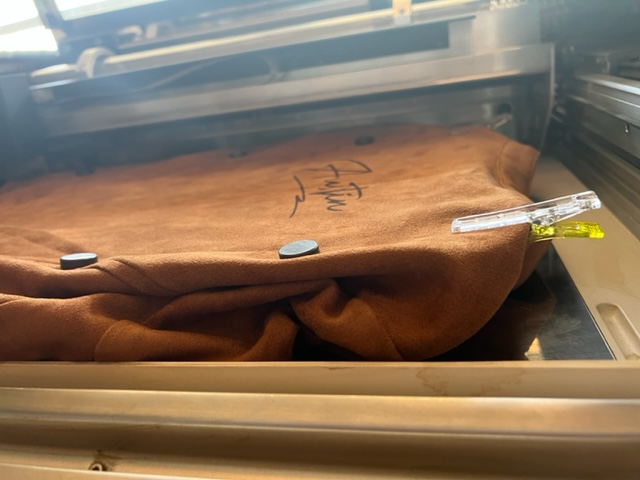
With this nicely folded and secured setup, I do not have any issues when it comes time to move the jacket into the bed and place the risers under the edges of the whiteboard to life it to the needed height. Everything stays in place and I don’t have to fight with shoving fabric. I then place the magnets on top of the whiteboard so that the fabric stays nice and flat as the assist fan blows over it (if its not flat then it will start lifting in sections and mess up the engraving).
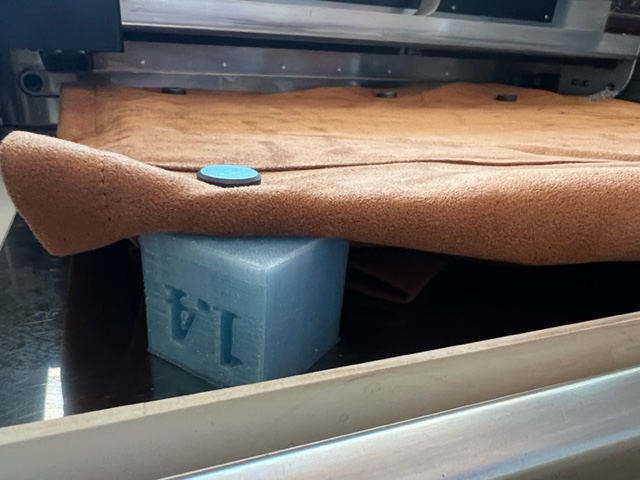
Sleeve example
For the sleeves I mainly use the hemming clips to get the segment of the sleeve flat. I then organize the rest of the jacket under the whiteboard. Getting the setup of the rest of the jacket under the board is a bit tricky and just takes time pinning and working with the jacket. Okay, in all honesty nowadays I just use the magnet passthrough hack with sleeves and have the rest of the jacket being held up by a music stand sitting in front of the GF. But that is just because its a little quicker and I am comfortable with it. Whatever you end up doing, just be smart about it
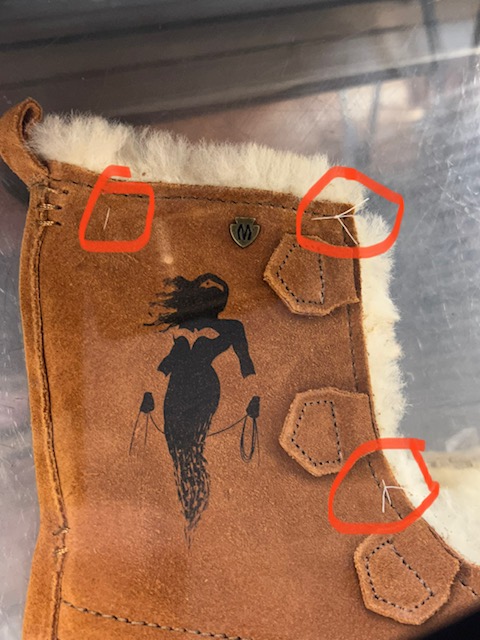
Stitching together layers
How I do these boots is but using a needle and thread and adding a few stitched that close together the shaft of the boot
Other random photo setups
^^ this one is not of fabric but just the only photo I had at the time with the cork and pin setup.
Verify the path of the print head
One of the final things I wanted to touch on with this post is the value of powering off your GF, set up your item in the bed, and then move the arm and print head over all parts of where it will print to make sure it will clear the path. This is good to do in general but it is also what I do when I want to print on odd shaped items like these below:
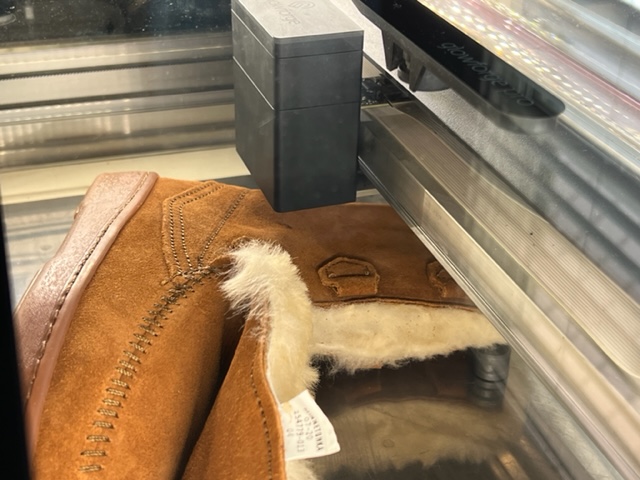
^^^ you will see in this photo there are some magnets under the top of the boot shaft. Those are just to help prop up the top of the shaft so its a flat surface.
I often get asked how I am doing these prints without the print head hitting the item. Simple, I don’t give the print head any reason to…I set up the item, plan out where the design will go, and verify my path. Once again, I only move around the print head and arm when the glowforge is powered off.
Anyways, I know this was a long post but figured it was needed to address the questions I get on setting up in the glowforge. There are plenty of other options out there for setting up fabric in the glowforge (I highly recommend looking at the ones on this community forum). This post is just some tips/tricks I do.