I often get asked about my setup that I use with the glowforge because it is hard to tell in pictures and I realize I have not really explained it well. My setup has been evolving but here it is currently…
Venting
As most folks find out the hard way, if you are venting out a window and leave your GF hose connected when the GF is off, then the GF inline fan will not be running and condensation will quickly get in your machine and make a mess. Therefore, you need a way to be able disconnect your vent when its powered off (although there is an option for not having to do this and I will get into that).
For quick disconnect, I use this: Amazon.com
Others use a blast gate and that is a fine option as well.
The other key thing I use is this dryer vent seal: Amazon.com
This seal works by having a plastic seal that lifts up when air is exiting. When air is not exiting (i.e. the Glowforge is off) then the seal falls back in the center and closes the hole. I have never had issues with condensation and leaving my glowforge connected when off because of this. However, if you plan to have your GF sit for a few days without running (i.e. you are going out of town or just don’t use it for a while) then I would disconnect your vent. In summary, its always best practice to disconnect your vent when the machine is off. But if you forget and you have the dryer seal, then you will still be fine.
Some other venting items:
90 degree elbow for it you need to change the angle to your ducting
Amazon.com
Ducting
Amazon.com
Safety
Fire Blanket
I prefer a fire blanket over an extinguisher. I have it nailed to the wall right next to my GF. If a fire happens then I would quickly lift the lid (which will cause the print head to automatically go home) then I would pull the blanket, throw it in the GF, and close the lid.
I have never had a fire with my machine. Fire usually occurs because of cutting and using masking tape. Whenever I cut, I remove masking (which will mean the edge of your cut might have burn marks) and I then use fast orange wipes to wipe off any burn marks.
Here is the blanket I use: Amazon.com
Safety Glasses
If you are operating class 4 (meaning you either have the shields off your pro or you are bypassing the lid sensors and operating with the front open) then you need laser glasses and should wear them whenever in the room.
GF sells some laser glasses that are nice and clear but I learned the hard way, if you are use to wearing reading glasses and you are using clear laser glasses, then you might go into the class 4 space wearing the wrong ones and not realize it.
Here are the ones I use:
Class 4 sign
If you plan to ever be class 4 with your GF and you have others that live in your house, then it is good to come up with some type of sign you will put up on the GF room door to signal that it is class 4 and anyone entering the space should put on laser glasses. In my house we just use a caution sign and hang it up on the door. Also, if anyone is home when you are class 4 then it is good to make sure and let them know in addition to putting up a sign.
Wall filter
Having a filter is not a requirement for safety but it is a “nice to have”. The fumes from the GF in general are safe (unless you put stupid things in your machine) but sometimes it builds up if you are doing a lot of back to back printing. I have this filter mounted above the GF I use for marble: Amazon.com
The filter is also helpful when I am safely doing risky things such as using magnets to bypass the lid sensor and printing with the front door open.
**CO Detector **
GF safety manual says its good to have a CO detector sitting somewhere around your GF. This is what I have:
Amazon.com
Whiteboard and 3D raisers
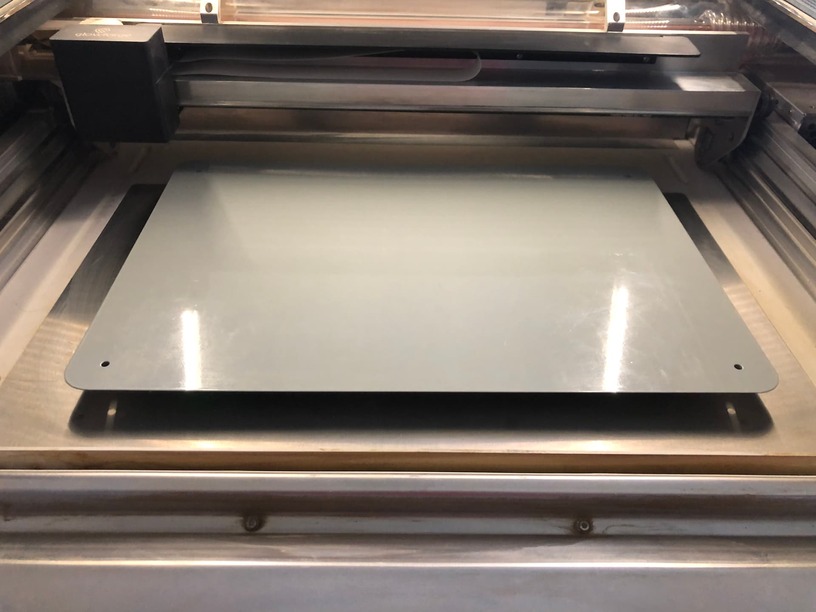
To start, I don’t do much cutting with the glowforge (not big on the much greater risk of fire from cutting as opposed to engraving). I mainly do engraving projects and the projects are usually with items that would not fit in the GF if it has the crumb tray in. Therefore, you will usually see my machine with a white board and 3D printed raisers in the bed.
Before getting into this too much, here are some things to keep in mind:
-
This is a setup I have built around my specific uses of the machine. I might not have the same uses as someone else but maybe these concepts can be expanded on to better fit other uses if that is what someone wants to do.
-
I use 3D printed parts often and I will post the files for others to 3D print if they want. If anyone wants to 3D print them and sell them, go for it.
-
I use ceramic magnets for parts of the jigs. I have done a lot of research on the forums on magnets and their potential effect with the assist. I take that all into account with the ways I use them. I do advise anyone else wanting to use them should first spend time on the forums looking into the precautions to take with them, if you have not already done so. The forums have a lot of great information on magnets. I specifically do not use neodymium magnets. Every project I have done has been doable with the much less stronger, ceramic magnets.
-
And probably most importantly, whenever I do more elaborate setups in the glowforge, I always set up my jig and item and then, with the glowforge off, I move the laser arm and print head over all parts that will be printed on and make sure the glowforge will clear it. This is one of those sanity checks that you can’t really over do.
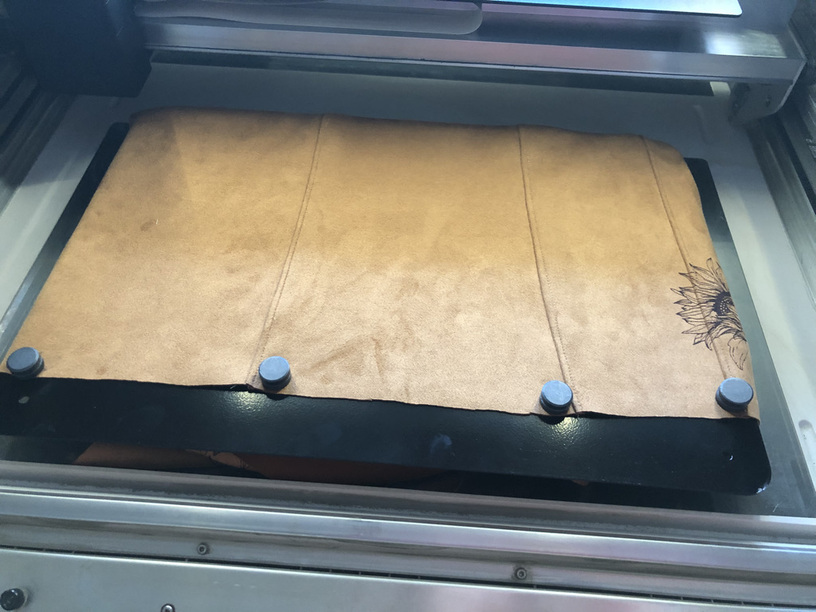
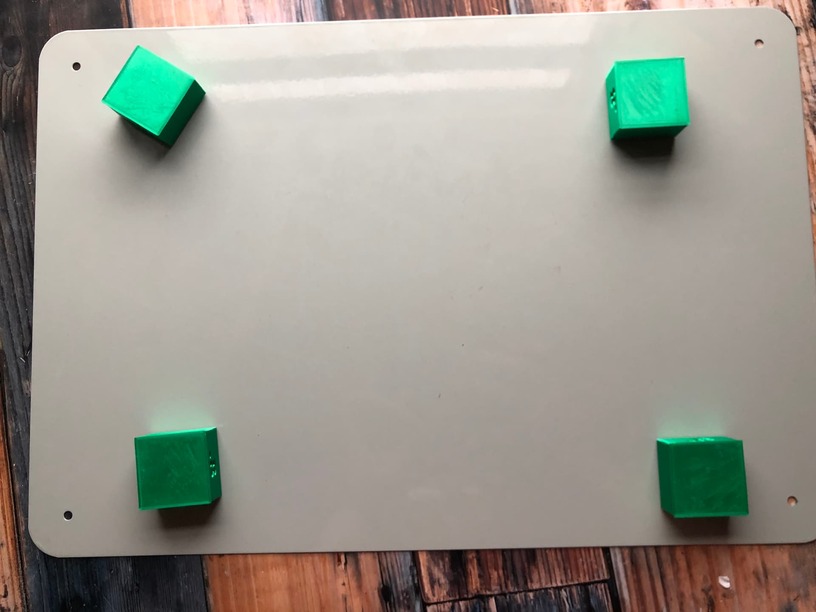
For this jig I use a magnetic whiteboard I picked up off Amazon: Amazon.com
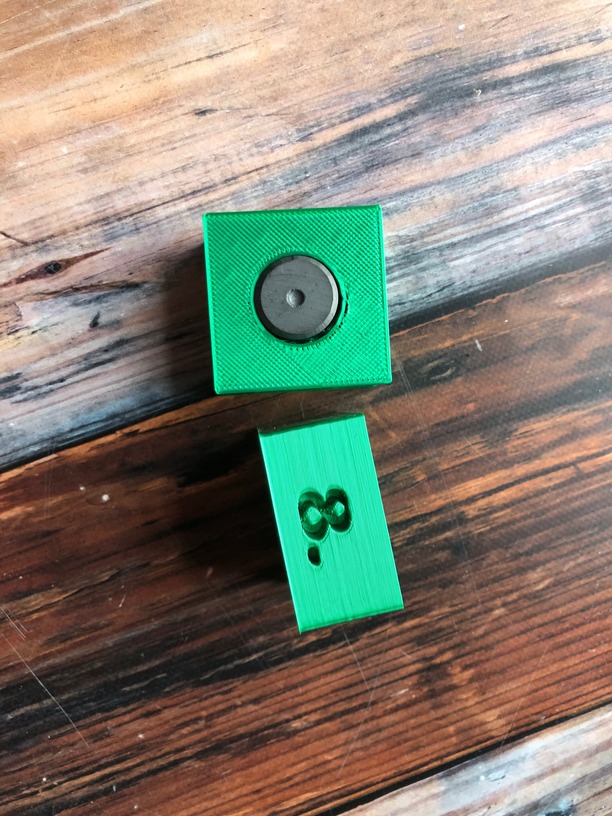
I then have 3D printed blocks of heights .8, 1, 1.2, and 1.4 inches. Each block has a little hole in it where I then glue in a single ceramic magnet. The reason why I don’t have printed blocks for less than .8 is because at that point, I can just use the .2” magnets. But certainly, making smaller ones is doable.
Here is a link to the 3D blocks:
Here are the bed rising blocks:
3D design Glowforge Bed Blocks | Tinkercad
These blocks are then basically little feet that I stick to the whiteboard and now have a board that can easily be lifted to different heights with those 3D printed blocks. The reason why I prefer this design over the ones that have multiple heights to them is because I like the way the magnetic feet hold to the whiteboard and it makes it much more stable. I work with a lot of marble in the glowforge and so I do not want any support rotating on me. Again, that is just my specific use case and the other blocks that have more than one height might work better for others depending on their use.
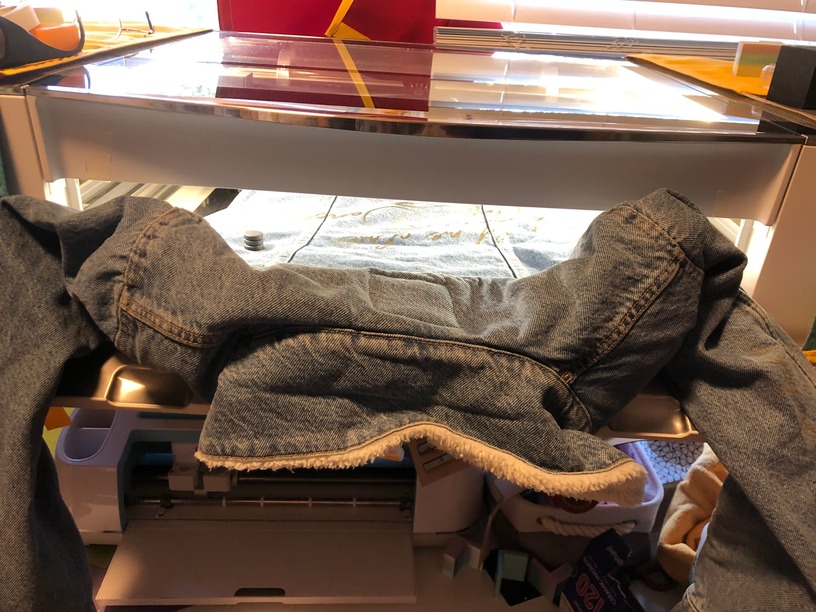
The main application I use this jig with is things like fabric and other items where being able to set a magnet on top of the item would be useful. This is the jig I am using in things such as these:
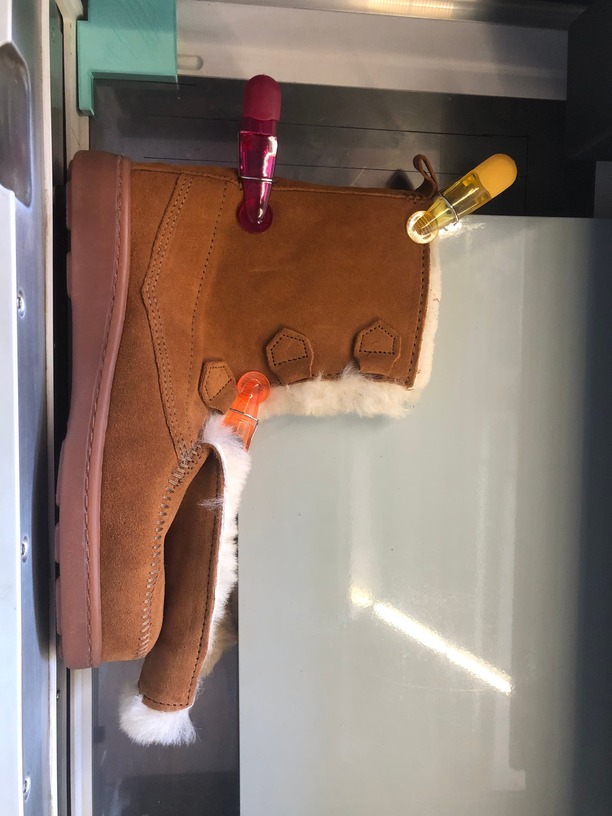

^^^^^ If you do this then seriously, make sure you know what you are doing and are being cautions. I have a strong amount of training in class 4, I use all proper PPE. I even have a wall mounted air filter above the glowforge to act as a fume hood.
Grid Jig
I have posted a few non 3D printed jig options to be able to reinsert an item back to its spot in the glowforge. I use a 3D printed one because it does offer a bit better of an option because it will not move around on you the same way the lego option would. This is the lineup jig I currently use and it is my favorite for now:
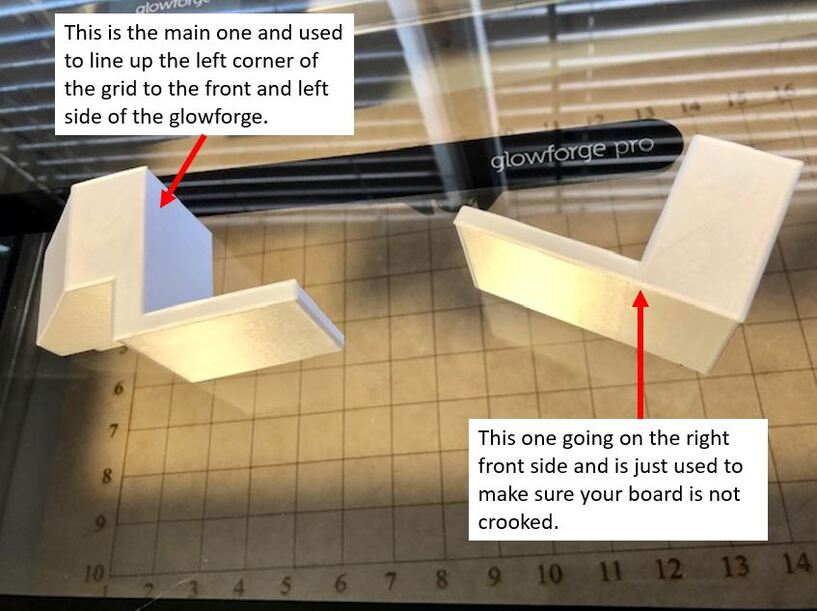
Here is the link to the grid lineup jig:
Login | Tinkercad
It also was behind this setup that allowed me to knock out an order of 20 wine trays and doing 2 at a time:
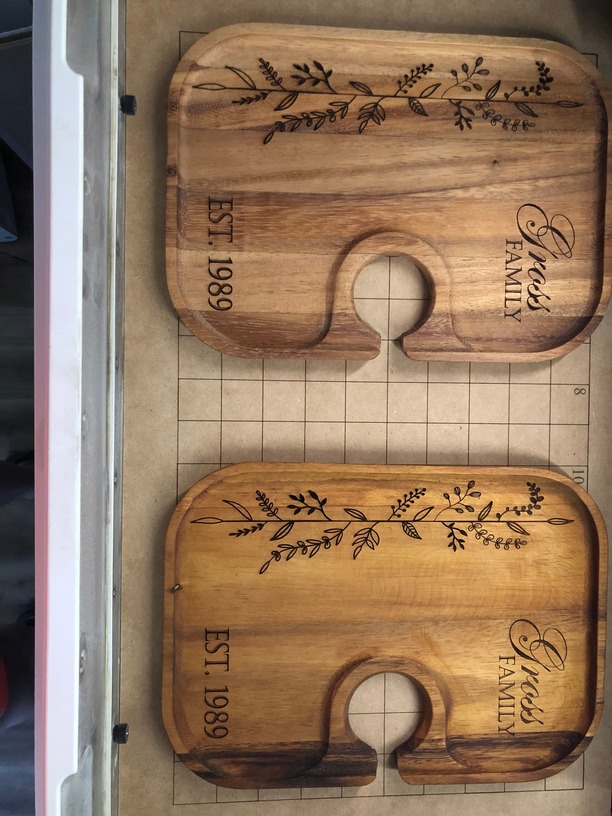
These projects are all using the same printed grid and 3D parts. I have also use the set up to do things like batches of hangers, rolling pins, cork screws, spoons, just to start.
I have done various version of jigs to lineup in the bed of the glowforge but my current favorite one are these ones:
I just finished up a v3 of a no crumb tray line up that better fits with the foot space and it does not touch the front of the glowforge. Therefore it has the same number of points of contacts with the frame of the glowforge that the crumb tray has. This piece allows for lining up from the front left edge of the crumb tray and the then not having the crumb tray. I will do an updated explanation on how to use that hopefully this weekend but it has been spot on so far, no matter the height I have my magnetic tray at (and the item still within the needed range of the print head).
I am not sure if this explains better what shows up in my photos of prints but hopefully it makes sense.
Tie Down Mat
I already had this as its own post but I am linking it here as well: Tie Down Mat