Settings for Rayzist LazerMask

I spent the afternoon playing with my Rayzist LazerMask samples. It was tough to figure out the best Glowforge settings but I eventually got something good.

This is a neat material and you should check it out if you like glass etching. It is a game changer if you are used to vinyl sticker masks. The caveat, of course, is that the item you are etching must fit into your Glowforge, so vinyl cutter sticker masks still have their place for bigger items.

tl;dr

  • Create a black raster image
  • Engrave with “Vary Power”
  • Speed 1700, Power 100, LPI 450
  • Focus at actual material height, no tricks

More info

The balancing act is getting enough power down to make a nice clean engrave with a sharp edge, while avoiding these problems:

  • Applying too much power to the glass, so you get an uneven fractured top layer. This will make an uneven result when sandblasting.
  • Overcooking the mask material, which makes the image a little bigger than the artwork, and obscures details

My overall results were very good but if you have super fine details… like the points on tiny stars… they can still get lost. There just isn’t enough power delivered at the sharp point of the star unless the power is too high for the wide open areas of the design. No LPI/power/speed combo I tried could make this perfect. You can see the points are rounded on most of the stars in this test matrix.

But, those stars are 4 mm across, so it still looks great unless you get out a loupe.

Here the points on the stars are pretty good, but the body of the stars are overcooked. After sandblasting, the appearance was uneven because the laser made some of the top layer of glass loose… But not all of it.

image

After hours of messing around figuring out the technique… This took about 10 minutes to make… 5 minutes engraving, and 5 minutes sandblasting. (Test item is for a friend’s band.)

What you cannot see is the mask material sticks really well and holds up to blasting great. You can get enough relief to feel with your fingernail. If I had a better blaster, I could probably carve enough relief to see.

17 Likes

Why is raster important?

If you’re doing such high lpi you’d think vector might be better?

2 Likes

Thank for the info.

Vector engraves are slower so I decided to go raster this time. I think the material limits the possible resolution more than the Glowforge, but next time I am playing with this stuff I might give it a shot.

1 Like

Not sure why you would say that.

There is absolutely no difference when using the same settings.

2 Likes

Thanks for the write up on your process! Can’t say if vector is slower than raster – I engrave nearly only vectors. With a laser that engraves fairly slow to begin with, is there that much difference? I wonder if the LPI setting is different by default for vector v. raster?

Vector engraves have lesser maximum speed than raster, don’t they? If this was vector artwork I don’t think I could engrave it at speed 1700.

1 Like

That might be true. I’ve never used more than 1000 speed on my pro.

You likely know all this stuff but:

Tt some point depending on your design (designs that are taller than they are wide generally) it might be a longer job to go that fast due to acceleration effects. Did you ever do any “dry runs” at different speeds to see what’s the shortest job time? It’s really hard to optimize an engrave for fastest execution time.

1 Like

Yeah, I know what you mean. I didn’t test carefully here but my perception is that this is overall faster than I would have gotten using my usual method, which is lower power, lower speed.

At speed 1700 the work area is slightly reduced but still probably big enough for a jig of 20 glasses.

3 Likes

Yeah, probably not worth a whole lot of testing unless you’re making hundreds these things.

1 Like

Today I did a run of a dozen shot glasses with LazerMask and it went very well. I wanted to post some more tips and a little video clip of the etching process.

When the Glowforge zaps the LazerMask, it will mark the glass underneath a little bit – I cannot find a setting that vaporizes the mask cleanly while leaving the glass untouched. But, that is OK, because the etching process will even everything out.

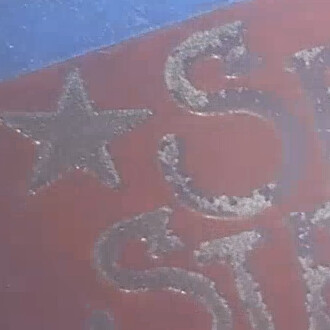
Here is what it looks like. You can see bright flecks of glass get blown away by the etching tool. That’s the top layer of glass, that was damaged by the laser, getting removed by the abrasive spray. Make sure you get all of it, and you will be left with a nice even white etch from the abrasive.

I am working at 45 PSI here with a cheap airbrush compressor and an Air Eraser, in a homemade blast cabinet. The LazerMask holds up great to the abuse. You can etch a shot glass like this with one minute of blasting time, but if you want to refill the blaster and keep going, you will get a deeper carve and the LazerMask will still hold up. Then, drop the glasses in warm water for a few minutes and all the LazerMask and tape releases cleanly.

Because the engraving process micro-fractures the top layer of glass, I do not think you can use etching cream with LazerMask. The etching chemical won’t get down under the fracture layer. The mask also softens in water readily.

This is a really good process. The hardest part is aligning the artwork in the Glowforge.

Here is a pic for the non video watchers, and the video is below.

image

3 Likes

Thanks for this info.

1 Like