I see it now. It’s some strange node that doesn’t look connected. I forget to use outline mode to see these things. Good catch.
1 Like
Also, your artboard size is 24 x 12, too large for the GFUI. Try cutting it down to 20 x 12.
2 Likes
And if you release the compound path, you’ll see that the red cut line consists of many open paths rather than a continuous line. Shouldn’t affect it cutting in the GFui though. Somebody remind me, do we avoid compound paths in the GFui?
1 Like
HAHA I found the points that @cynd11 is talking about. I ran a test of the file and I circled the hotspots the laser leaves at the ends of the broken line segments.
I also found that oval, the GFUI read it as a third operation.
4 Likes
It’s second nature for me to check the outline mode, having run vinyl cutters and other 2D CNC machines for years. Those machines dont care about self-intersecting stuff but just to avoid a blade or tool from gouging a hole it’s worth the look. The GFUI seems to be sensitive to some of those things for engraving functions.
1 Like
That’s a great point to make about closing up line segments that you are scoring. The Glowforge will start and stop and add a slight more power there in the instant so watch the needless nodes and connecting them, don’t just butt them together.
Agree that the best course of action is to close line segments.
Question about the hot spots though - is this the same as the overburn in corners? As far as I understand, they should be able to reduce/remove the corner overburn by accounting for actual speed in power output via a future software update. Should this go away with that fix as well?
These hot spots along the line segments are actual start/stop points for the laser. The laser head physically moved to a completely different line segment, then came back and finished the one it was cutting before, because the nodes were not joined together, and when cutting something delicate like paper those start/stop points really show up.
It’s similar to an overburn in corners in that the energy hitting the material effectively increases in that split instant before the head actually starts moving. In theory they could ramp the laser power at the start and end but I’m not gonna pretend to know how to do that reliably and repeatably for all materials types and thicknesses out there.
Like I said it shows up on paper but I have not seen it in acrylic nor engraving/scoring anodized aluminum. I havent done a whole lot of wood product but I imagine it would show to some extent there as well.
2 Likes
I’m currently using Inkscape, as I don’t have funds to purchase CorelDRAW or Illustrator. I removed the color from the path in the blue section then did a “union” of each color section. I’m not seeing any layers with the extra cut info you guys are talking about, but I will copy each section (red and blue) out to a new SVG and test it this evening.
1 Like
Inkscape is more than capable. I’m more used to Illustrator and CorelDRAW after 20+ years using them but right now I’m not earning income from design so I’m using Inkscape and Affinity Designer. Both are good in my book, just the usual interface differences between programs to deal with, nothing big.
1 Like
I had some very interesting experiences with trying to engrave unclosed paths. the processing software in the cloud does its best to close them and engrave that, but no. That’s just not what the code is designed for, and bad things will happen. Luckily inkscape has a tool for joining nodes when you need to. And for score, similarly. Any place where a path ends you’ll get a start/stop with potentially bad effects.
Thank you so much for the details. I’m looking into it now. As soon as I have more information I’ll update this thread.
I use Inkscape primarily for my design work. It is certainly a capable program for almost anything you need.
There are still issues with the second file you posted. I’m curious as to what you mean by “union”. That’s generally a boolean operation and really isn’t needed. You would need to join a few unconnected nodes those.
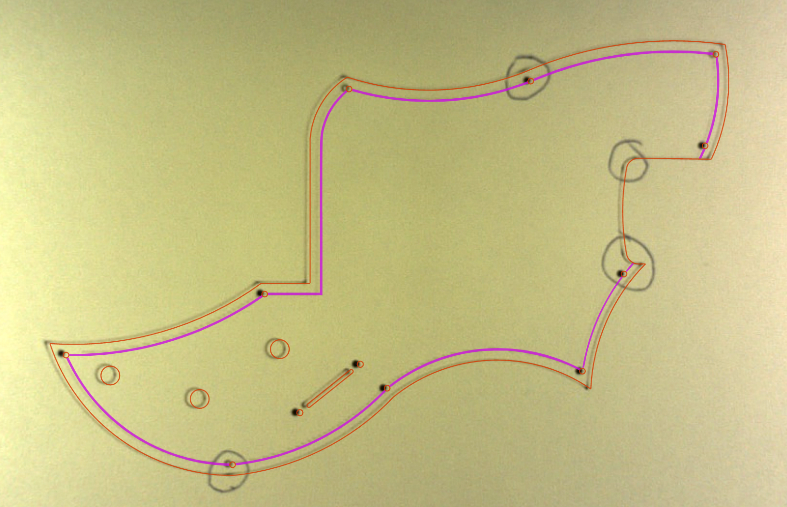
First, here is where that stray object is above your drawing on the artboard:
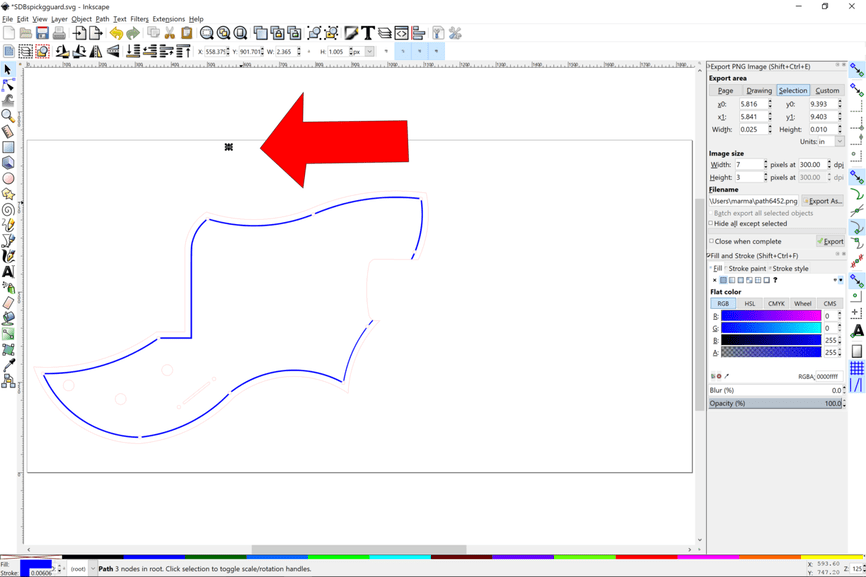
It’s very small. The red arrow is pointing to it and I have it selected.
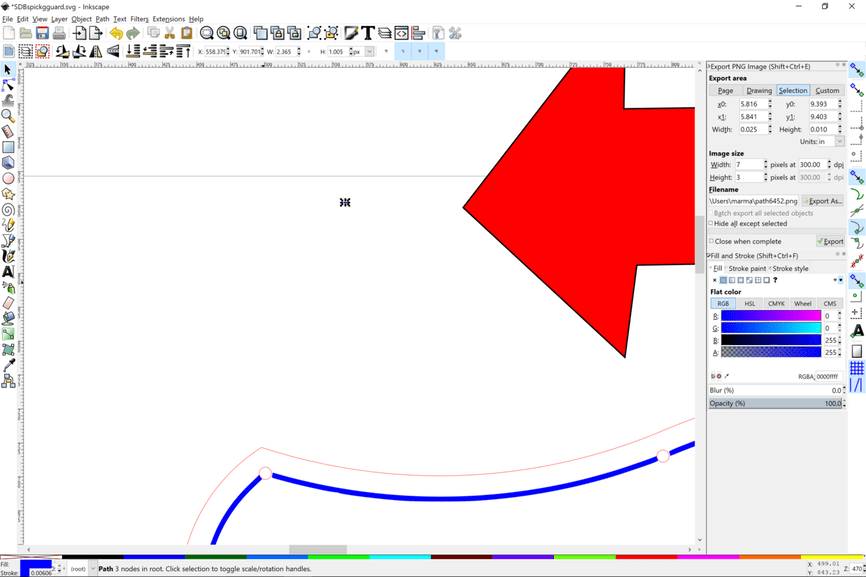
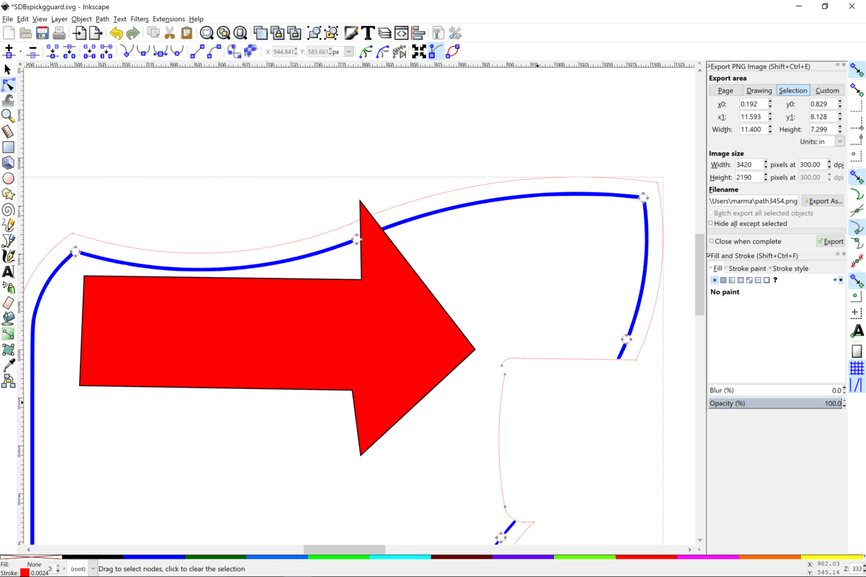
I have highlighted here a broken node in your cut vector path, the red line. You’lll need to select the end nodes using the node edit tool and join them in the join node command. Here is a link on how to do it. You have to break apart the red and then select each segment of the outer red so that you aren’t selecting the small circles inside. Then combine them into one path. Select the whole path and switch to edit node (F2). Then select all (ctrl+a). That selects all the nodes and then click the join node command. (this link shows you how). I appreciate doing this because I finally learned how to join multiple nodes efficiently.
I have moved one of the nodes to demonstrate that they aren’t connected. Most of your red line is made up of unconnected paths. Thus you won’t have a continuous cut motion. If you same select all the red path and break it apart, you will see all the individual line segments. If it were a totally closed path, you wouldn’t be able to break it apart any smaller.
All the separate paths:

Also, the little slot in the inner shape is also not joined together. I made all your little circles a different color to differentiate between the outer cut and then inner cuts. It helps to have these different colors for different classes of objects so you have a little more flexibility in your operations and also in your file editing.
It looks like your blue is in good shape. Only filled and totally closed paths.
Hope this works out for you. Here is what I came up with. You may get a nagging popup because I’m using Inkscape .92 which scales different.

7 Likes
Part of the issue seems to be that I converted a DWG file that was intended for use with a CNC router into an SVG hoping everything would come across cleanly, and it looks like it didn’t. The DWG file has layers for each pickup type I might want to install in a guitar pickguard. I hid all those layers before converting the DWG to SVG but it looks like some of that data is coming through in weird spots.
2 Likes
@SDB_Guitars We’d like to have you try a few troubleshooting steps for us:
- Turn off your Glowforge (this is important to avoid damage to your unit)
- Open the lid and, using both hands, gently move the laser arm to the center of the bed
- Gently move the head under the lid camera
- Turn your Glowforge back on
- Print the Founder’s Ruler on Proofgrade™ materials using the default settings
- Let us know how that goes
1 Like
Jae - per your request, two founder’s rulers cut in two different materials about 10 minutes apart. Neither looks very good. Alignment issues all over the place.
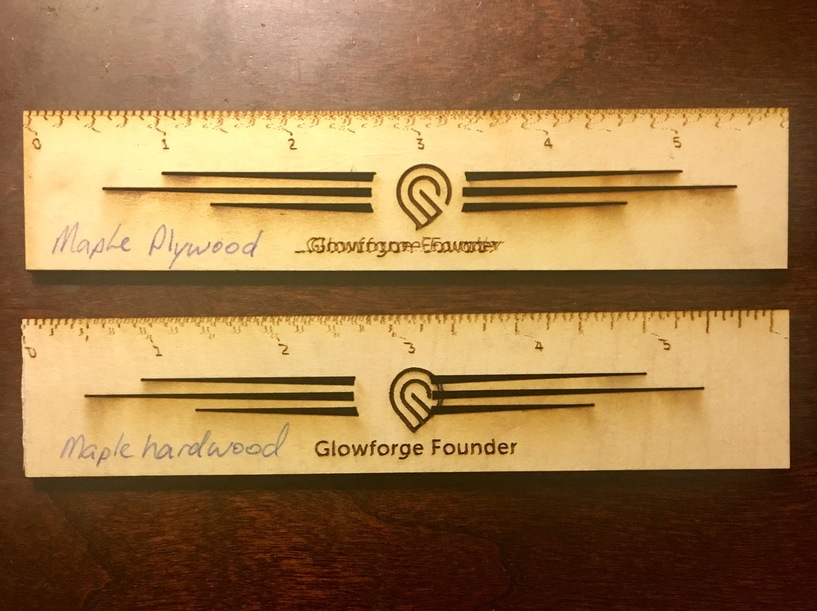
8 Likes
For what it’s worth, I just ran your original pickguard file and it came out A-OK. Sorry!
2 Likes
Woof. That’s not good. Never saw that before.
1 Like
Whoa… your machine looks like it’s been dosing itself when you’re not looking! That’s definitely no good.
5 Likes
Perhaps a more severe case of what @Tom_A’s first machine had.
3 Likes