I run a contract printing shop and bought the GlowForge to use as a laser die-cutter. After many months of “tinkering” I am now using the machine for production (albeit very slowly… we really need a REPEAT button!!)
Here are two jobs we did on the GlowForge:
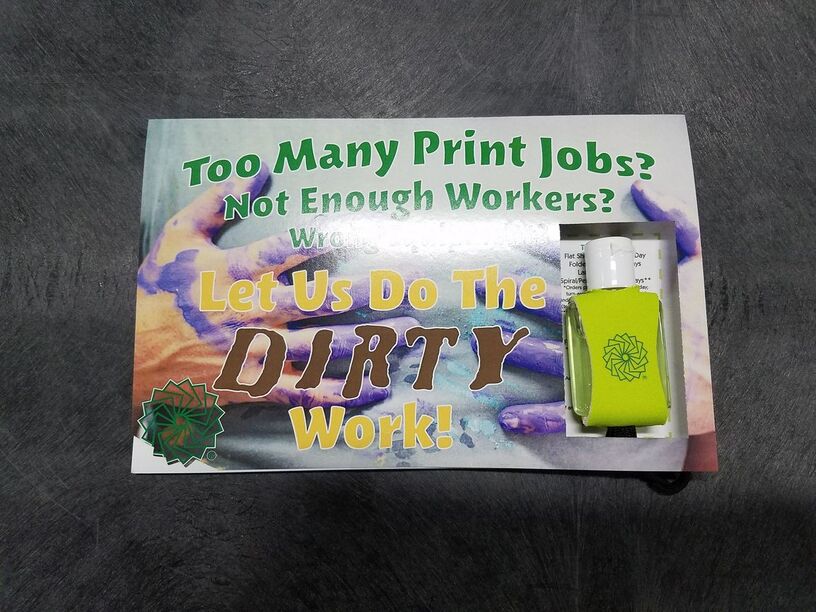
Job #1: “Dirty Work” Campaign (self-promo)
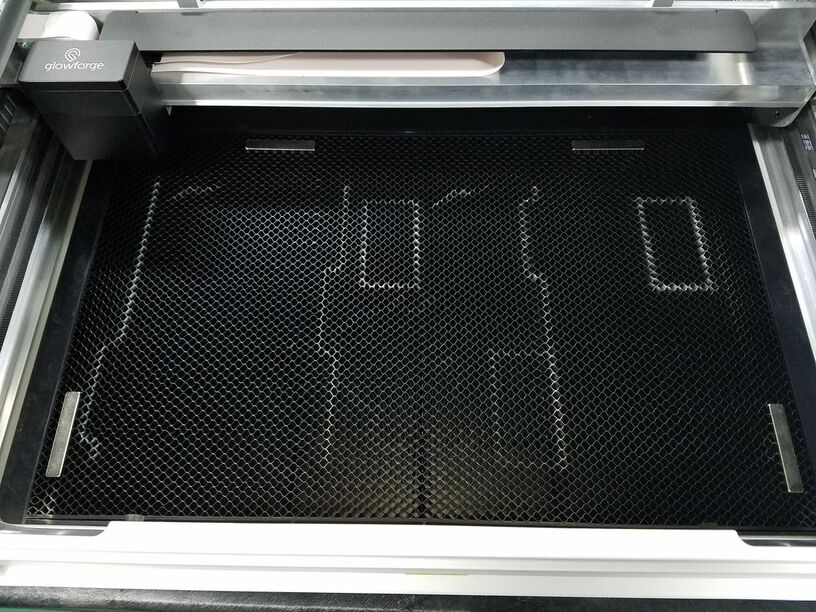
I wanted to send a mailout to all of the area quick copy shops to let them know what our capabilities are, and that we could “do the dirty work” for them. I created a piece using 14PT coated stock that would act as a backboard for a small bottle of hand santizer. When I realized I had more to say then would fit on a normal card, I expanded to a folded card… which would require a window for the hand sanitizer.
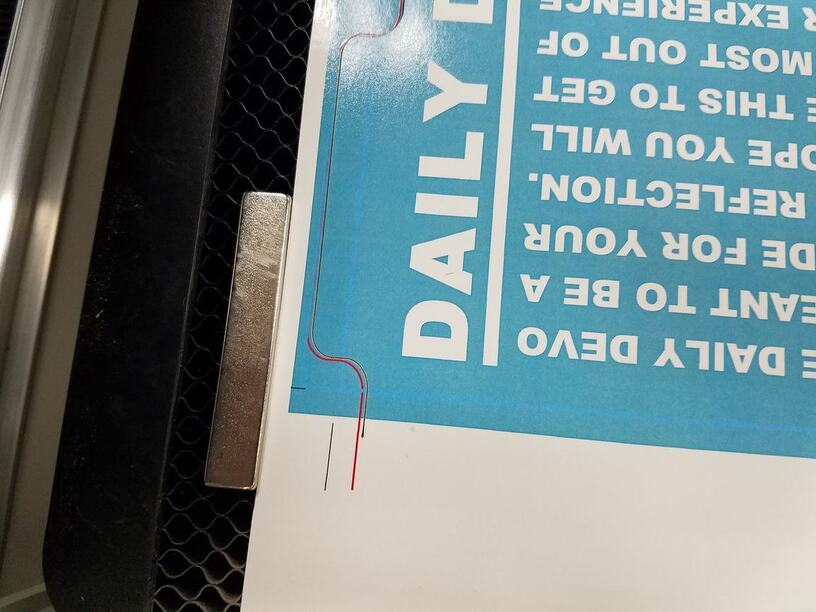
Using the GlowForge I cut a rectangular window in the top fold; then I got creative and decided to cut around our logo on the corner of the card. I cut them two at a time, so the time “under the knife” really wasn’t that bad (just the time wasted having to re-load the job every time). I used magnets to hold the registration, and as you can see from this picture it was spot on throughout the entire run.
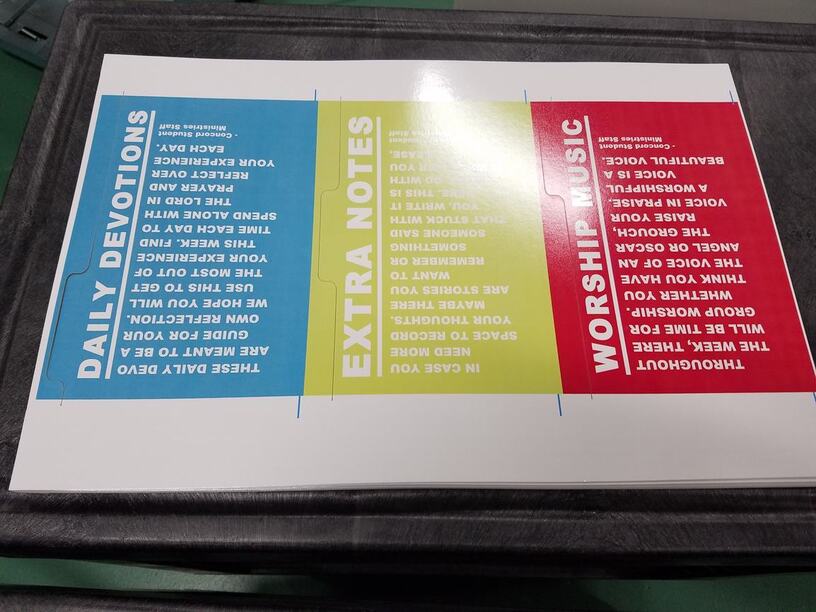
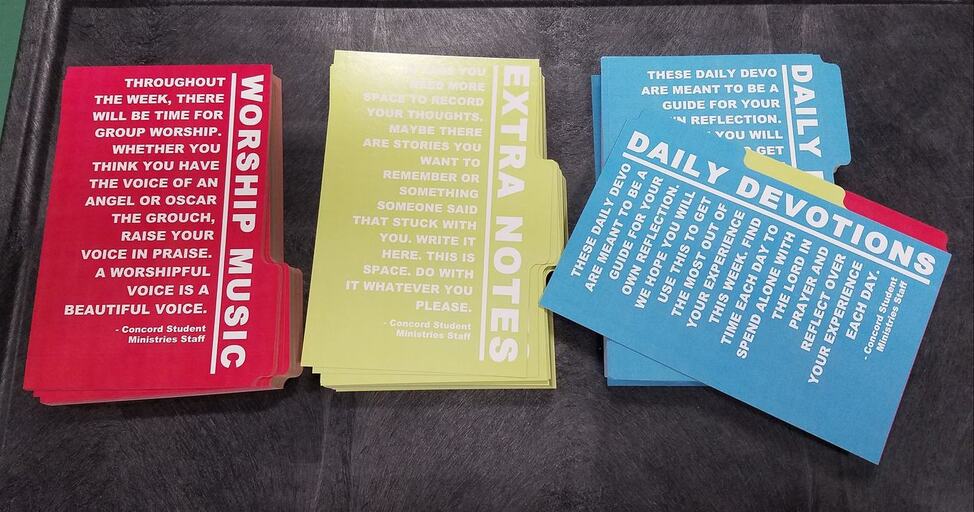
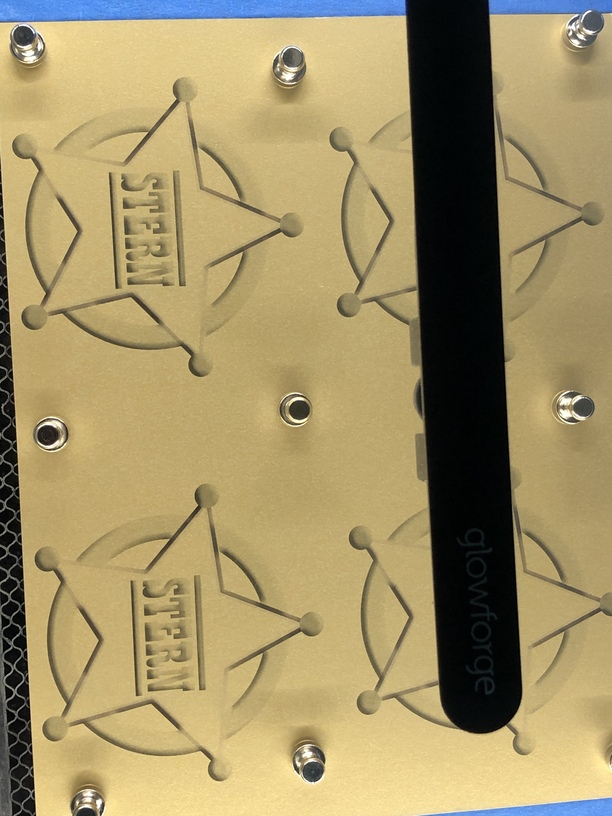
I had a customer who needed a tab set for a half-sized booklet; our normal supplier couldn’t get them done in time, let alone they were to be full-color/full-bleed. So I got brave and decided to do them on the GlowForge.
First I created test pieces and zeroed in the template on the GlowForge, then used finished stock that had the template overprinted on it. Once I was satisfied with the registration, I proceeded with the job.
As you can see by the next picture, the registration is well within tolerance across the entire run. By combining all three tabs on a single sheet I kept the setup time to a minimum.
Settings are important, and vary not only by paper stock but also with what is printed on the stock. It is best to caliper-measure a final printed piece. On the first job I used 2-pass 35 strength on 14PT C2S UV coated 1 side; the second was 2-pass 30 strength on 12PT C2S UV coated both sides.
Laser strength should be just strong enough to barely cut through using 2 passes; this keeps the paper from burning and/or the UV coating from melting. (Think of it more as a “kiss cut”.)
An air filter IS A MUST; any kind of colored or coated paper is going to give off fumes you really don’t want to be breathing.
Great job! (And my hands currently look just like the graphics above…had to refill the ink on the Canon. I have yet to pull that off without getting very colorful.)
Isn’t that wild? I’ve found that just when you think you have the “perfect settings”, the printed color can make just enough of a difference for those settings to not be perfect.
You should get one of the Epson’s EcoTank, they are lovely and the cost print is really low on that AND you don’t get messy to fill them up! Once every 2 years more or less!
Really economic!
Bwahahahah! I tried one of those large tank setups for another printer a few years ago…maybe normal people don’t get messy filling them up…not so great for complete klutzes!
Being unable to touch a sharpie, even closed, without marking self, I long ago settled on keeping the house stocked with medical exam gloves.
The heavy duty blue kind that they sell on amazon. Thick enough they don’t rip easily. Food safe for when you’re dealing with toxic things like raw chicken or hot peppers. And very cheap.
I don’t see the industry changing soon; with only being able to do one sheet at a time, and a 2-minute make-ready per sheet (NEED A REPEAT BUTTON!) this is not a cost-effective way to mass produce.
For the jig I used the rectangular neodymium magnets to form a snug lockup for the sheet. (The magnets were against the outside edge so that I didn’t have to move them off of the sheet each time.)
For the test templates, I took the SVG file that was being sent to the GlowForge and printed it as a visible layer on 10 make-ready pieces, which I finished just like the regular job (which did not have this layer showing). Then I laid the sheet under the GlowForge lid, aligned the laser cut lines over the template lines, did a cut, then adjusted as necessary. I repeated this until it was spot on (took about 6 sheets). I had to adjust the individual cut lines on the GlowForge to get them to line up perfectly; the template did not line up exactly across the entire sheet.
Those things work great for paper as well . One thing I did to make them easier to move/lift w/o sliding is to wrap with a piece of masking (2in) tape to make a flap/handle. Just an FYI
Dear downdigUSA,
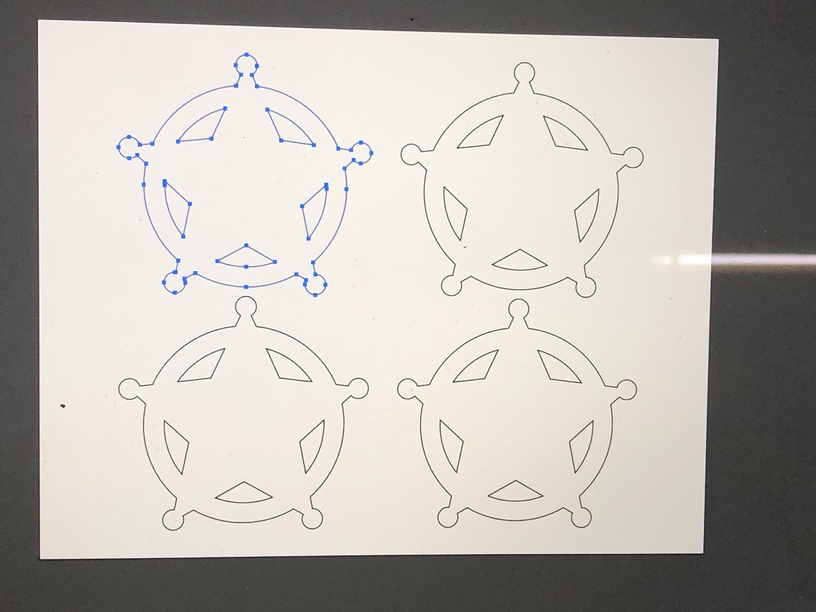
here is what I’m having trouble with… I am trying to die cut embellishments to add to invitations. I am using 14 point Stardream metallic stock on which I have printed sheriffs stars four up. I have discovered the proper settings, but I am having trouble lining up multiples on the printed page
I took the same illustrator file that I used to print the stars, and made the outlines for cutting which I changed into an SVG
When I import that art to cut, it does not line up over the four printed stars. I can shift the group of 4 left and right of course but for some reason, the proportion of the four is off. When I enlarge the four star group
When converting from AI to SVG there are some “ruler” changes that might affect the initial step-and-repeat placement. (Think of the space program and their feet-vs-meters debacle a few years back.) This may be caused by your paper thickness setting, the height of your magnets (if, for some reason, GlowForge can actually “see” them), etc. (The GlowForge is essentially projecting your die onto the image shown on the screen, and is simulating the distance based on your materials settings.)
There is an easy solution; once your GlowForge has finished the initial placement scan (where you can see the stars on your screen, and then see the misplaced die lines), simply click and move the individual die lines until they line up with the GlowForge placement. This should then remain consistent (spacing-wise) from sheet to sheet.
If you cannot easily select each individual die marker on the GlowForge screen, go back to the SVG file and try placing each die line on its own layer (or in its own color) so that GlowForge sees each collection as an independent piece.
If after trying this you still see a variance from sheet-to-sheet, try using less magnets (just to see if they are somehow interfering with the capture lens). I usually use flat magnets and don’t even lock down the paper (just use the magnets to make the upper left/right corners and snug the paper against the front edge of the GlowForge). If the paper stock is thin I sometimes will roll one magnet over a corner, but leave the others to make my jig.
Another suggestion: I wouldn’t make the die line so tight against the artwork (again because of the projection difference). If you find the die is so tight you can never get the left to line up with the right on one of the stars then you may need to expand your die lines a little until you get it to hit where you want.