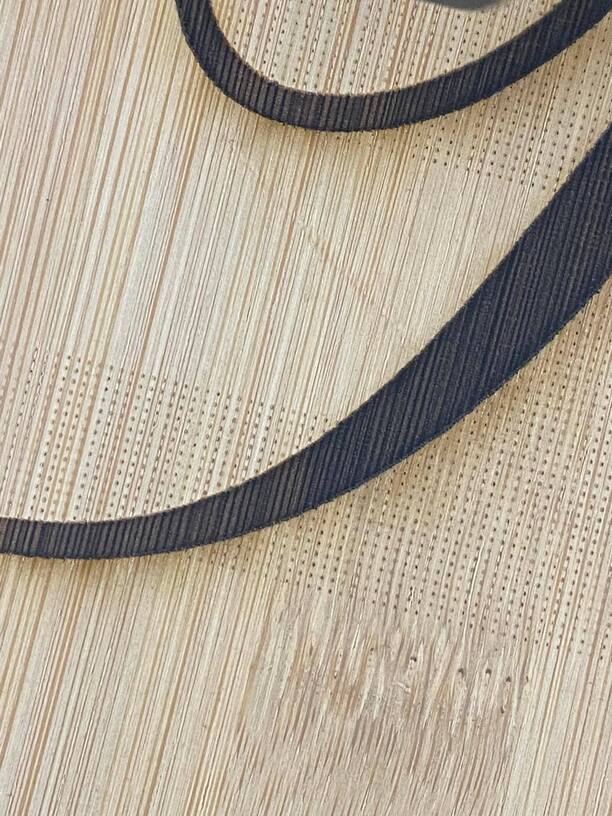
I’m having an issue of these small dots showing up around my fonts and images. Happened for the first time ever yesterday. I make everything myself in photoshop that I use. I save the work as a PNG with no background/transparent background and upload it to the system to be engraved. I have done this 100 times and it’s never happened.
I did this on bamboo yesterday and it showed up around the font. Thought maybe it was the font or the fact that I had it on “convert to dots” instead of “convert to path”.
Was engraving a recipe today and it did it again (it’s also a PNG I made myself) that I took the background out of take and it happened again.
Settings are 1000, 100 convert to pattern and 225 lpi. I have a Glowforge pro. I don’t know why this keeps happening. I can easily sand it off, I’m just afraid I’m going to get something one day that I can’t sand off. Anyone have any ideas that could help me out here?
That’s usually when the background isn’t 100% clear, but you say you have it removed entirely? Are you willing to post your art here so one of can see if we get the same result?
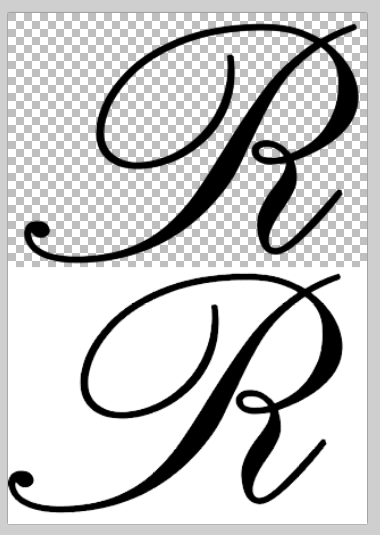
Ok, obvi I haven’t run this yet, but I found this fascinating. I took a copy of the R and pasted it again in the same image - but with a white background on that section
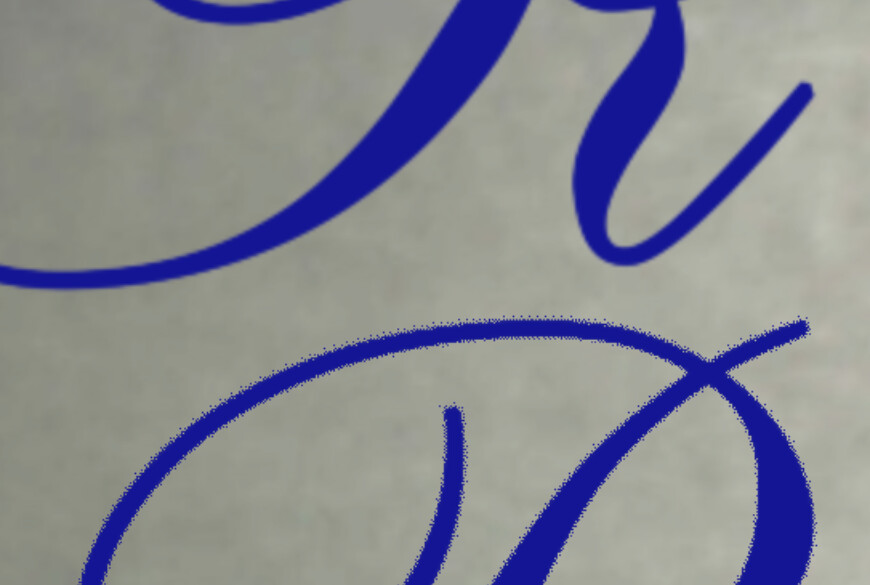
When uploaded there is a significant difference between them in the GFUI using any of the Convert to options (they look identical in the Vary Power options):
Lots of greyscale around the fringes of the letter, and the GF UI is trying to convert those to dots.
This doesn’t explain the weird grid. You sure the laser did it? Like did you watch the laser run back and forth across the material? It doesn’t look lased, it almost looks like tooling marks. It’s hard to tell, it almost looks like the grid of dots stops in the engraved areas, but I’d get a microscope out and really be sure.
If you watched the laser run back and forth across those areas and seemingly do nothing (and it was putting dots down) then that is evidence that the Glowforge made them… but if the laser didn’t scan across those areas, then it’s not laser-caused.
Anyway, my current guess is that was pre-existing surface damage to the material. That’s bamboo, yes?
Can you duplicate it on a fresh scrap of material that you’re very sure isn’t damaged already?
EDIT:
Hmm I dunno now, looking carefully at your picture it seems like the dots follow the curves of the R. Interesting.
I watched, with my own eyes it going back and forth putting the lines in it. I tried the R and a recipe on two totally different types of bamboo and it did the same thing on each. I’m going to try and save the file a different way and see if this helps. The only thing in common with the both of them is that they were saved as PNG files and not SVG or PDF. I’m going to try it again and see what happens…stay tuned.
is there a reason you’re working with text as a PNG bitmap file instead of as a vector file (like SVG or PDF)? if you eliminate the bitmap from the equation, you may find better results.
if you have a bitmap and then “delete the background,” you’re always dealing with some issues around the edges of objects.
I have had this happen on occasion. I use CorelDraw 2021, and if I engrave from a jpg, bmp, png, etc that has any slight or “invisible” artifacts from the bitmapping it will cause this.
To correct it when it does, I do a trace of the item.
After the trace is has completed and I accept the results, I immediately do a cut function to grab the trace and then paste it on a new page.
Once it is pasted ungroup the image.
Select the parts you want to engrave (or cut or score) individually (do not select an area that contains what you want) one at a time while holding the shift.
I just ran a test using your image as shared, but I didn’t get the extra engraving you experienced. I was going to run yours and then run one the way I described above, but had no issues printing the original.
Yeah that’s what @deirdrebeth has been saying, and I confirmed, the background is transparent, there’s no reason for those dots. It’s really weird. I’d ask support if it were me.
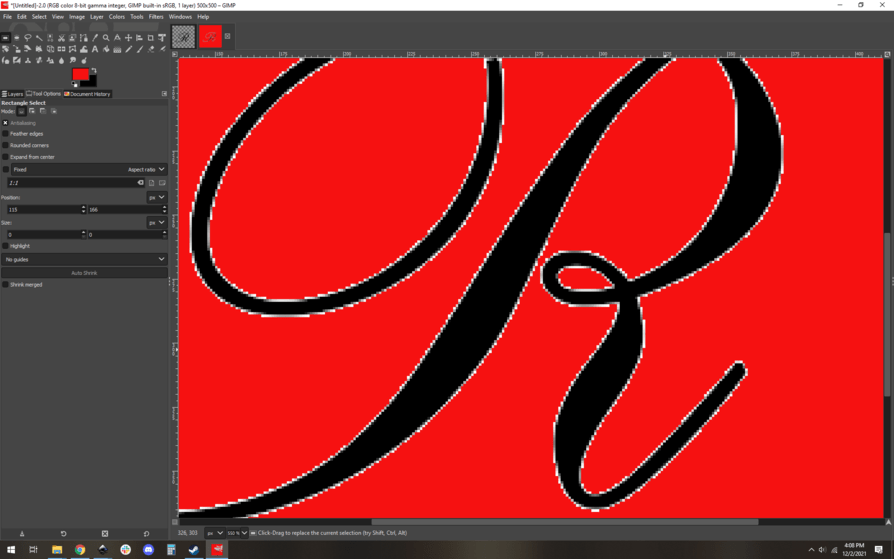
I do think something is unusual about the png. Gimp acted strangely when I tried to open it, almost like it had a limited available color palette to just black and alpha. I don’t know enough about PNG specs to know if that’s even possible. In the end to get a white background I had to open a new image and import the R.
Support might well be interested in the source file because it may be some weird edge case that they haven’t accounted for.
Ok. But that is what causes that pattern. I had exactly the same situation, it looked transparent but when etched the dots showed up. There was something in those areas that caused the background to be treated as sightly off white. I reversed the image and made sure all transparencies were turned completely opaque and a bunch of extra background shades showed up.