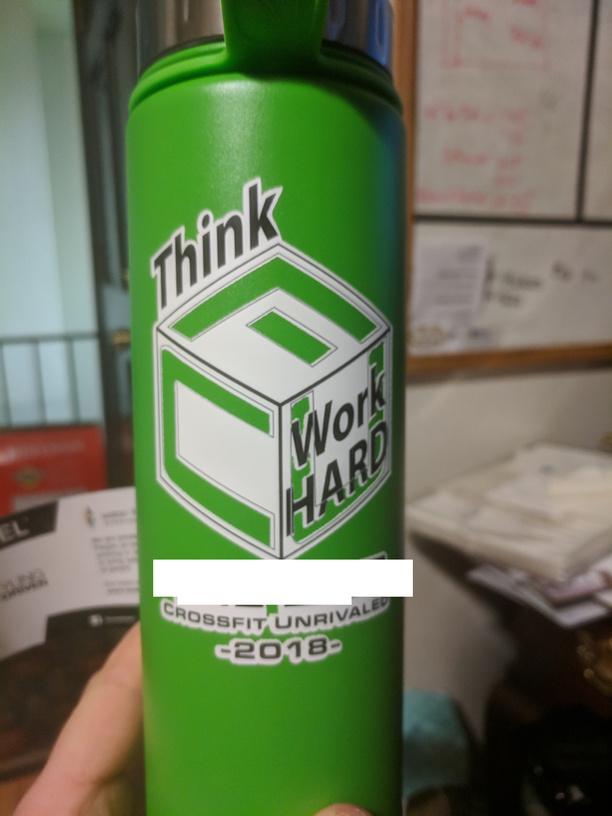
BAAAAAAAHHHH!!! Don’t yell at me! It’s not vinyl. They’re actually polyester or something. ![]()
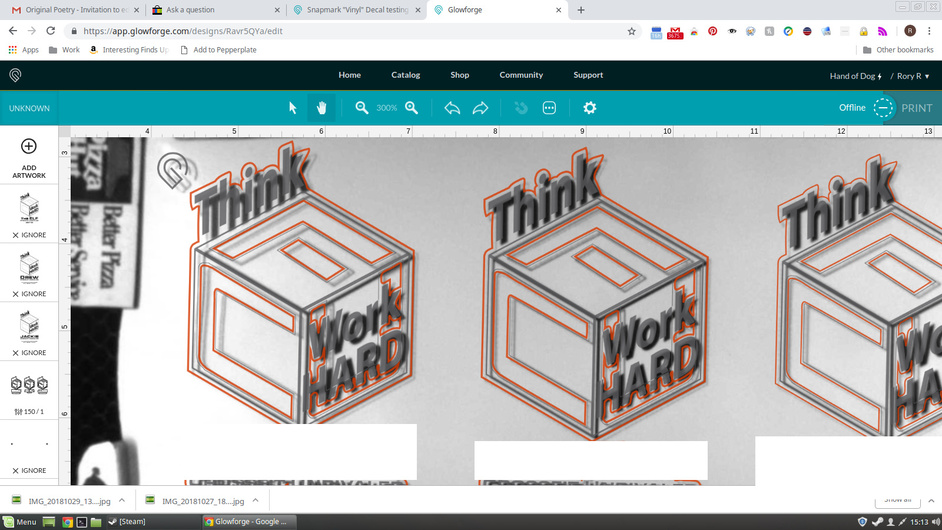
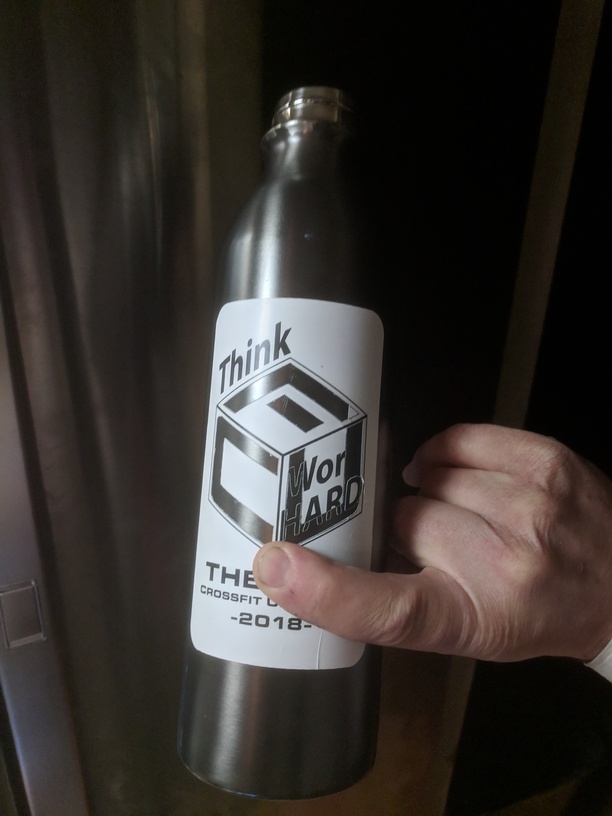
Kay, so a friend of mine asked for some help with a gift. I got 3" diameter water bottles from him, which of course don’t fit in the 'forge. So, my idea was to do some decals. Did some research here and ordered these puppies from Amazon after getting the MSDS from the company that makes them. I printed up the logo, with some Snapmarks for alignment, and had a pretty great experience with it. That is, after I figured out that the marks need to remain oriented the same way as they are in the design without rotating it in the Glowforge UI. The “vinyl” (BAAAAHHH!!) stickers are made for outdoor usage, so I’m hoping they’ll be okay in the dishwasher for a while. Also, wasn’t sure how the laser printer ink stuff would hold up, sooo… Here’s my proof of concept bottle to send through the wash:
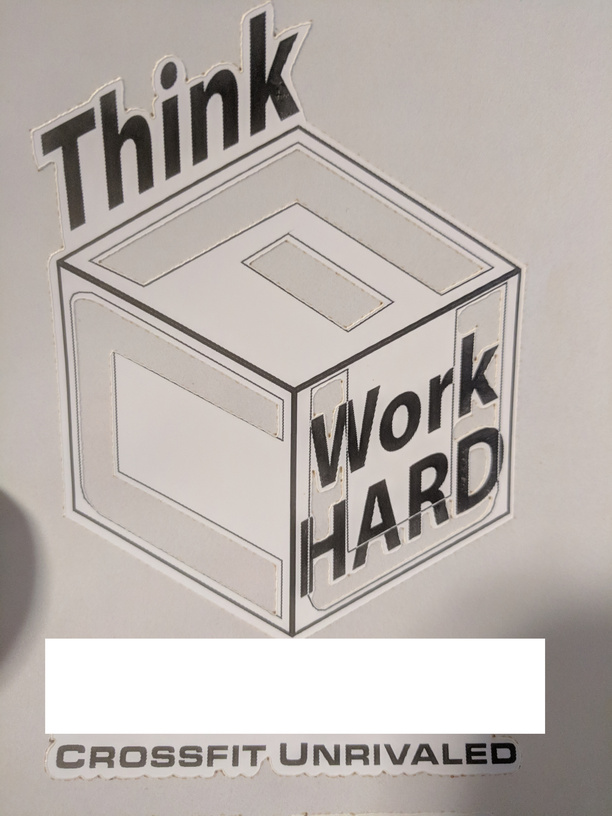
It’s a little messy 'cause I’m still working on settings and didn’t use transfer tape (and I missed the “D”), but the vector cuts match well with the laser printed stickers.
Anywho, I looked around a bit and found some settings on the spreadsheet to get me started, but if anyone has any tips for working with vinyl… I mean polyester or whatever… on the Glowforge, let me know. I’m looking for a cleaner cut, mostly. I’m also getting burn-through on corners and sharp turns. The goal being to kiss cut through the sticker, but not the backing.
Also, any aesthetics tips would be useful if ya got 'em. I can’t change the logo, but the cutout choice or sticker shape or maybe some other things. Just in case it isn’t obvious, the letters in the cube are cut out to show the bottle through.