I am the coach of my son’s soccer team. It can be difficult herding ten 9 year olds, but there are a lot of rewards for coaching. I have always felt that the training they receive from the trainers is good only in that it teaches them how to play, but not how to compete. There is a mental game that is overlooked. Especially that part that recognizes that 9 year olds can fall apart mentally when the game gets tough. And once one goes they all seem to go. And once they all go it is almost impossible to recover. The only thing that seems to work are snacks and time! I have been trying to get them to understand that winning is great, but losing is also ok and a great lesson, too. Losing makes new opportunities to learn and be better. But even more so, if they always play their best game on and off the pitch, they will feel much better about any outcome. I have come to say at every game like a broken record "you don’t have to worry about winning or losing this game, just go out there and play your best game! Plus, I remind, we are all in it together!
At the holidays I usually give them a small personalized gift because 1 - I want to create good memories for them and who doesn’ t love a personlized gift and 2 - I have a LASER and I can! 3- I can use the LASER to drive my point home! So to drive the above point home, I made them LED lights.
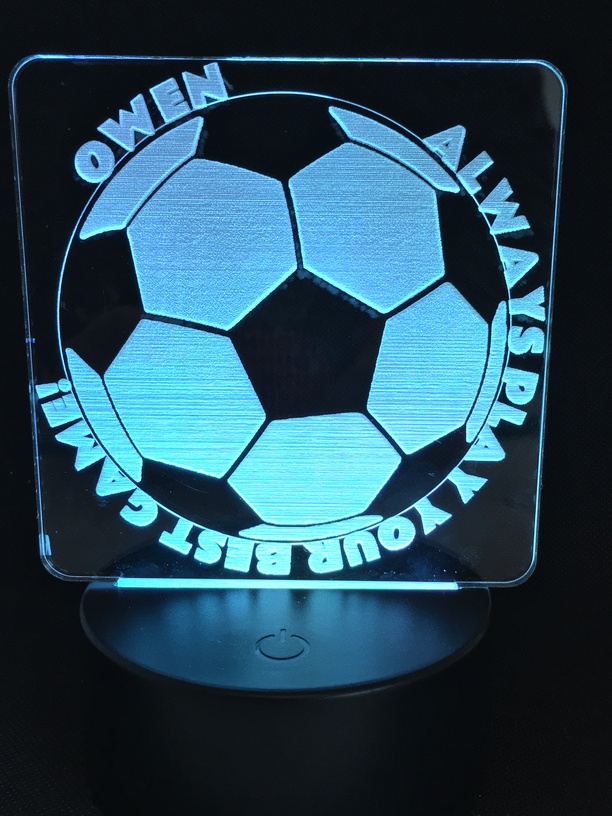
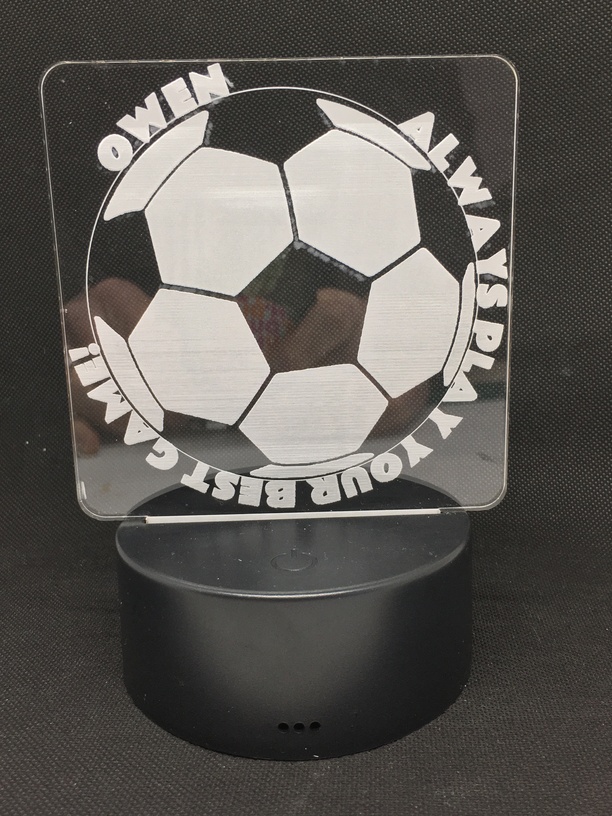
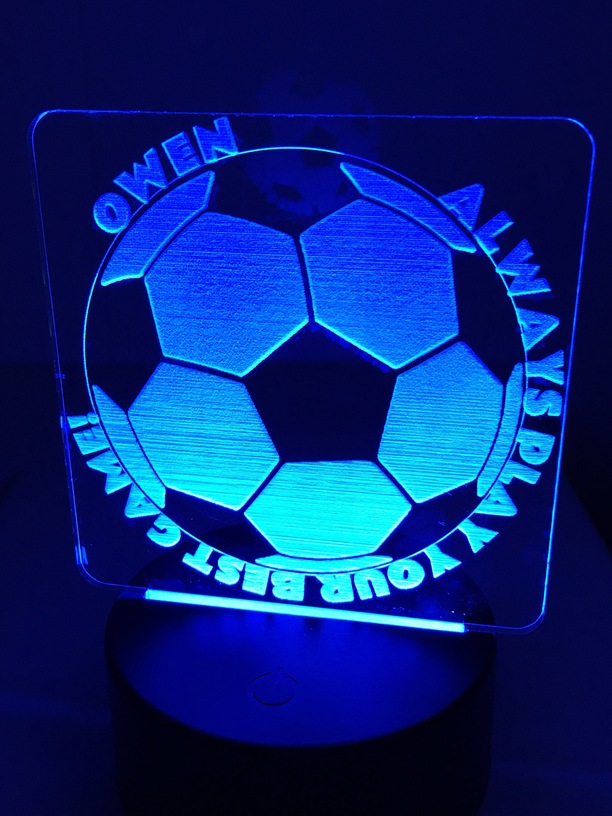
I used 4mm clear acrylic on bases that I purchased from Amazon (I think they have been discusses in the forum - eeekit LED lamps). To make the plates fit the lamp, I had to engrave some of the base away (also discussed here previously I think).
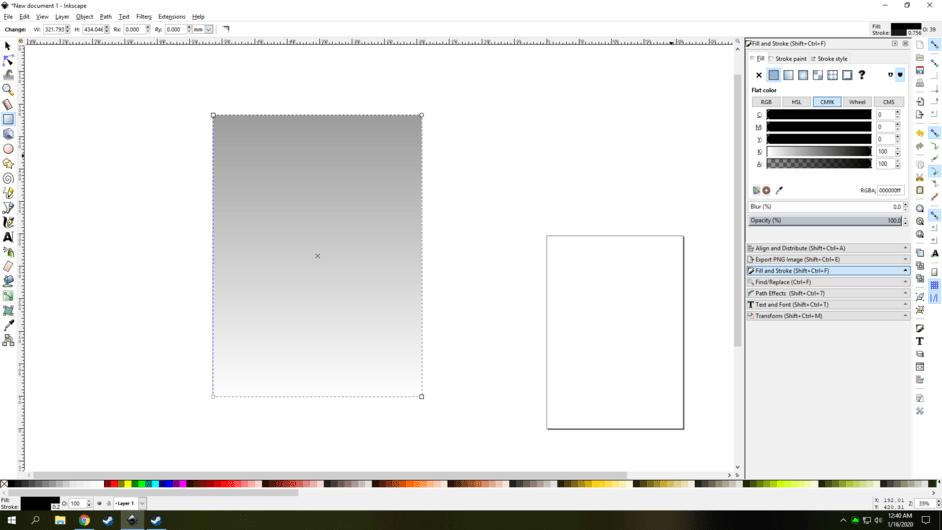
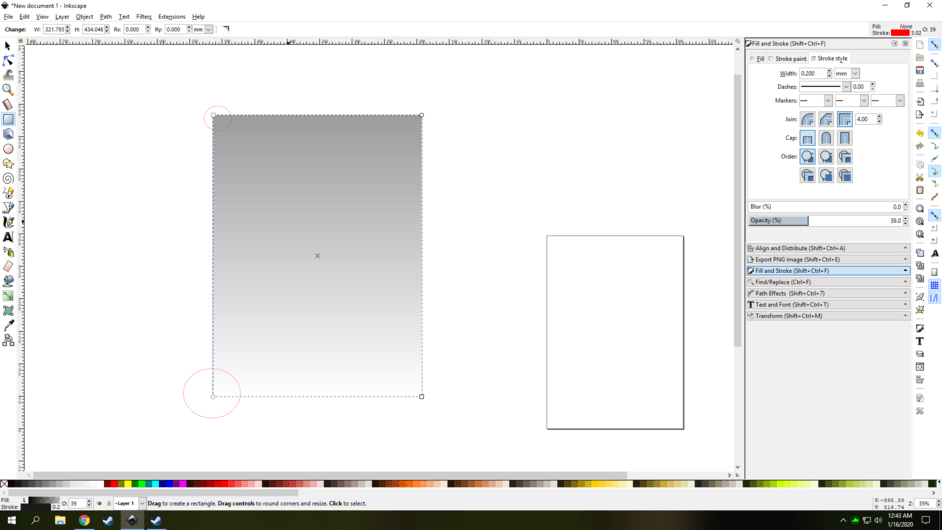
To get the best effect, I created the graphic with each name in Inkscape. I grouped all the parts of the words and ball together then used a gradient fill going up, white to black to fill the graphic. I then created a 300dpi png of each graphic in inkscape and lined it up correctly in the final shape. My original 96DPI pngs were terrible, not smooth. I imported the files to the GFUI and used vary power to do the engrave. I engraved at 135 lines per CM which led to about a 30 minute engrave per piece. (you can see the lines in the ball, but I didn’t want the engraves to last forever so I was willing to make the trade off) The circle to make the ball was a light score so it wouldn’t interfere with the passage of light.
I have to say that I think they engraved well and they light nicely, but I don’t think I achieved perfectly even lighting even with using the gradient. The light from the base should have been bright enough as the plates were only about 4 inches square. Of course, I don’t know how they would look without the gradient because I didn’t even try it. Perhaps the gradients were not as good as they should have been., but Ttheoretically, even the smallest of gradient changes should yield better results (my uninformed opinion perhaps). Could have been the acrylic. I used cast acrylic made from 100 percent recycled material. Either way, I am very happy with them and some of the parents sent a pic of their player using it with big smiles. They players seemed to really like it so I am happy with that, too!
 I export all my png at 960 dpi keeps things relatively crisp all tho for larger projects the MB add up quickly. a little more % difference in the gradient and it should give you a nice uniform light