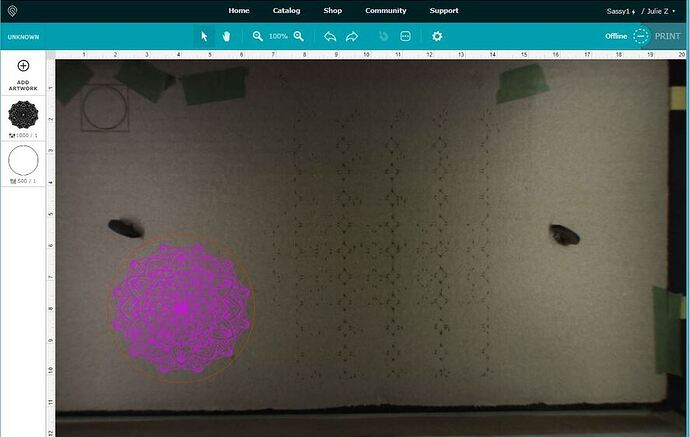
Spent hours on a design... too complicated

livingmandala.ai (2.4 MB)

Hey everyone. I designed this really cool 3d mandala and glowforge says its too complicated to print… I figured the bigger the better but apparently not HELP
Thanks!

Can you share an snapshot of the design? Hard to help if we can’t see it.

If you don’t want to share the design, rasterize it. (Assuming the mandala part needs to be engraved.) Use a high dpi (600) and save it as a PNG for the transparency. If it’s large size-wise, (as in covers more than half of the bed) use an LPI of 225 or so in the GFUI. Nothing higher than 270.

3 Likes

This is almost always because the print time exceeds the current max run time (around 3.5 hours). If you want to maintain the same size, you’ll need to adjust the settings (LPI and/or speed)

Best advice I was given was to just break it down into small parts. As long as you dont move the material inside you can keep adding. It does not take a lot of design before glowforge says NO.

I did a simple engrave on my Mac book and had to do it in 4 parts just to give you an idea.

2 Likes

I’m so sorry for the frustration.

There’s a problem with our software in handling very large engraves and it looks like that what’s happening here. Your message will help us improve our software for everyone.

If your design includes a large engrave, you have two choices. You can reduce the size of your print in the app by signing in, selecting your file, clicking on your image, and then dragging a corner towards the center of the image to make it smaller. Or you can divide your image into pieces and print them one at a time, as shown below.

  1. Split your image into pieces

    • Save your design as a PNG file
    • Go to imagesplitter.net and upload your file
    • Click on the “SPLIT IMAGE” tab and enter the number of rows and columns you want to split your image into
    • Choose PNG
    • Click the blue “SPLIT IMAGE” button. The software will split your image into the number of rows and columns you specify and automatically download a zipped file of the pieces.
  2. Create a single file with all the pieces

    • Locate the file on your computer (where your downloads go) and unzip it
    • Mac: Double click on the file to open it
    • Windows: Double click on the file to open it, then click “Extract All”
    • Open a new file in Inkscape (used for this example, although other software will work too)
    • Choose File > Import and select all the images from the zip file
    • Line up the images up so they are seamless. In Inkscape, when you drag the images near each other, they will snap together. (If they don’t, go to View > Show/Hide > Snap Controls Bar and adjust the settings.)
    • Select File > Save As and save the file as an Inkscape SVG file
  3. Upload and Print

    • Sign in to app.glowforge.com, click “Upload” and choose the file you saved.
    • Each piece of artwork will import as a step in the app. Click on a step and choose “Ignore.” Ignore all the steps but one, and then press “Print.”
    • When that print finishes, leave your material in place
    • Set the step you printed to “Ignore” and print another step
    • Continue ignoring and printing until you’ve finished
2 Likes

thanks everyone, trying to share a picture but i’m new to all of this (coming from a silhouette craft cutter lol)

It’s a lovely design, but did you want to cut it or engrave it? Remember you are only going to have one color to work with…black.(burned)

Okay, that particular file has a couple of issues…the main one is overlapping vectors, and unnecessary paths at the outsides of the bed. (Lose the outside rectangle.)

I was able to turn all of the colored filled shapes into a compound path that will engrave fine…what you want to do is just use a Fill color without a stroke color for the engrave areas. For this design, it’s necessary to turn all the shapes on top of the back shape into a compound path, and then subtract them from the back shape to wind up with the final compound path for engraving. It loads without issue, and looks pretty sharp.

livingmandala2.zip (46.7 KB)

There’s a list of recommended reading that explains a lot of the design considerations for the Glowforge here:

If that’s not what you’re wanting to do with it, for instance if you wanted to cut it out, I would be really careful, those little bits are very close together. It’s going to be torchy. :slightly_smiling_face:

2 Likes

thank you!!

1 Like

The cut was a little off because the camera was dirty but I think it came out pretty cool, was looking for something to try depth with :slight_smile:

22 Likes

Very pretty! I like it with a few cutouts!

2 Likes

It came out great!

1 Like

Nice!

Beautiful print! I’m glad you resolved it! I’m going to close this thread. If you run into any other trouble, please start a new topic, or email us at support@glowforge.com. We’re here to help!