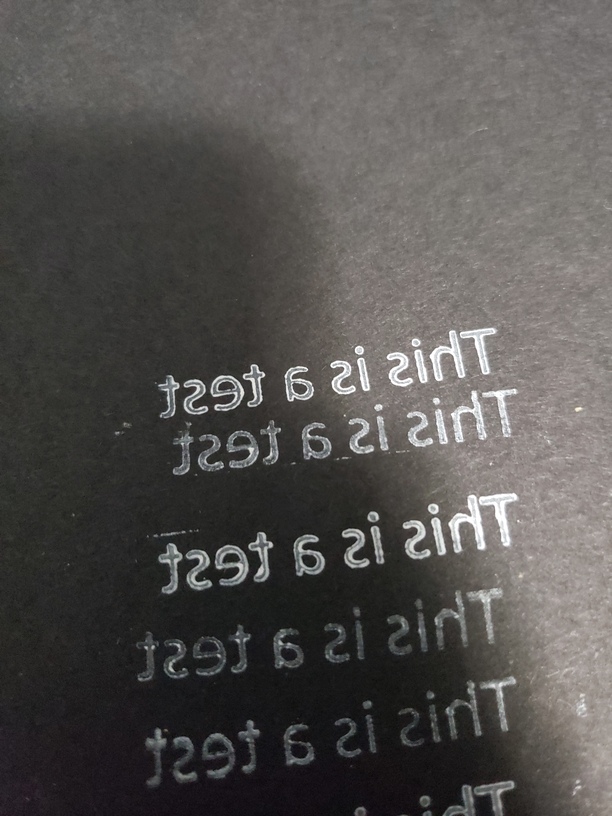
I recently got some stamp rubber recommended here from Johnson Plastics, it engraved well and was pretty easy to get looking right once I fiddled with the settings according to some of the other forum topics. But I’m having problem with the quality of the stamp itself. For some reason I get big ‘pools’ of the ink around the letters of the stamp, rather than on the letters themselves.
I’ve tried a few different methods, like setting up ‘shoulders’ in photoshop around the letters to help fill them in and trying different depths, but none of that has helped. To be honest I’m not even sure how to google a problem like this, which is where I’ve tried looking already. If anyone has any experience with this or advice I would sure appreciate it!
Havent’ made any stamps myself, but I wonder if the SLIGHTEST array of grooves (or a grid?) over the flat parts would allow the ink to remain in the center instead of all getting shoved to the sides.
It looks like you are using a pigment ink–they can be a little more challenging than dye inks to stamp well, especially on dark card stock. Getting good results is mostly a matter of technique. To me it looks like the stamp was probably over-inked; like you pressed it a little too hard on a juicy ink pad. Try just tapping the stamp lightly with the ink pad, several times, and stamping with even pressure but not too much pressure.
Stampers have found that using a stamp positioner like this one can take a lot of the guesswork out of getting a good impression. It’s what I mostly use now.
Wow, I have never thought about one of those before, but it makes a lot of sense, I’ll definitely check it out because I plan on stamping white ink onto business cards and registration will be super important. Is pigment ink harder because it is thicker? I noticed that it was closer to a paint than an ink like the pads I had used before.
Pigment ink sits on the surface rather than soaking in like dye ink. I think that’s why it tends to pool a little.
Here’s another thing to consider if you are stamping on dark card stock: you can stamp with a clear embossing ink like Versamark then dust a little superfine white (or gold, silver, whatever you prefer) embossing powder over it which sticks to the ink, tap off the excess, and heat it with an embossing heat gun. You’ll get a raised stamping where the powder melts together–it’s a really cool effect on dark cardstock. (Note: the above links are not affiliate links–just products I like and use. You can likely find all this at your local hobby store as well).
Whoa, that’s for sure the coolest thing I’ve seen today. I’ll definitely be giving that a try too. I love the depth of the lettering when done that way, reminds me of the raised lettering business cards
I see lots of people using the clear stamp rubber, is there a reason besides being able to see through the pad that it would be helpful? Like a material difference?
The clear laser stamp material is way more expensive than the laser rubber, so that’s one difference. Being able to see through it to help with the positioning is the key advantage. There are some folks that believe real rubber gives a better impression. That can depend on the quality of the clear stamp material–silicone based stamps are not very good for stamping, the ink pools up too much. But the kind you get for laser cutting (like from rubberstampmaterials.com) works just as well as rubber.
Oh, and one last tip: sometimes there is a residue on commercial stamps (and you might find it also on the ones you make). You can remove that by rubbing the stamp with a rubber eraser, and you will get a better result.
You can also use clear embossing powder over pigment inks. Some pigment inks won’t dry on some surfaces (e.g. clay coat stock) over a reasonable time frame without assistance or coating. I did this with the stamped designs on my Viking Longship pop up card (which I thought I shared here but, search says not).
I have been using the low-odor gray rubber for stamps.
I’ll second @cynd11’s recommendation to experiment with pressure, both in inking the stamp and in making the impression.
One potentially useful side-effect of slow-drying pigment inks on less-porous stock is that you can often remove smudges using a bit of paper towel or a swab, possibly with some rubbing alcohol. I saved several labor-intensive handmade cards from being consigned to the scrap pile for stray smudges that way.
I tried the amazon pink rubber stamp material, and the low-odor grey stuff from JMP, and both worked. But then I tried the Laser Photopolymer Clear (or art stamp laser polymer) from JMP, and I don’t have any desire to go back to the others. It’s thick enough to make a pretty deep engrave, doesn’t make the same mess in my machine as others do, and the sticky-back is great for applying to a clear acrylic handle. (JMP’s website is the “rubber stamp materials” site that @cynd11 linked to above)
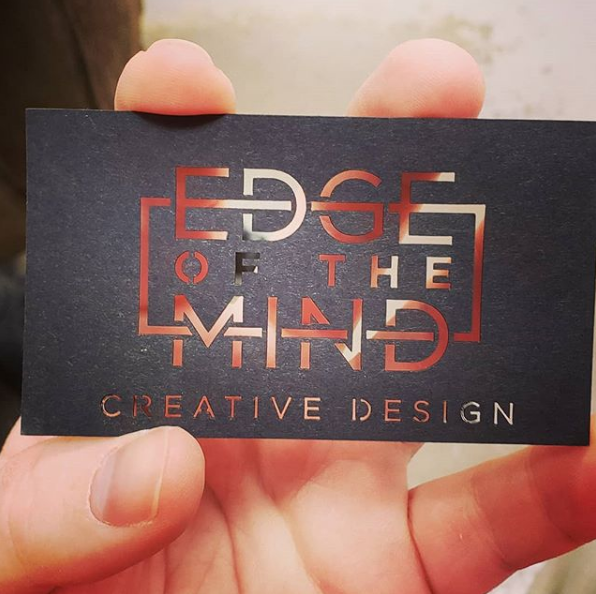
Wow, you guys have given me a ton of things to try out @jbv I’ll definitely try out the clear polymer, and @evermorian those cards came out fantastic! I’m trying something in the same vein, I’m working on business cards for a design agency I’m setting up using a combo of laser cut cardstock and white ink for smaller information.
Somewhere around here someone adhered together multiple layers of different colored card stock and then just engraved off a layer(s) to reveal the color below.
There are even some stocks where you can do that without any manual layering. I didn’t call it out in the post but, the backing card for my recent Phoenix pop up is done like that. I was originally planning to stamp and heat emboss it. I did an engrave on a prototype for size and positioning and was delighted to discover that this pearlescent white stock engraves to metallic gold.
Some dark-colored stock will have an obviously-lighter core.
I don’t see it working with the glowforge because of the forced air assist but I wonder if you could not dust that powder on and use the laser to selectively melt it.
I use a photo lens puffer to remove stray bits of powder. It blows the loose particles off but, not those stuck to the ink. Similarly, my heat gun on the low setting won’t blow off the powder stuck to the ink. So, it might survive the air assist (particularly with a wall/lip around your piece to control the angle of attack from the air flow some).
You can get embossing powder unstuck from the ink with stronger air flow or a brush.
You might be able to coat something with ink, then a dusting of embossing powder, laser a design into it, then remove the unfused powder. That probably would not be as clean as stamp embossing but, it might be interesting.