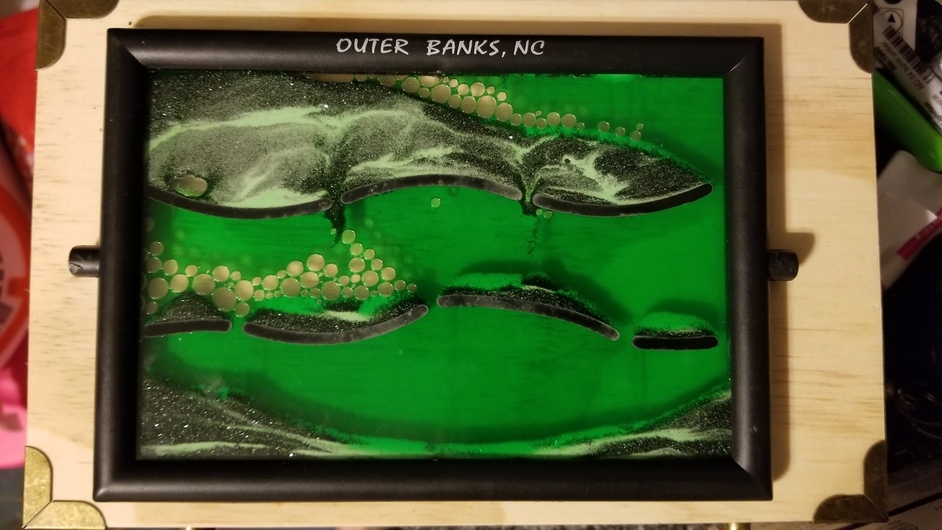
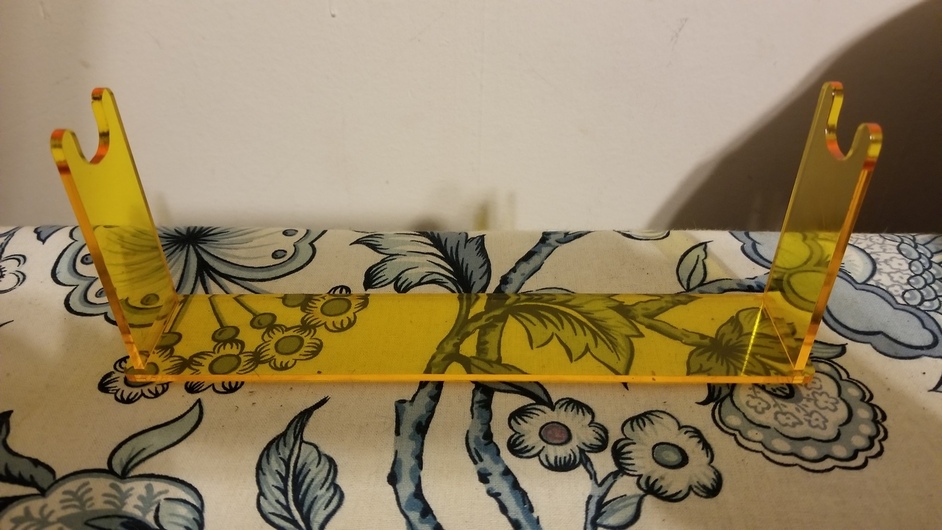
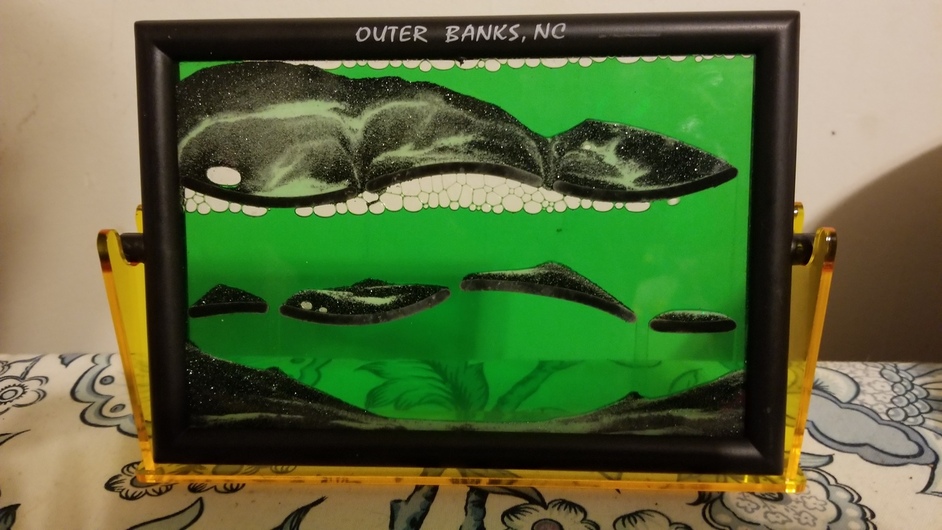
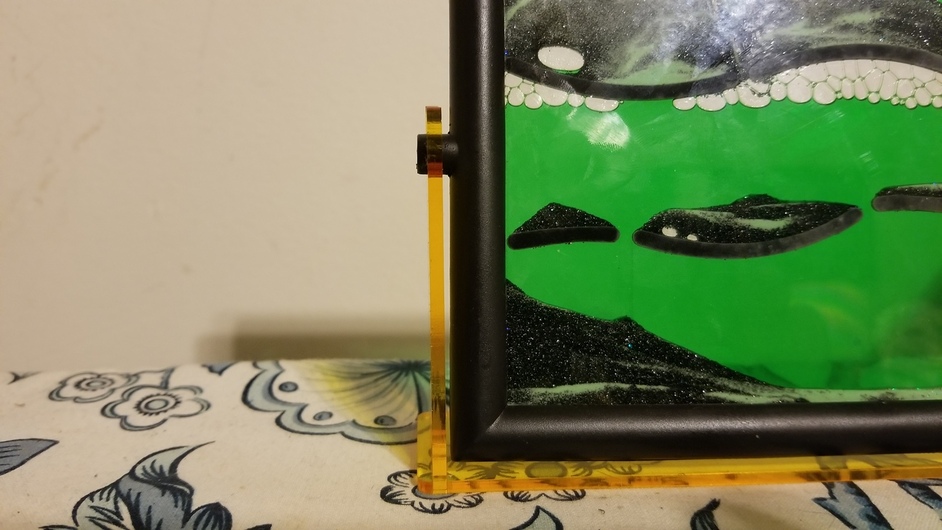
It’s our Son’s, so I asked him what material he wanted the stand made out of. He decided on transparent yellow acrylic. He said it would go nicely with the green liquid. So a few measurements later I had a basic design. A couple of battles with kerf and also a couple of battles with my own stupidity (forgot to add length to the stand posts after removing a section for the slots and mis-measured something else). And I made this:
Hmph. Never realized that worked to strengthen acrylic. Always thought of it as a metal process only. Oh, and glass now that I think of it. But I never even thought of it for plastics. Since it’s only plastic, can I use a regular oven for it?
The temp for annealing acrylic is apparently about 180F/80C for an hour per millimeter, so you might need a really low oven, or just give it an initial pulse of heat and then let it cool and hope for the best…
Thanks! I was just reading up a bit on the process. Plexiglas says 1½ hours at 230ºF for thicknesses 0.060" to 0.177" with a ¾ hour cooling time. But when you mentioned about the low temp oven I went and checked… My oven can go down to 170ºF. Who knew!
Yeah - Plexiglas and NASA both use the same standard - 230F or lower as needed to prevent distortion and a really long (24 hrs for the 200F range) warm-up followed by slow cool down.
Lots of others have the 180F 1hr/mm recommendation - also with a slow cool down. That’s the one I use - in a convection oven to prevent the buildup of fumes. After the heating period I just turn it off and let it cool before opening and removing the piece.
I’m not a materials scientist so don’t know which is right and don’t know if Plexiglas is right or if that’s overkill for our purposes or if I just don’t know that it’s not been annealed using the 180F method. @jkopel may though - he’s done this a lot if I recall.
Thanks for that info!
Yeah, I haven’t had a convection oven in a few years now.
It’s funny… Aside from materials, I think the laser thing is going to have me buying all sorts of other tools to go along with it.
I have used the 180F 1hr/mm as well. However I am definitely not a materials scientist, so I just followed recommendations from somewhere. I used it when turning 2" diameter acrylic on the lathe, since it seemed as if removing 60% of the material might induce some stress. I made about 30 of these objects and they all survived, although I can’t really say what would have happened if I had not annealed them. The took forever though.
I have also had to anneal lots of tiny acrylic architectural model parts we used to make via CNC mill. Those were super fragile and used to curl up like potato chips if we did not anneal them after pulling them off the mill bed.
So, yeah, I have annealed a bunch of acrylic, but I am still not an expert!
You’ve successfully done it! Makes you more of an expert than I! I’ll have to give it a shot and see what happens!
So, take this stand as the example… Should I separate the pieces and do them flat? Or leave it built? For the former I’m worried the pieces won’t fit back together. For the latter I’m afraid of slumping.
I am not even sure you HAVE to anneal this stand.
The main reason I would do it is if you are going to glue it with solvent glue (instead of CA for instance).
If you want to try it I would definitely leave it together, and do not let the oven get over 200 degrees.
The glass transition (i.e. the point at with it will flow) is somewhere around 220F so as long as you stay below that is should not slump. If you are worried then try it with a test piece first, or figure out how to support it.
I work with acrylic…never felt the need to anneal any of it…never had anything break or fall apart yet…and I use weld on to glue it all together…not sure what all the hub bub is about…lol
I made a few things with the beta unit and tried to glue them with weldon.
They cracked and crazed and would not behave.
An hour in the oven cooked them into submission.
You pays your money and you takes your chances.
Some 3D printed plastics require you to anneal it to strengthen and for the print to have higher heat tolerances. A few people use hotplates for annealing, so you don’t stink up your kitchen. And if something goes wrong, you are only ruining a $60 hot plate, not a $500 oven.
I’d highly recommend against using the oven you cook your food in for annealing plastics.
Plastics can offgas some nasty stuff when heated, and it is unlikely that all of that is going to be gone by the next time you bake some food in there.
I would second @scott.wiederhold. And as I understand it, the convection moves the hot air around inside the oven, but doesn’t necessarily exhaust much of it (because that would mean heat the new air). Shoulda looked more carefully at our dead oven before it went to the scrapper.