Here goes my first post showing my first project (I’m not counting the GF Ruler from the tutorial).
I am an avid Star Wars fan and I wanted to create a meaningful keepsake to commemorate Carrie and Kenny - who both passed away in 2016. This picture shows my progression from concept sketch to final design.
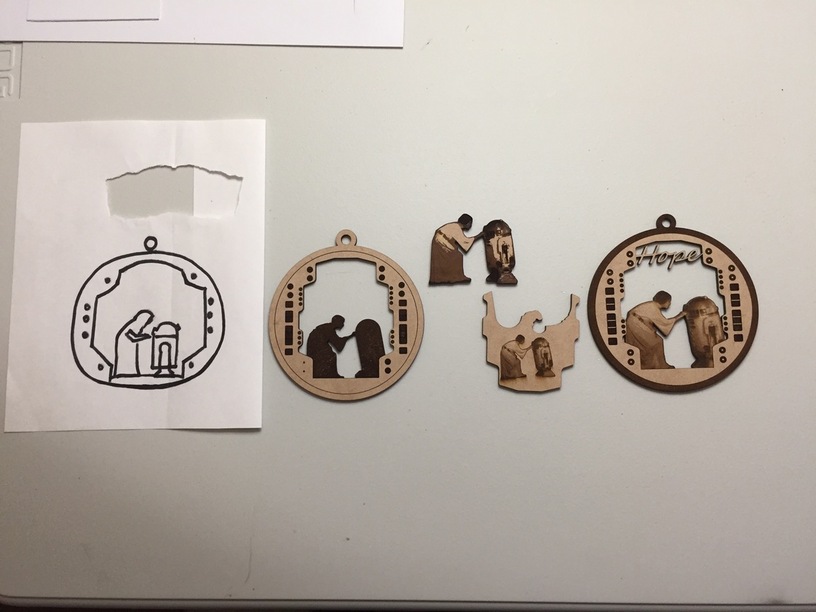
As you can see, I started pretty basic as I was learning what each of the settings would do. I thought the silhouettes were going to tell the story for me, but my wife suggested the I push the design a little further.
I experimented with a 3D engrave on the figures, but the results were a bit harsh. I switched to a photo engrave and got much better results. I needed (and still need) to tweak the photo to get a proper level of contrast.
The final design on the right took just over an hour. The outer edge engraving was most of that time. For my production offering, I think I may paint the outer edge in “Rebel Orange” instead of burning with the laser.
My technique: I scored the shape around the figures and cut the inner negative space as the first process. Then, I carefully removed the film from the figures to expose the surface for the photo engraving. Then, I ran the rest of the job. This minimized the amount of “over burn” that would have resulted from engraving first, and cutting afterwards.
So, there it is.
Thanks for reading.
