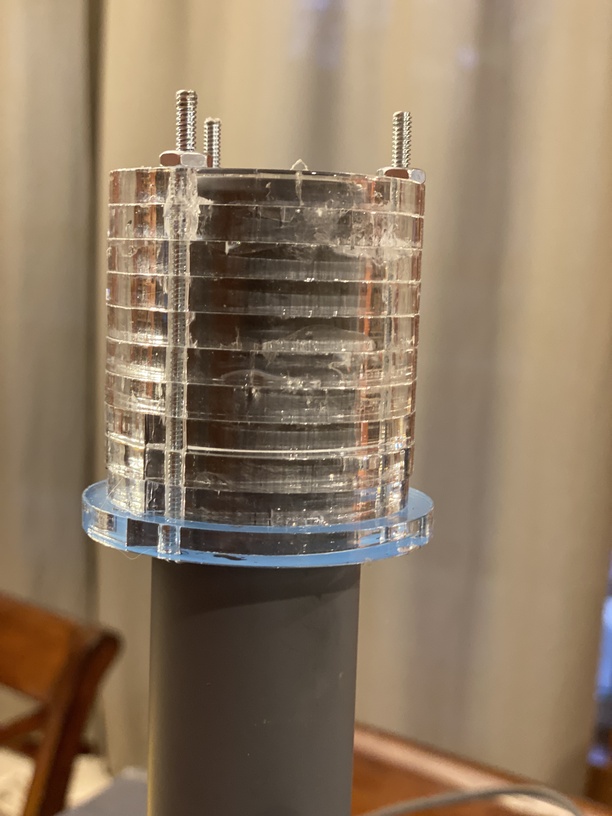
I was elated when my Starlink finally arrived, but my roof mount was backordered. Rather than pay for months of unusable internet while I waited for the precious piece of tubing, I set out to McGyver my own. While it is definitely not pretty to look at it is doing the job beautifully. (Truth is, it is snuggly hidden away in the mast of my old Wild Blue/Viasat dish so it isn’t even seen)
I assembled it on the mast of the Starlink dish to ensure all of the holes lined up. What looks like cracking is actually the acrylic cement in used between the disks. I removed the last piece of blue masking from the top and painted it in order to protect it from uv damage.
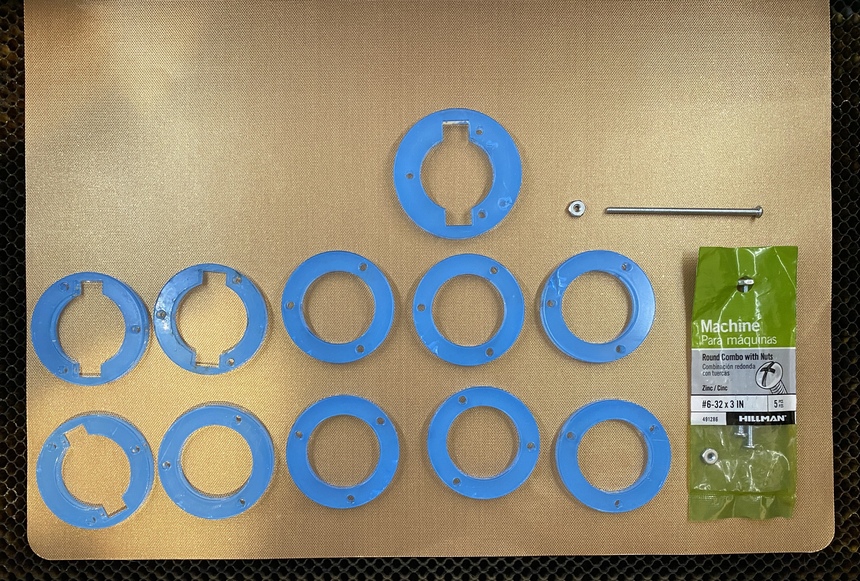
These are the parts cut out before assembly. I ended up only using two of the smaller slotted disks. The spring tabs on the mast fit into the slots in case the dish needs remove but keeps the dish from moving in a wind although the fit is snug enough I don’t think it could happen.
The outside diameter may need to be changed based on the equipment you already have. I have 4 different satellite systems on my property and 3 of them use a different sized tubing for the mast.
nice work around, love using the laser to solve problems. Exited to see more of these dishes out in the wild. Have you thought about welding the pieces together with a drop of acetone? Not needed tho, I’ve just been playing with it recently and thought id mention it. Thx for sharing the files.
Thank you.
I thought about the acetone but decided the viscosity or lack thereof would be messier so I used a model cement compatible with acrylic. To be honest, I only used the screws to see if I could.