When cutting acrylic, I’ve observed what looks a bit like chipping along the cut edges. It’s one of those things that once you see it, you can’t stop seeing it - so consider that before continuing with this post ![]()
Initially it seemed random, such that some edges were clean and others beset with ‘chips’:
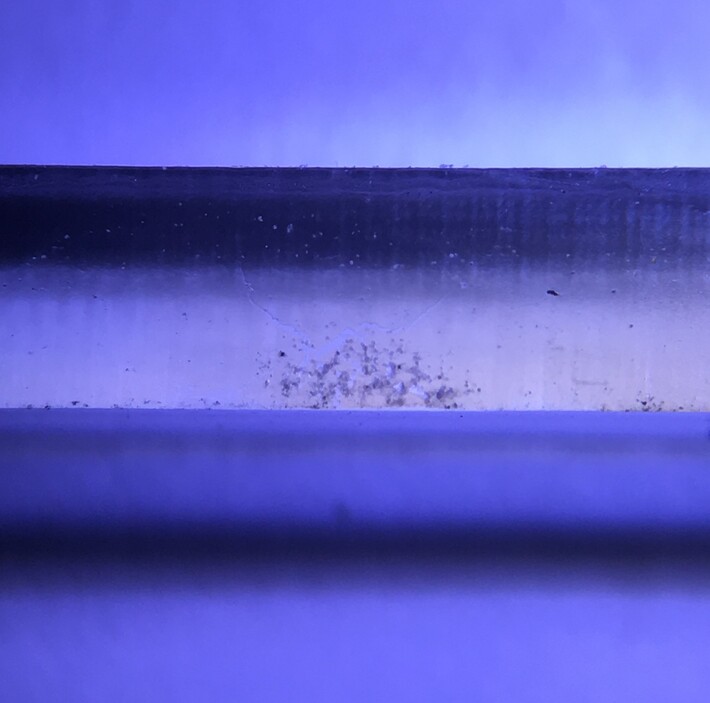
Root cause is the build tray. When the laser cuts through the acrylic and hits the metal grid of the build tray, some of the photons are reflected back up to the acrylic, creating ‘splash’ damage:
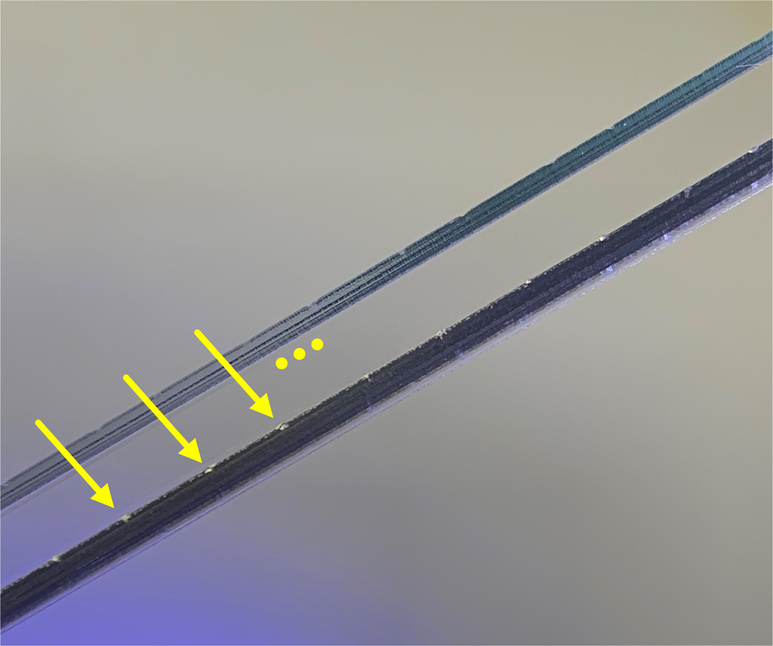
Elevating the acrylic panel off the build tray solves the issue, so I did a quick study to understand how far it needs to be elevated. I made a series of cuts over the same spot on the build tray, raising the acrylic for each cut with a sheet of thick paper (0.215mm per layer). The image below shows five samples ranging from flush to 0.86 mm off the build tray:
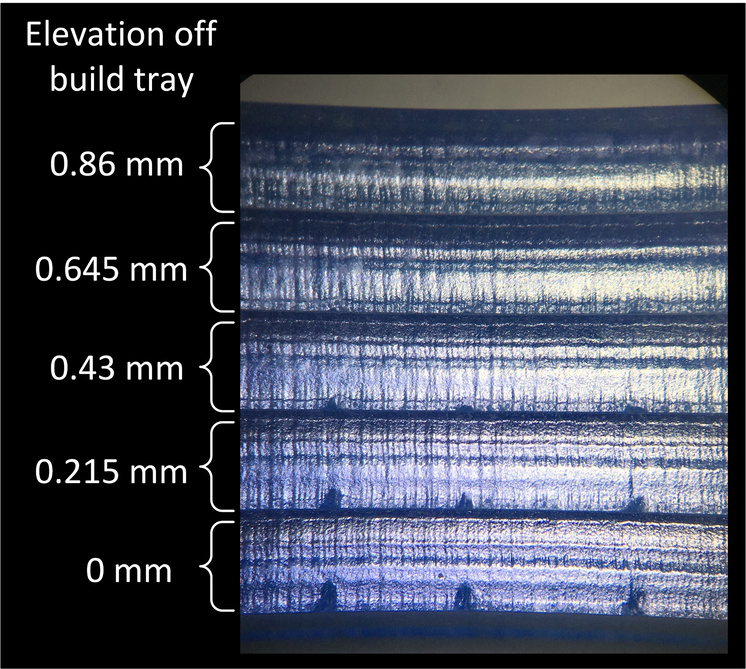
It looks like 0.8 mm or higher will avoid the splash damage from the laser hitting the build tray. BTW, this can apply to other cut material set directly on the build tray. The degree it’s noticeable will depend on the material, for example, I’ve observed how white paper or vellum set directly on the build tray can sometimes show apparently random burn marks along the cut edges.
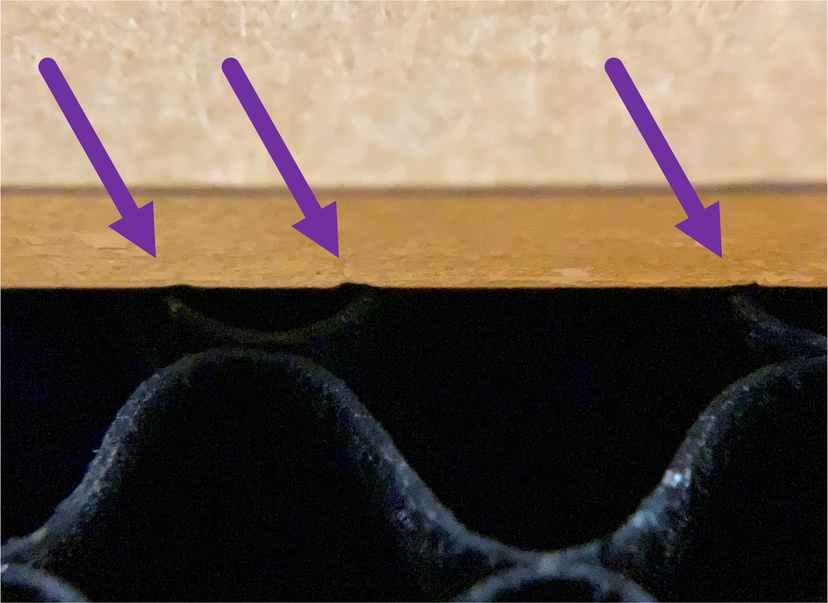
So whenever I want high-quality cut edges, I suspend the material at least 1 mm above the build platform. Alas, that’s a non-trivial complication to job setup, but the beautifully clean edges make it worthwhile.
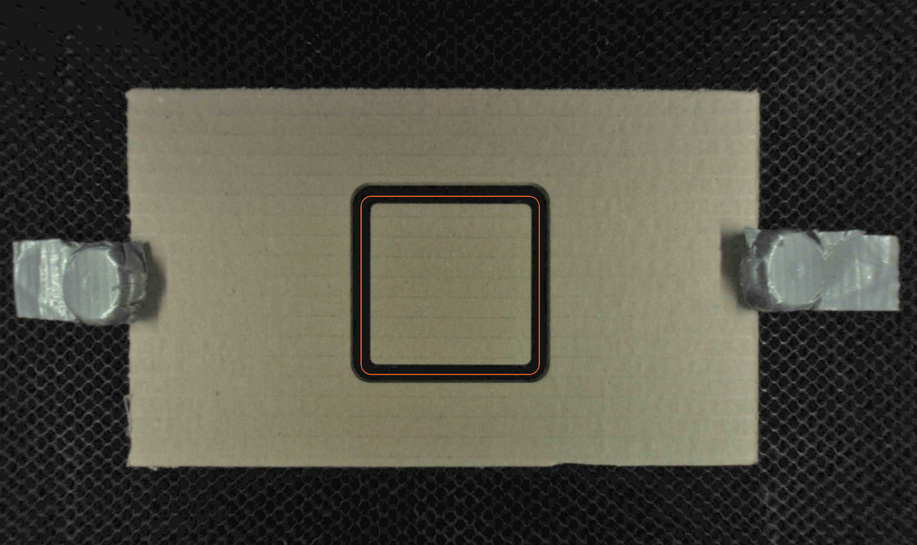
I typically use cheap cardboard sheets to create suspension jigs for production runs. I’ve also used sheets of synthetic (polyester) felt as a sacrificial buffer layer - it shrinks back from the cut line as the laser passes through, so it doesn’t add any debris to the acrylic cut. I’m eager to hear any other suggestions for how to cheaply and conveniently elevate material before cutting…