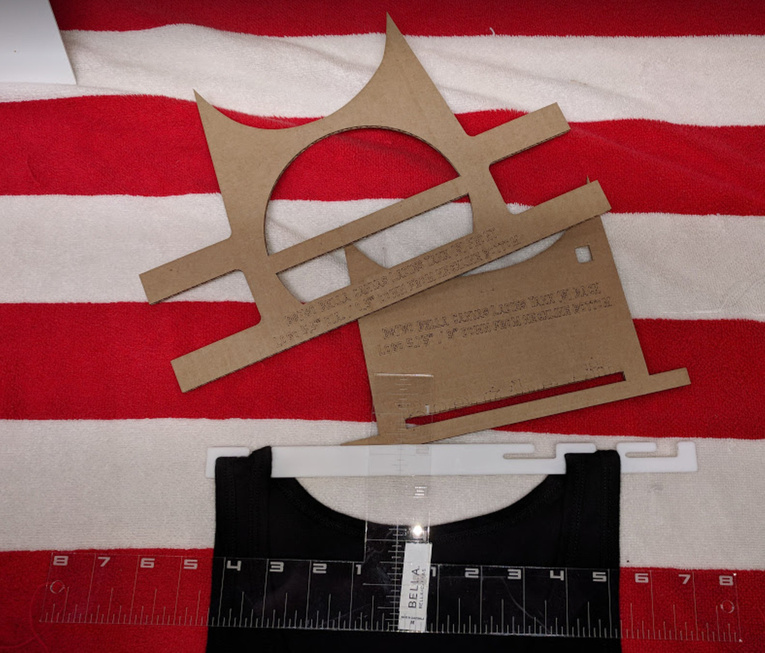
I had to make a pile of T-shirts for a friend’s business, and arranging the artwork on the shirt is tedious work. After spending too long standing over the heat press with a ruler, I decided to make some tools… custom cardboard templates that I could use to orient the art with respect to the neckline and sleeve seams. The white piece is a bespoke hanger for the tank tops I work with, with slots that make it easy to hold on to a shirt and keep it hanging neatly.
The PG acrylic ruler I posted before, but the hanger and templates are new. They made a HUGE difference in how quickly I could line up a transfer on the shirt.
To start the templates I took a photo of the shirt and traced the neckline in Illustrator. You don’t have to be super precise, because shirts are not manufactured to rocket ship tolerances. Once you look closely there is a lot of individual variation. So, get the neckline curve as close as you can without too much sweat, and call it good.
Then I added the other cutout shapes to help line up the art. The bits sticking off the side help me line up the whole thing relative to the various hems and seams.
Oh, the cool thing you can’t see is the reverse side is covered with some packing tape, and on that is a little repositionable adhesive… So the artwork sticks to these templates, and then I can press the art down to the garment and pick up the template.
Using these tools I probably reduced my time at the press by at least 2/3 and I think I am getting better results, too. I recommend this approach if you need to make more than about a half dozen shirts of one design.
Thanks a bunch for the explanation. If you’re still fiddling with the shirts, I’d love to see a picture of them in action with the artwork as I’m just more of a visual person. No worries if you don’t want to though!
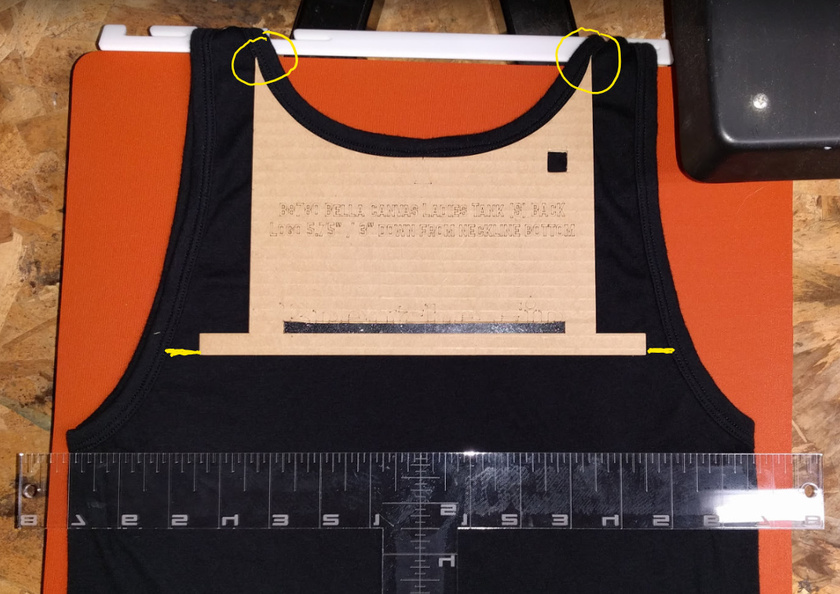
Here is how I use the hanger and template. Try to line up the marker at the bottom center of the neckline with the center of the garment… while using the circled points and yellow lines as additional guides. In this case the whole thing needs to scoot left a bit.
As an additional guide I put the ruler across the shirt, from the very bottom of the sleeve seam on one side to the other. I consider this the reference level for the design placement, and so try to keep the cardboard template parallel to the ruler.
Of course for that level to be trustworthy the shirt needs to be flat, with the seams on the sides in the same place. Scooting the garment around, flattening it, and evening it out take the most time in application, at least for me. Once the garment is as even as it can be, the template is quick to use.
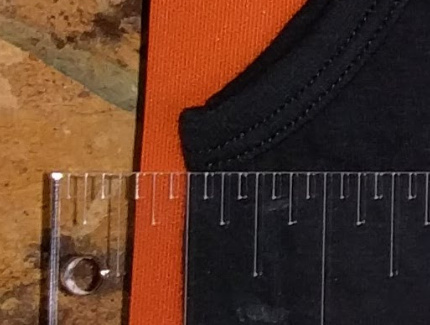
Here’s how I place the bottom ruler. It and all other references possible are based on touching the INSIDE of a hem.
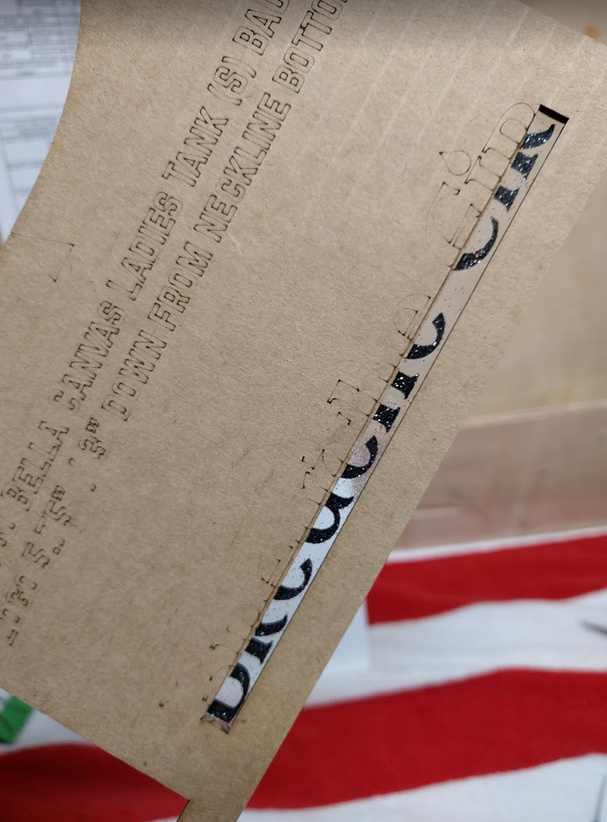
The front of the template shows an outline of the design and some kind of hole so you can see to line it up and stick it in place.
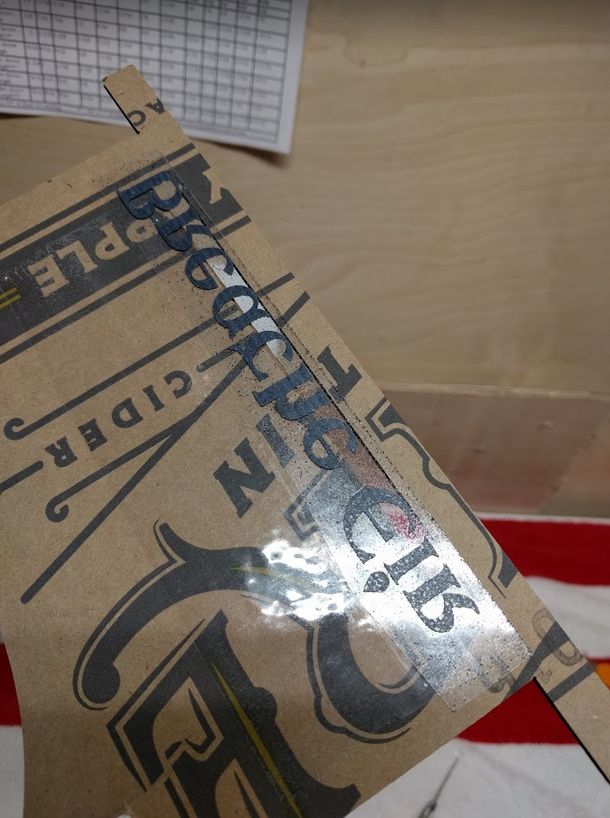
This slot is too narrow, I should have cut a bigger hole in the middle so I could put my finger down easier and detach the transfer from the sticky strip on the back of the cardboard.
Back of a template showing tape strip with a small bit of repositionable adhesive, and a transfer stuck in place. The transfer itself is sticky and will stick to the garment, which is hugely helpful. But you need to press it down well first, so don’t make your holes too small.