Testing out the pass through on a Pro


The other month I was in town for a funeral and stopped by after to visit with @cynd11, her husband, and the cats. We had planned for me to test out the pass through on the Pro she has. I had a design ready, at least I thought, and we tried to use Snap marks to cut a large design. Well, I didn’t quite get the snap marks in the right places. We ended up just sliding it through with a straight edge registering on a factory cut edge of the acrylic.

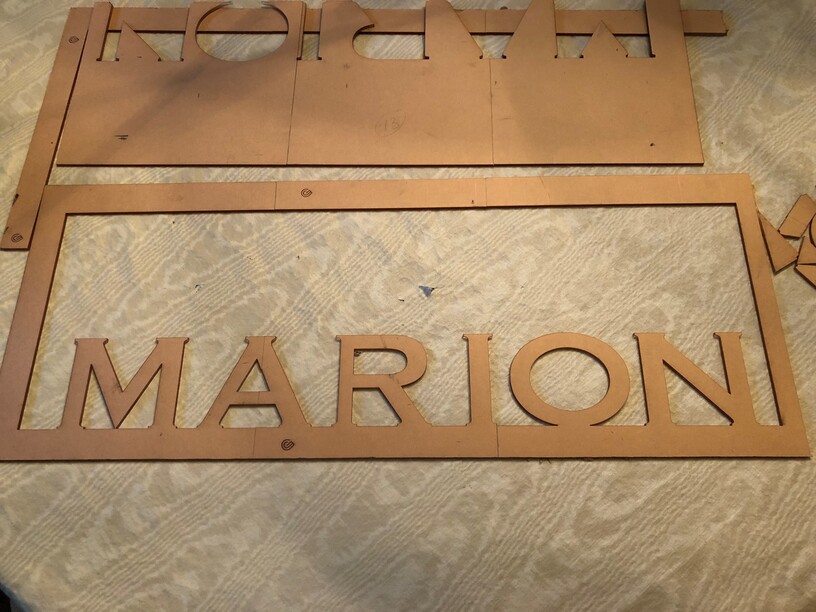
I know the design isn’t very creative. Not having a Pro of my own to dream about using, I just couldn’t think of what to design.


A little out of alignment, but ok for the test. Doing this forced me to learn how to use the Cut Path operation in Inkscape and that was worth the trip. Still, the best part of all is just seeing these two fine people. Amazingly creative couple, and such great hosts.

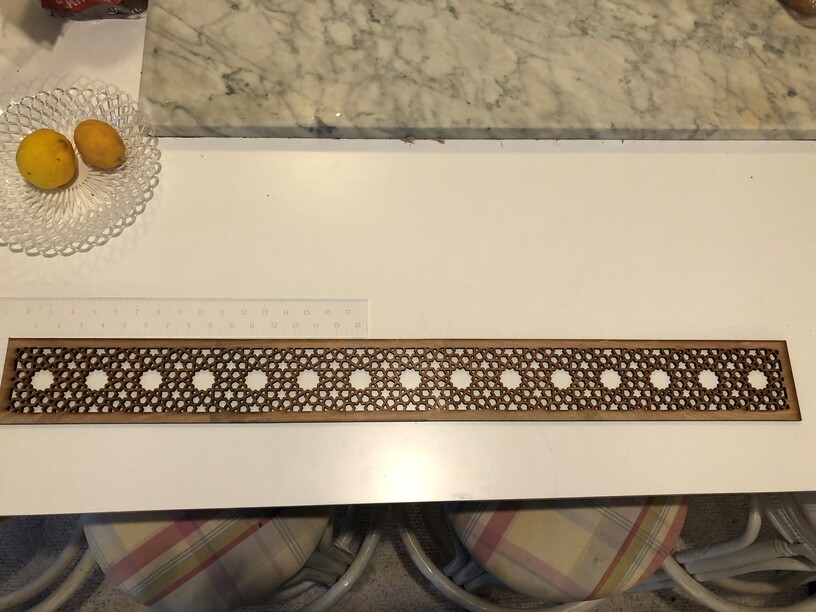
So I was back in St. Louis for retreat this week and we usually get an afternoon off to do whatever. So we set up a play date for the Glowforge. I had spent a little more time preparing the files. This time an Islamic style screen pattern. I really worked hard getting the Snap marks set up correctly.

Here is the test pieces and first attempt. I thought I had the power level set for this cheap 5.4mm luann from Menards or wherever, but cutting squares and cutting smaller intricate shapes are different beasts. Should have just left it in and ran it again with slower speed, but I my whole workflow was different and I was not thinking clearly. Tried to re-align, but that was a no go.

Then I learned something about the pass through that is very important. If the operation has lots of little bits that fall through after cutting, it is very important that you try to retrieve them all before sliding the material farther in. Otherwise you get stuck. That issue kept coming back to bite me. This luann really had some wonky places that just didn’t want to cut through. Also the shapes (little wooden lucky charms!) seemed to not want to come out, even if cut all the way.

Second try. Still not cutting all the way through in spots. And I couldn’t get the snapmarks to register. I found out later after I got home that I I had accidently changed the stroke width of the snapmarks on some of the pieces when I had them grouped with the pattern. That was part of the issue. Some of it was getting the snapmarks read at all. Ended up just eyeballing it and doing the Kentucky windage, using the scored snapmarks, and just adjusting the design till I was re-scoring them for the next piece of the four piece design.

It was a challenge on each piece to try and match, plus trying to move the board through after each cut with all those lucky charms. I hope I didn’t damage the flaps.


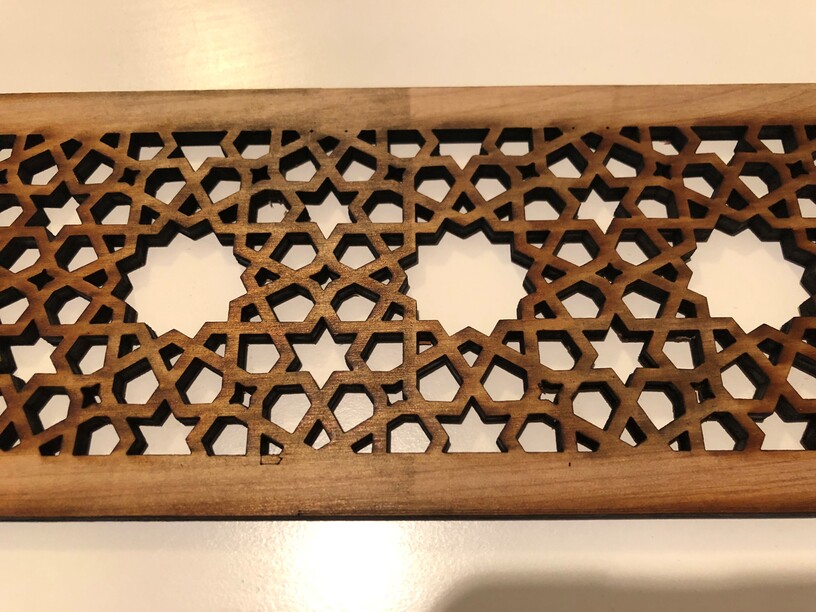
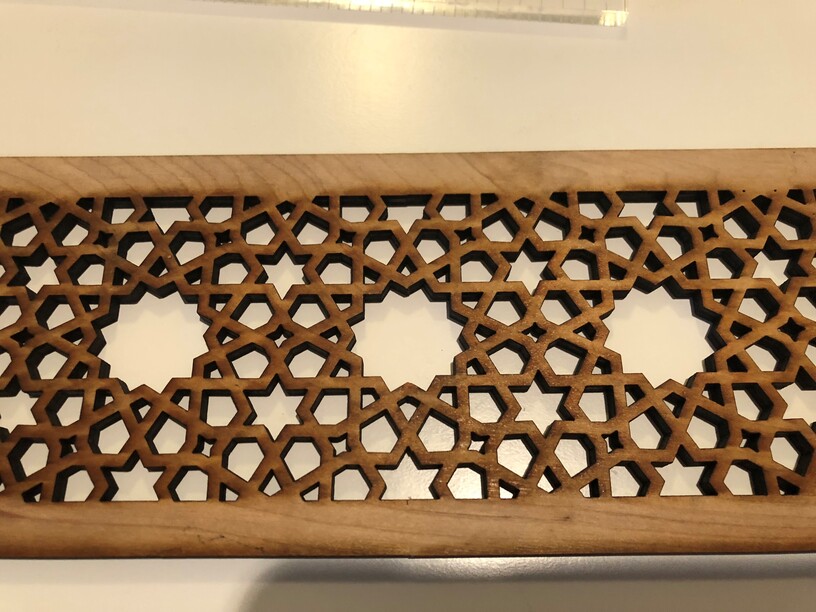
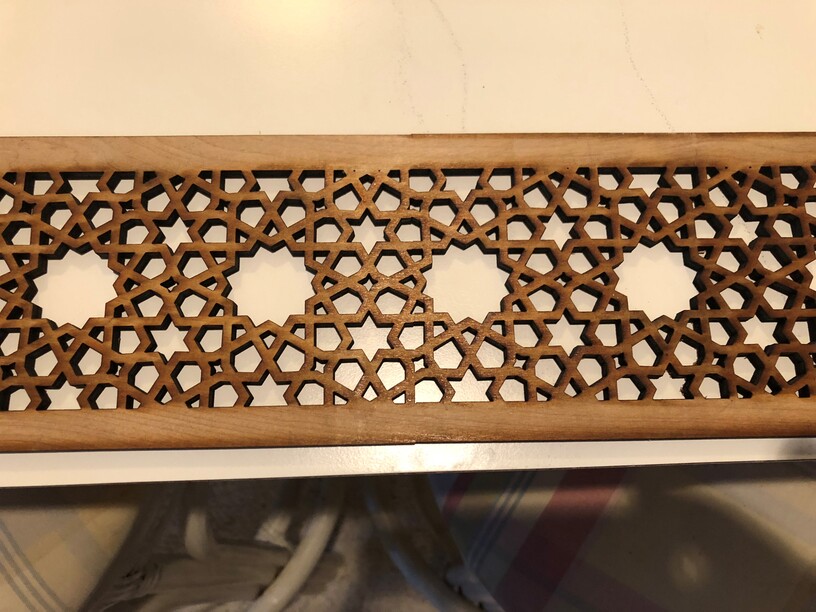
These are the three joins. Not bad, but not perfect, but good enough.

I think the pass through has great potential, but it is tricky. I do hope they can come up with a solution for all the Pro owners for this.

You can get excellent results with the pass through. I think I can do a design now that I can just use visual align and set focus, plus Kentucky windage. I might be able to get snap marks to work, but that will take a little more time.

Not having a Pro, I just don’t think with the pass through dimensions. That would take some doing. 1/4" is a limitation, but for larger signs, it would be pretty handy.

Finally, @cynd11 made an important observation. She had done the bed calibration and had excellent visual placement for the designs. When we shifted the Glowforge to allow for material to go all the way through (the material was 48" and the final design cut a 37" slat) that made the Glowforge go out of level because of some slope to the floor.

Also I was a bit forceful at times trying to get that material through with all the bits sticking all over the place. I am sure I racked the Glowforge a bit and might have made it out of alignment for its calibration. When we went to do visual align, it was not as close as it had been.

I am curious as to how others use the pass through. There aren’t too many pure pass through projects that get posted. Not too many folks post designs. I think I could get some good use out of one, but I’d have to work up to it.

So we were able to at least finish the piece. A few spots didn’t cut all the way through, so I did the razor blade and fine pick to get them fully liberated. We ended up having a wonderful dinner and nice relaxing conversation. I really appreciate the opportunity to use the Pro, but best of all seeing all the members of the household! Thanks so much.

arabic%20vectors

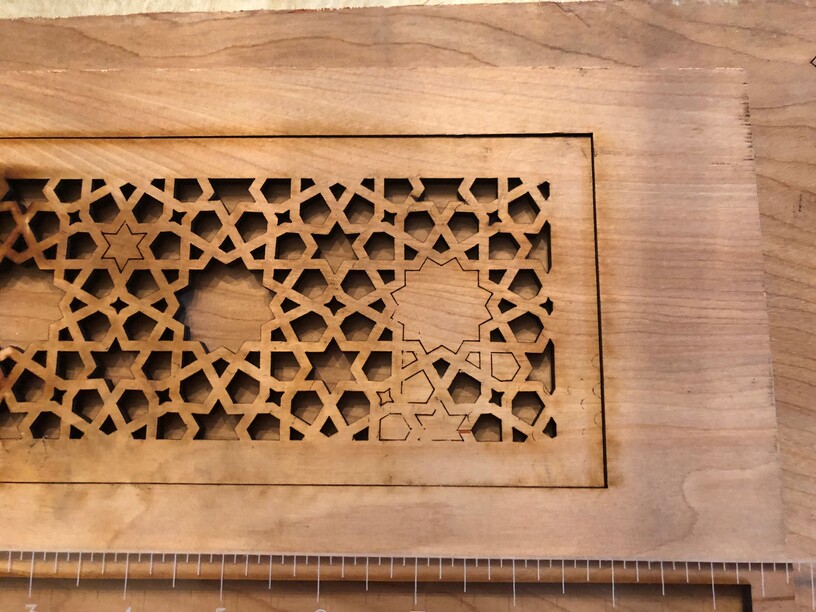
Here is the original design still in a single path. You can make the stroke as wide as you want and then convert to paths to get the cutouts or engraves. I have included the primitive geometry shapes to demo how I came up with the pattern. Right click and save as to a spot you can find later.

arabicscreen

Here is the screen. It’s about 4 1/2" x 37". Feel free to use as you wish.

32 Likes

Nice design! And yeah, that would be a tough one to try to shift. (What I do is lay out sheets of masking tape on top after it’s cut, and brayer it down well - they keep everything together for the shift. Or you can run a sheet of something thin (like paper) underneath it to hold the bits if there are not too many. But the masking tape works best.)

6 Likes

It was a really fun evening! It was just @marmak3261’s bad luck to end up in the one St. Louis household that wasn’t watching the Blues game 7 (I did offer to turn it on…).

I learned a lot as well. I’m afraid I was no help at all because my only prior use of the passthrough was to cut off long material. I tend to do fairly tiny projects. I do think the moving of the machine to out of level condition was responsible for the failure of the Snapmarks, and for the offset alignment we observed. Note to self: check level and alignment after each move of machine.

In spite of all, the project turned out great! We all had a great time and polished off the last of the loaf of homemade sourdough that Marion had dropped off earlier in the week. Thanks again!

7 Likes

Thanks for the design and great explanation of challenges with the pass through. I have only used the slot for simple cuts and have had to rely on visual alignment. Your post and the other recent one by @stevenrhenry will be instrumental in getting me to fully utilize my Pro. I had not considered the difficulty falling bits would cause. I did, however, rearrange my work area so there is ample space in front of and behind the forge to use the pass through. It is rather odd to have the Glowforge in the middle of the room and still vented out the window.

5 Likes

I pretty much have only used the Pro to avoid the end of the material being in scraps. When I lay out a design, my preference would be to use the full width, but I often use the 12" width and the pass through.

Learned to be very frugal as a child, and will probably not change. :smile:

Haven’t met @cynd11, but she is always very kind and helpful on the forum. Also, due to some recent help via messages … She really wowed me with her kindness.

How wonderful you were able to share the process!

6 Likes

I wish you and I lived a bit closer—I could use more craft/maker buddies to get together with!

10 Likes

I enjoy the convergence of ideas on this forum. @rpegg posted about the Astrolabe project. Going to that site I found a post about a game that did constructions using geometry. This is exactly the process of making the pattern designs starting with primitives and building up. Connecting different parts of the intersections and vertices make the amazing variations.

https://www.euclidea.xyz/en/game/packs/Alpha

8 Likes

Great write-up and share. The screen is killer!

2 Likes

Me too! It’s nice to have ideas to trade, share encouragement and of course … Give ideas for more craft supplies!

4 Likes

Do you know what you’ll do with your screen? Curious.

Also, thank you for the files, the write up and all the photos. Those little bits are definitely a pain when using the pass through.

2 Likes

I was thinking of a screen to go on the top of my fireplace mantle. Put the votive candles behind it. I didn’t think beyond the plain screen as far as joints but it would work. Would be nice to wrap around the whole mantle but it is 4 1/2’ so just a bit wider than my materials.

1 Like

Excellent idea! Could be really cool!

We just had the sunken family room floor raised … And suddenly The mantle is so much more welcoming. Maybe I could make something as a backdrop for various holidays. For me, I’m thinking I won’t need the pass through … But will see what formulates in the mind.

2 Likes

Dadgummit! You shouldn’t post links like that…I’ve fallen deep into a rabbit hole! (And the beta level is kicking my derrierre.) :smile:

3 Likes

The sliding paper underneath after the cut trick never works for me - it just hangs up against the bits. I magnet it down and grab a vacuum and slurp all the bits up :slightly_smiling_face:

2 Likes

:smile: I’ve never tried to cut one with bits quite that small…stiff cardstock will slide in underneath larger cuts. (And I’ll pull out the ones that I can if possible. Gorilla tape to snag them all at once works pretty well, but that stuff’s expensive.)

3 Likes

We tried tape and vacuum. The plywood wouldn’t adhere and odd shape of cutouts wouldn’t come up after dropping.

1 Like

And we also tried a thin sheet of plastic underneath. That just moved the bits and they became inaccessible but still catching on everything. :crazy_face:

1 Like

Thank you for sharing

1 Like

Very cool, making a screen is the big reason I wanted a pro. Thank you!

2 Likes

If you have a used C-Pap hose the volume per sq in is higher because it is smaller and as the end is rubber you van squeeze it smaller yet to get better pull. If not cut through of course that is a bigger problem, but if very close just tapping or rubbing with a finger can make the difference.

1 Like