This is a Work In Progress thread. Going to start journaling creations as I do them. Most will be experiments, so expect a few failures along the way.
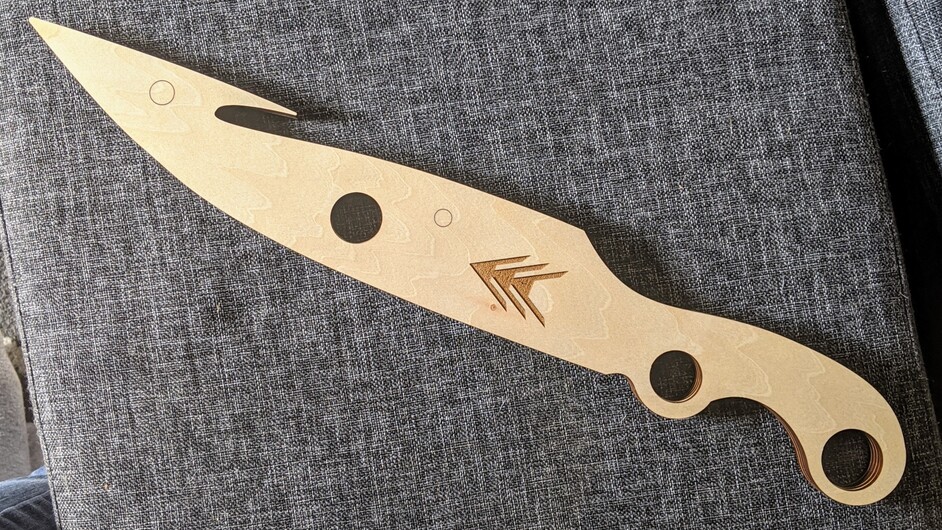
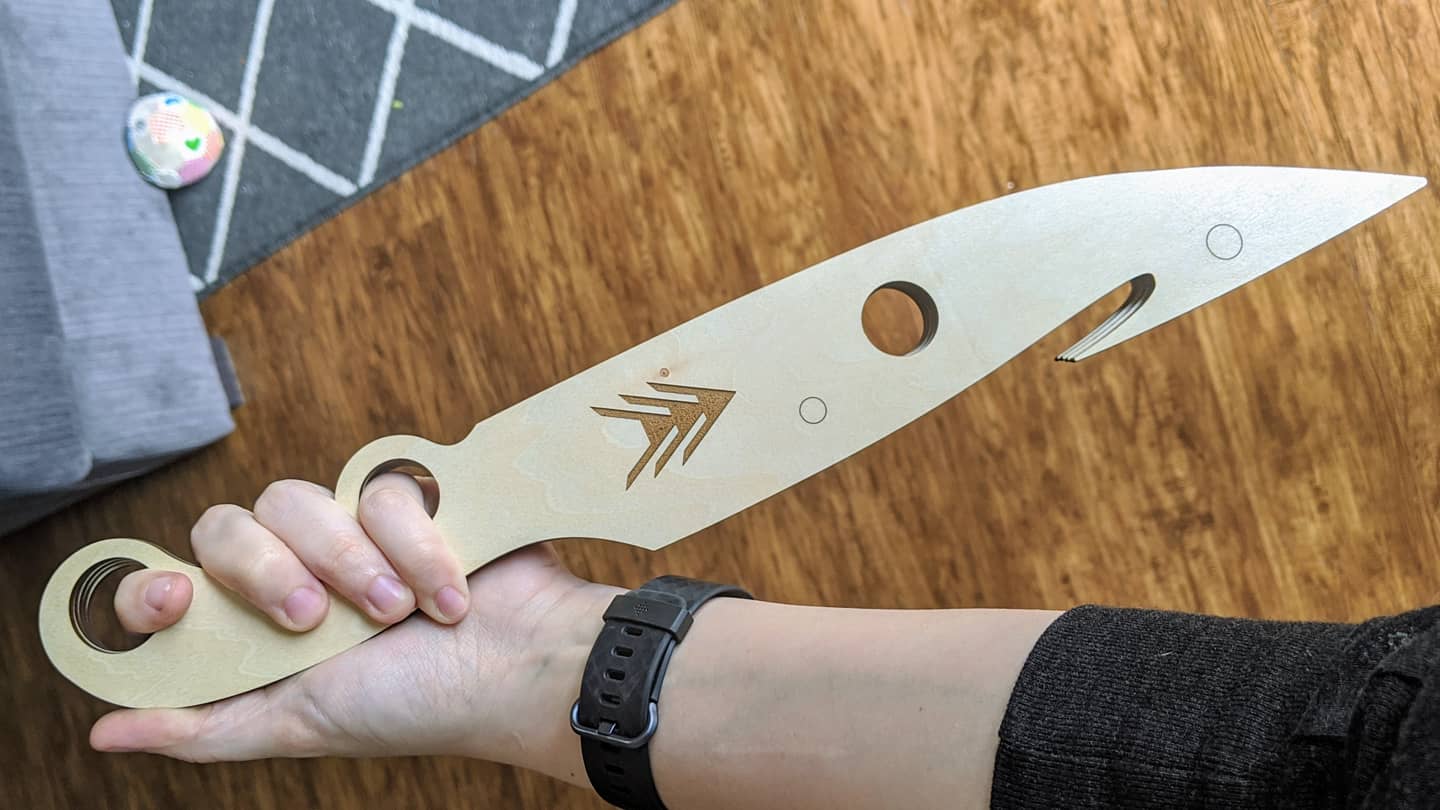
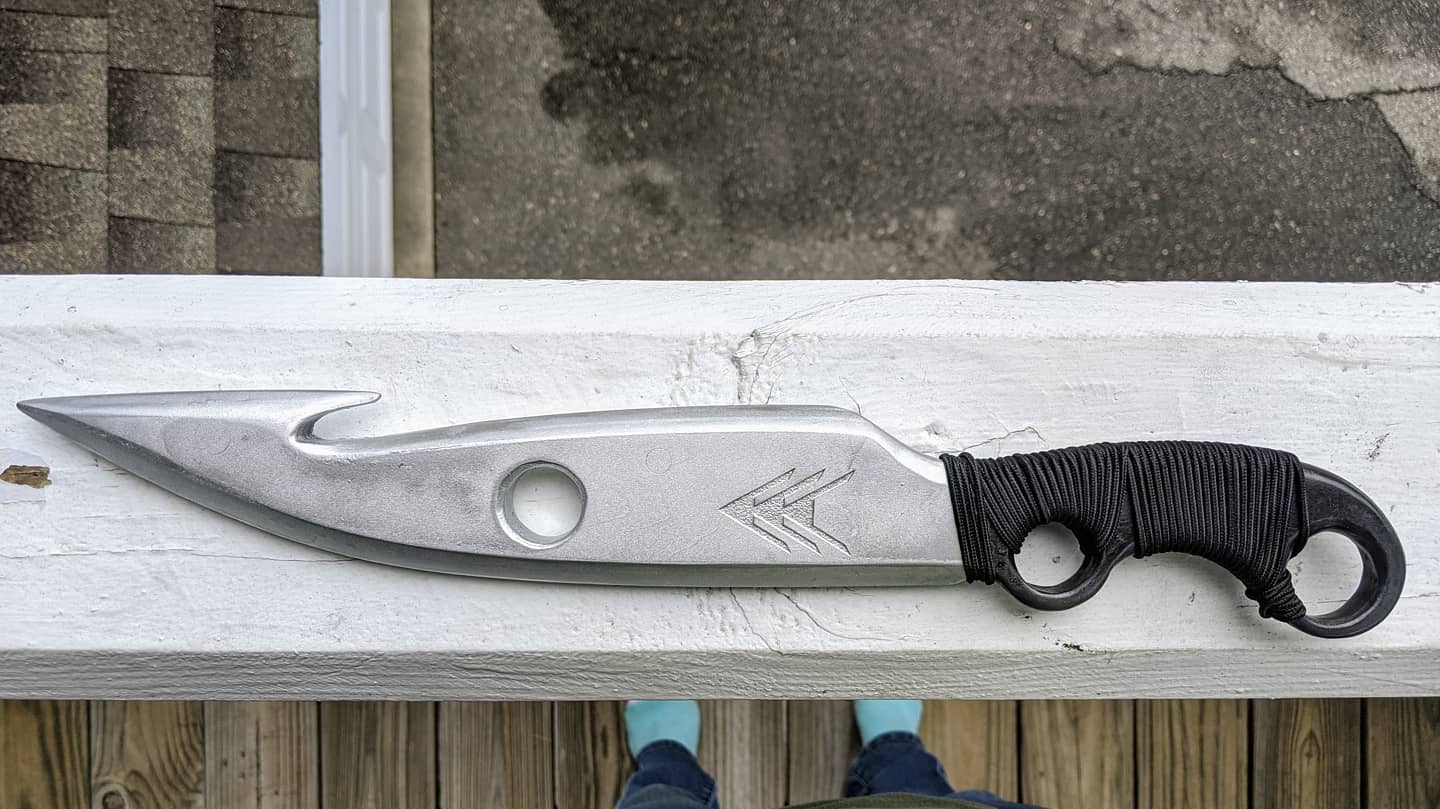
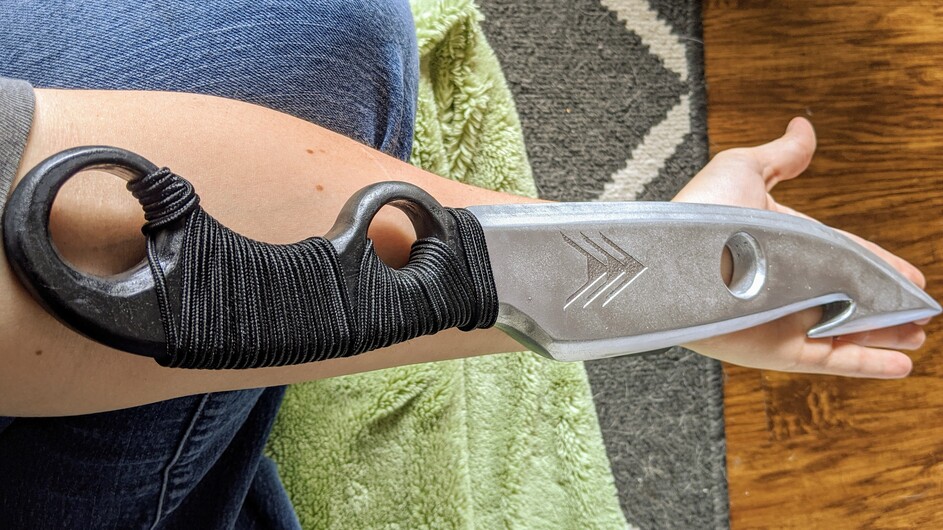
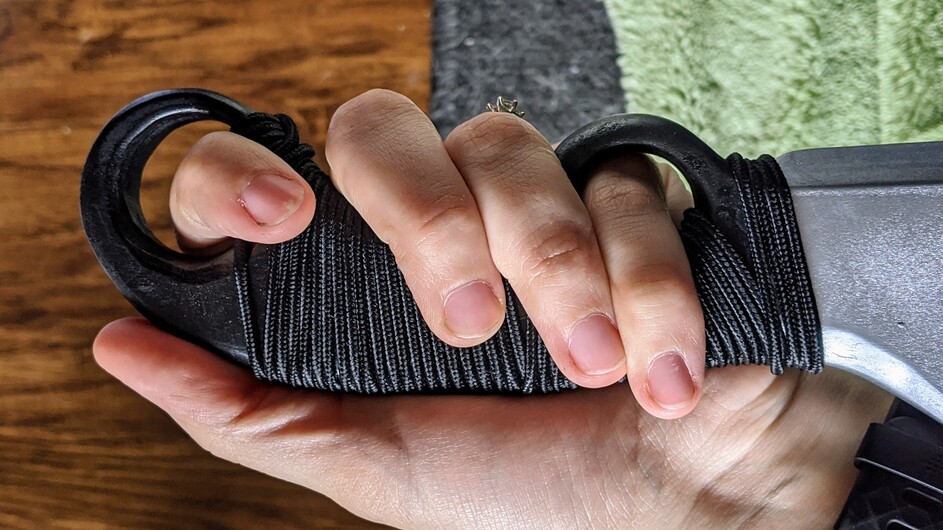
Current Project - Destiny 2 Hunter Blade
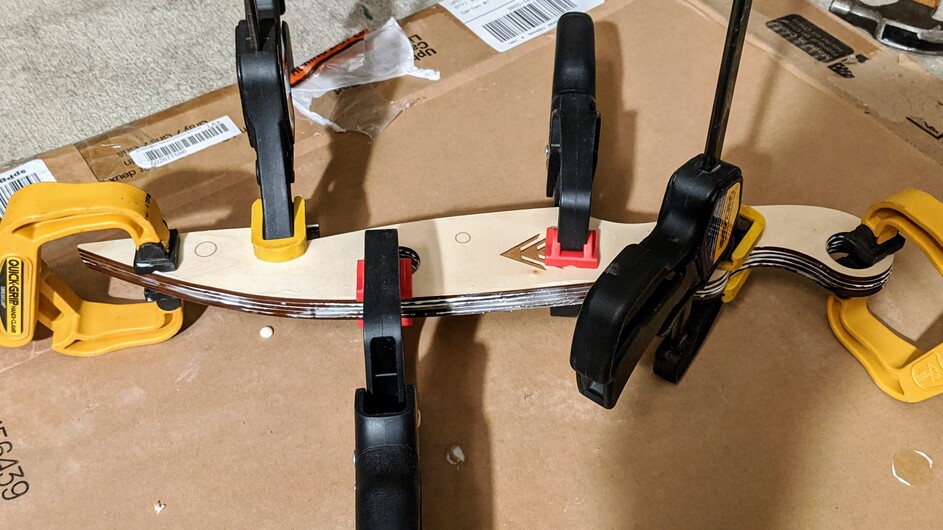
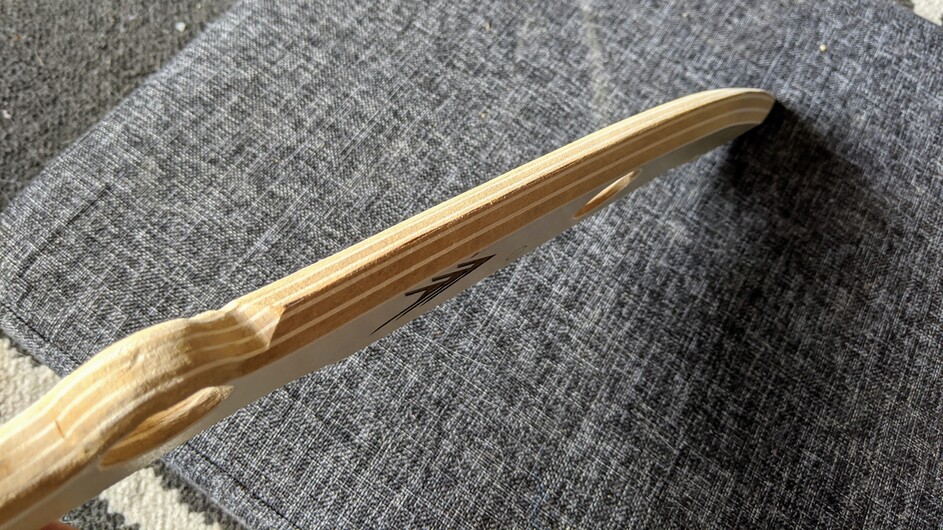
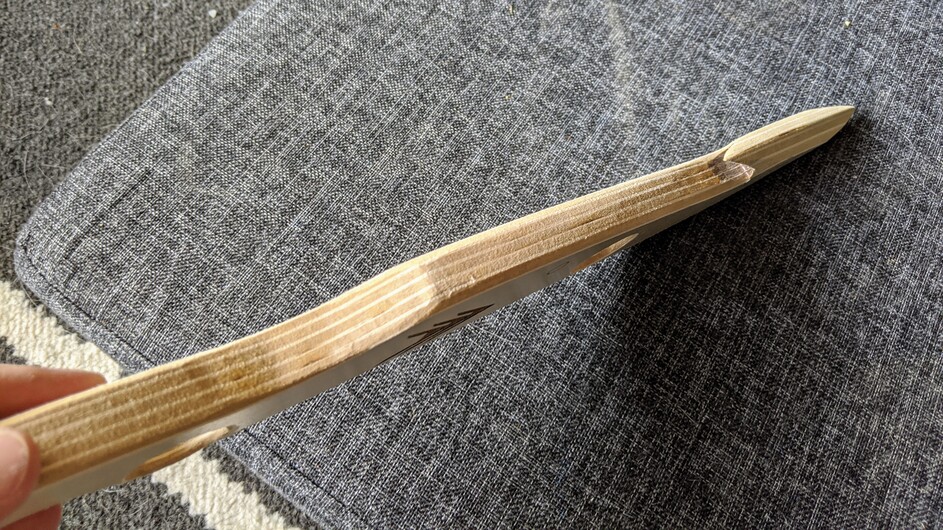
Starting with five layers of plywood. I will glue these together and then send edges into rounded forms or points, like an actual blade. All I had on hand was finished basswood plywood. I’ll need to sand the inner layers so that the glue works better. Gluing is not my friend xD
Like where you are going with this.
First blush response was a way to layer and make your finishing easier.
More work in front of project for less work in finish?
Anyway, something like below, which as you can visualize, would have a thicker handle.
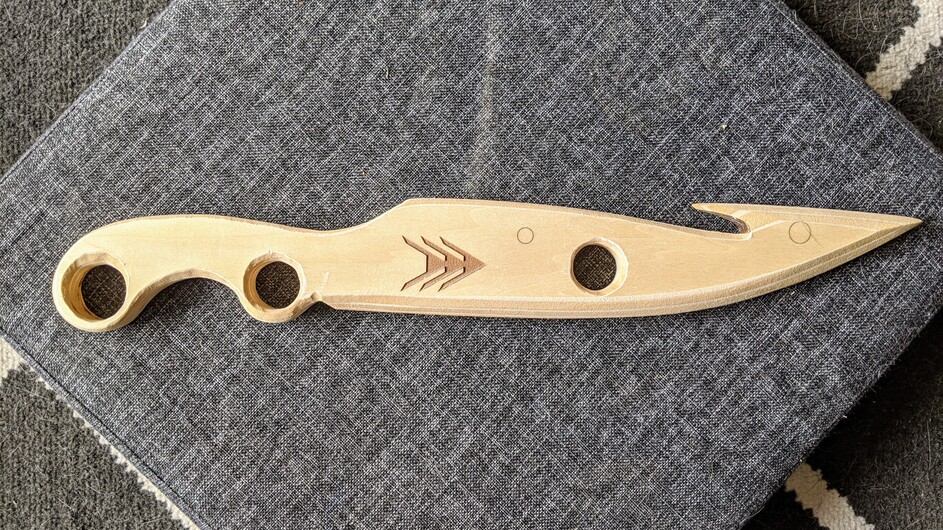
That ripping hook on the blade may be problematic, but it will be with any normal grinding down also.
I had originally planned a more staggered edge for the bottom of the blade, like what you’re saying, but didn’t think I could sand it as well. First time trying to make a blade of any kind so I’m kinda winging it as I go, hah. I also plan to use my table saw a bit to get the point. Will see what happens.
This is cool, I just got my glowforge and i’ll probably be messing around with stuff like this… Any tips on starting out? Where are ya’ll getting materials that are straight and not warped?
I think the main tip I would give anybody starting with a GF machine is get to know your program. I’ve been designing in Adobe for a few years now and that’s really helped me get going on projects. I suggest your first big project be the Catan board supplied by GF. It helps one learn how to balance a large project.
GF sells great materials. But I get all my hardwood from Ocooch. I sand and tape it so that it is proofed for the machine, then sand and apply finish after engraving.
Learn to make boxes with and without generators. MakerCase.com is amazing. Take advantage of the Free Files section to learn new skills and come up with your own files.
Be ok with messing up! Then don’t mess up the same way again.
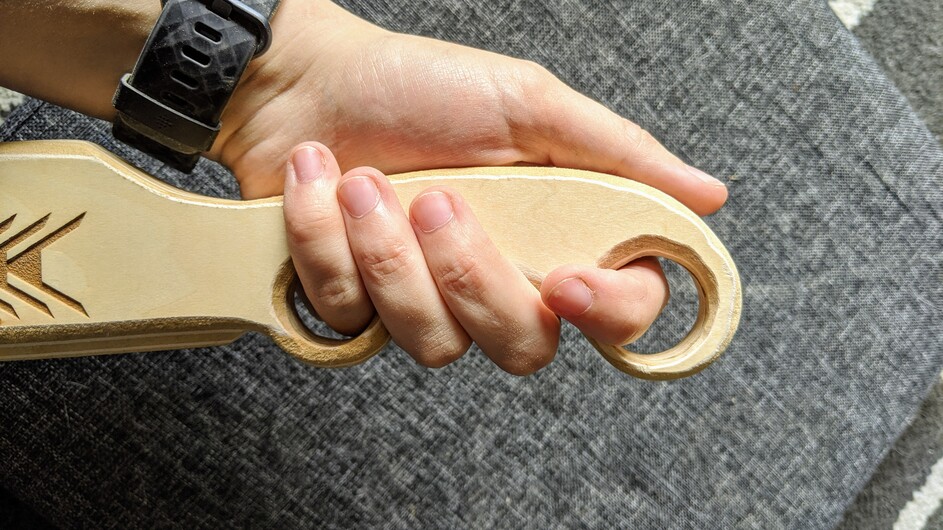
Used a very low grit to dig away the wood with my orbital sander. Then used a small wood-craft sander to get into the holes. Glad I bought a mask just weeks before this whole COVID thing happened. There was a LOT of dust.
I didn’t use a jig or a holder of any kind to get symmetry. So there is slight variance between the sides. But I rather like the roughness. It’ll of course start to look better as I get into the higher grits and start detailing more.
Thank you! I haven’t weighed it and I’m too lazy to check right now, haha. But less than a couple pounds, I think. It’s made from plywood so it’s pretty light.